
Furniture Rendering
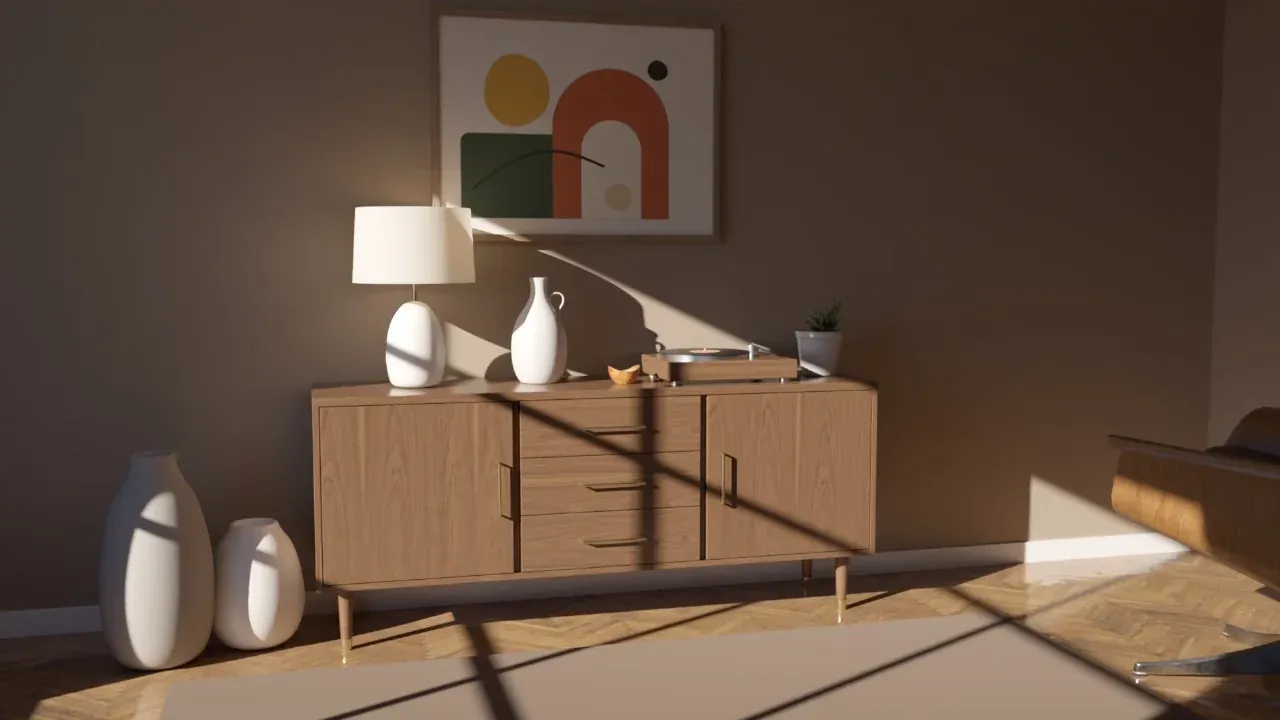
Furniture is sold on pictures, and a render can show a piece before it’s built: in every finish, in a studio and in a room, in the light of the afternoon and of the evening. This guide follows the video below, a walnut sideboard modelled in SketchUp and rendered with Rayscaper, through the shots it’s made of:
- a studio shot that shows the piece on its own,
- the same piece in different finishes from the material library,
- lighting looks, from a soft studio light to low sun and a lamp at night,
- the piece staged in a room,
- close-ups of the hardware and the details, with depth of field,
- an animation where the doors and drawers open, made with Fredo6 Animator.
The Example Scene
Section titled “The Example Scene”The room of the video is the example scene of this guide. It has the sideboard, the room with its window, the props, the Rayscaper settings, the six SketchUp scenes listed below and the Animator film of the last section. The studio and the other finishes aren’t in it: the guide shows how to make those yourself.
Download rayscaper-furniture.skp (11.9 MB)
With Rayscaper installed, open the file in SketchUp 2025 or newer and click Start Render on the Rayscaper toolbar. The render opens in a window of its own. Click a scene tab at the top of SketchUp’s viewport to switch to another shot:
| Scene | Shot | Light |
|---|---|---|
| Room | The sideboard in the room | Afternoon sun through the window |
| Evening | The same view | After sunset, lit by the lamp |
| Front | The sideboard from the front | Afternoon sun |
| Hardware | The brass pulls, close up | Afternoon sun |
| Record Player | The record player on top | Evening |
| Drawer | The drawers and the top, close up | Evening |
The scene works with the free version of Rayscaper, which renders at up to 1280 pixels on the longest edge, with a watermark.
Model for the Render
Section titled “Model for the Render”A render shows a model as it is, so the model has to be what you would build. A few things make the difference:
-
Model at real size. The sideboard is 180 cm wide, 45 cm deep and 78 cm high. Rayscaper renders at the scale of the model, so the depth of field, the light falloff and the size of the wood grain only look right at the real size.
-
Make every part a group or component. The top, the sides, each door and each drawer of the sideboard are groups of their own, named after what they are (Door R, Drawer 1). It keeps the model tidy, a part can have its own material, and an animation can only move what is a group or component.
-
Leave the gaps. Real doors and drawers have a gap of a few millimeters around them: the sideboard has 2.5 mm. In the render that gap is a thin dark line that draws the doors and drawers, as it does on the real piece. Without it, the front is one flat panel.
-
Round the edges. A real edge is never perfectly sharp, and a bevel of a millimeter or two catches a highlight along it. Sharp edges make a model look like a model.
-
Turn the grain the right way. Wood grain runs along the length of a board: horizontally on the top and the drawer fronts, vertically on the doors and the sides. Rotate the texture per face in SketchUp (right-click > Texture > Position) until it does.
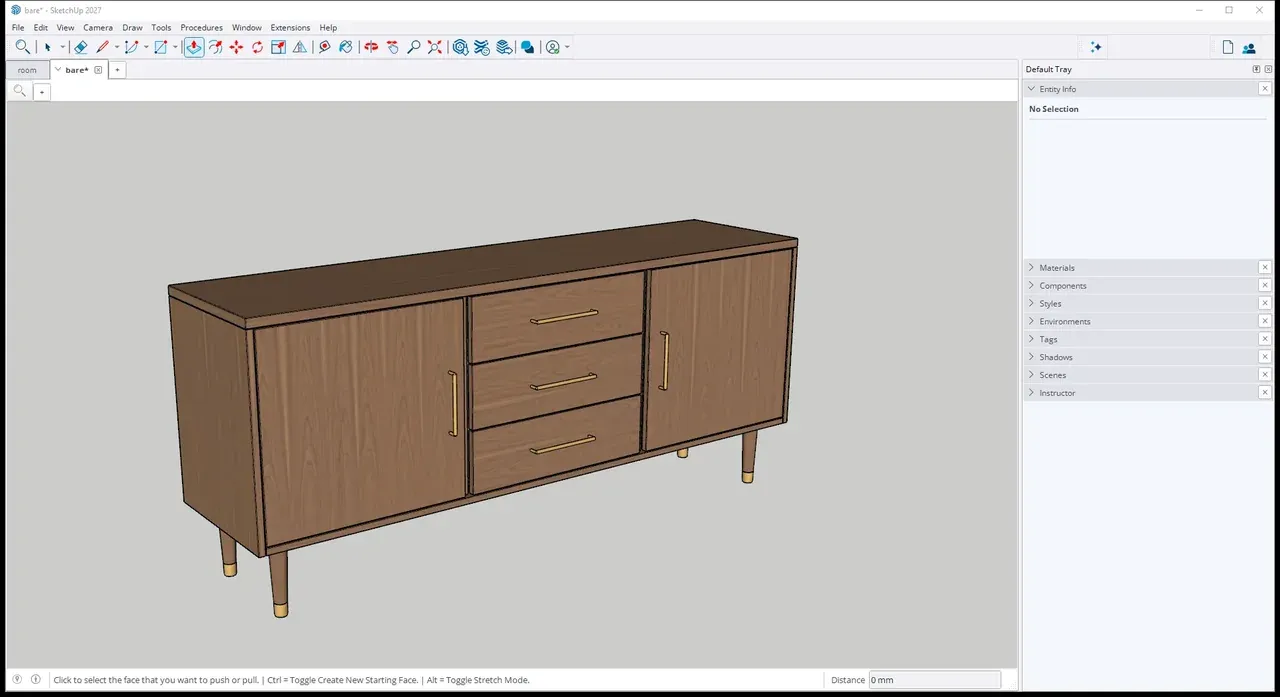
The sideboard in SketchUp, with the walnut texture on every part.
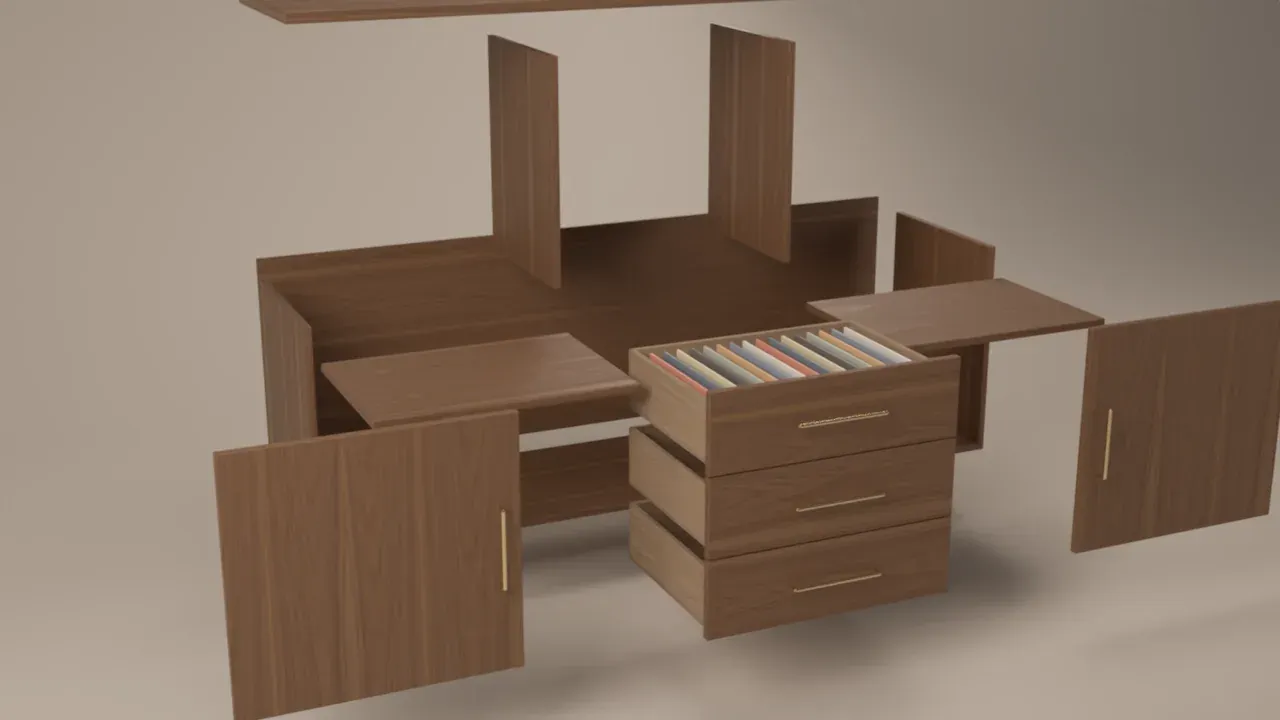
Every part is a group of its own. The video moves them apart in its assembly shot.
The Studio Shot
Section titled “The Studio Shot”The first shot of a piece shows it on its own, on a seamless background, the way a catalog does. The video’s studio isn’t in the example scene, but it’s quick to build:
-
Make a curved backdrop. Draw a floor and a wall behind the piece, and join them with a smooth curve with a radius of about 1 m, so there is no line where the floor meets the wall. Photographers call this a cyclorama. Make it wide enough to fill the whole picture, and give it a light, matte material.
-
Add softboxes. A softbox is a large, soft light, like the ones photographers use. Draw large rectangles around the piece, facing it, and give each a SketchUp material of its own. In Rayscaper, turn on Material Pick on the toolbar (Ctrl+M) and click a rectangle in the render to open its material. Under Emission, turn on Enable and raise the Power until it lights the piece (see Emission). Place them like this:
- a key light, the main one, in front and to one side,
- a weaker fill light on the other side, which brightens the shadows,
- a top light above,
- a rim light behind, which draws a bright outline around the piece.
Large glowing rectangles give soft shadows and long, soft reflections on a lacquer or a polished top, unlike the hard dot a small light makes. A Rayscaper area light works too.
-
Balance them. In the Scene Editor, open Environment, set Environment Type to Color and choose black, so only the softboxes light the piece. Make the key light about three times as bright as the fill. Change one light at a time and watch the render.
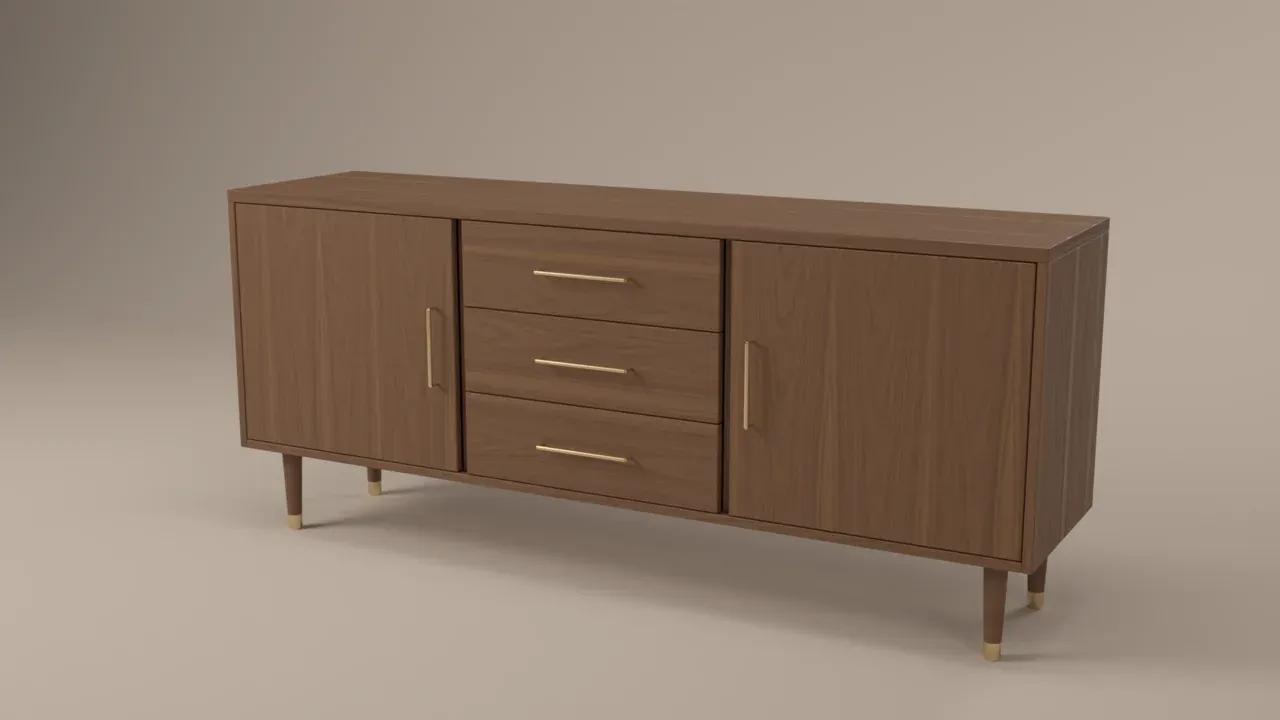
Soft: a key, a fill, a top and a rim softbox, the light of a catalog.
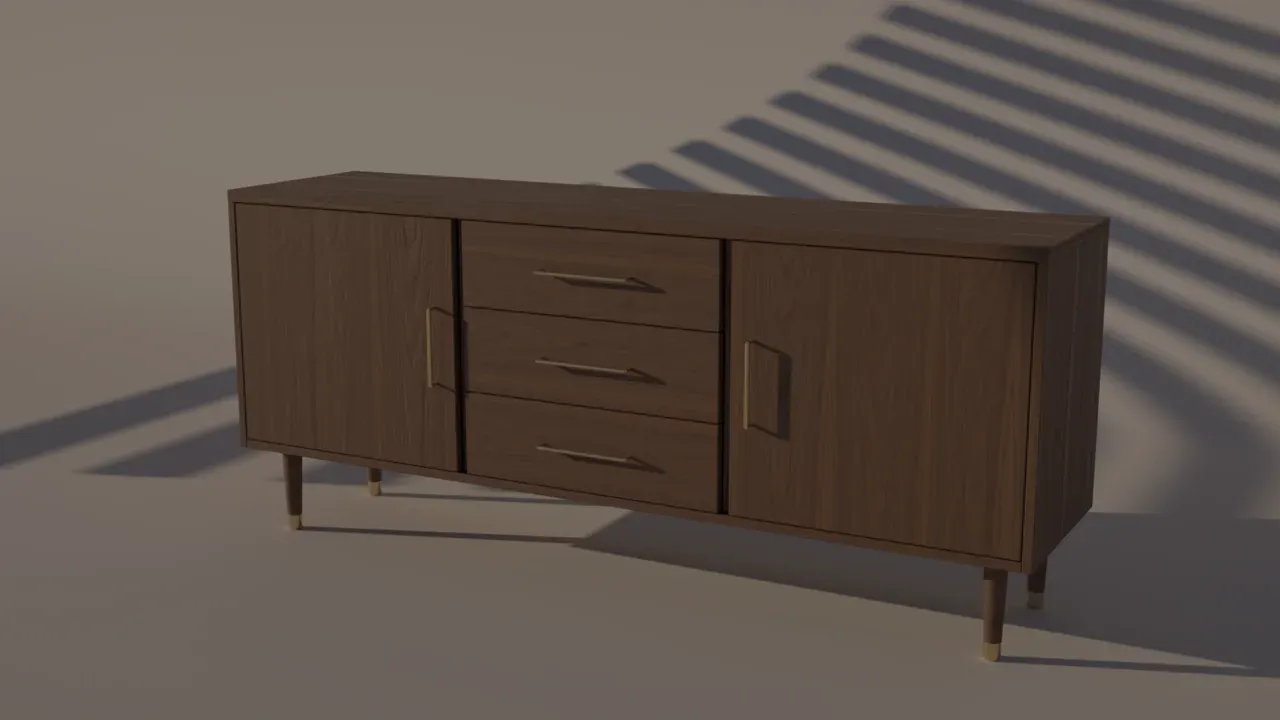
Sun: the same studio under a sky with the sun 15° high, for hard shadows and warm light.
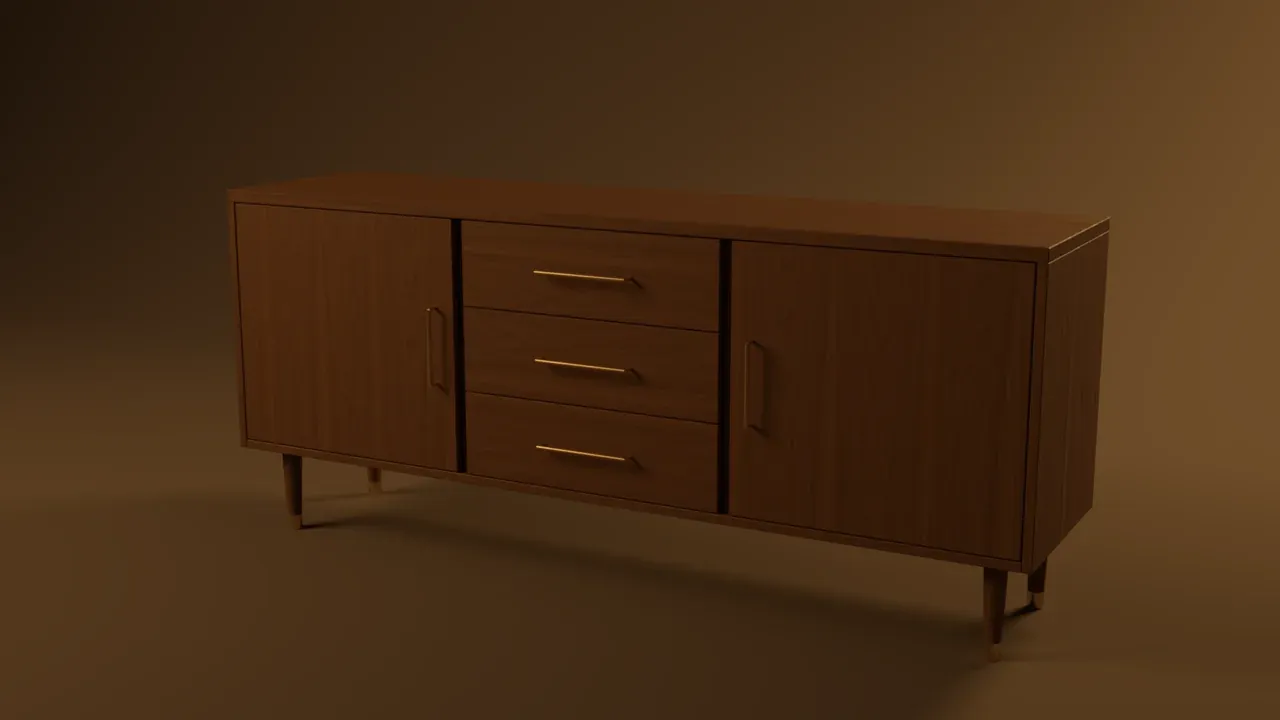
Evening: a dark background, a dim warm key at 2900 K and a bright rim light.
Finishes from the Material Library
Section titled “Finishes from the Material Library”The same model in another finish is one drag away. Rayscaper’s Asset Manager at the bottom of the render window has materials from Poly Haven, Rayscaper’s own materials and your library. If you don’t see it, click Assets at the right of the render window’s toolbar.
- Give the parts that should have the same finish the same material in SketchUp. In the example, Finish is the outside of the sideboard, Legs the legs, Interior the inside and Brass the pulls and feet.
- Open the Material tab of the Asset Manager. Pick Poly Haven or Rayscaper in the list above the categories to see only that source, then find a material: a wood veneer of Poly Haven, or a paint or a metal of Rayscaper.
- Drag it onto the sideboard in the render. Every surface with the material under the cursor changes.
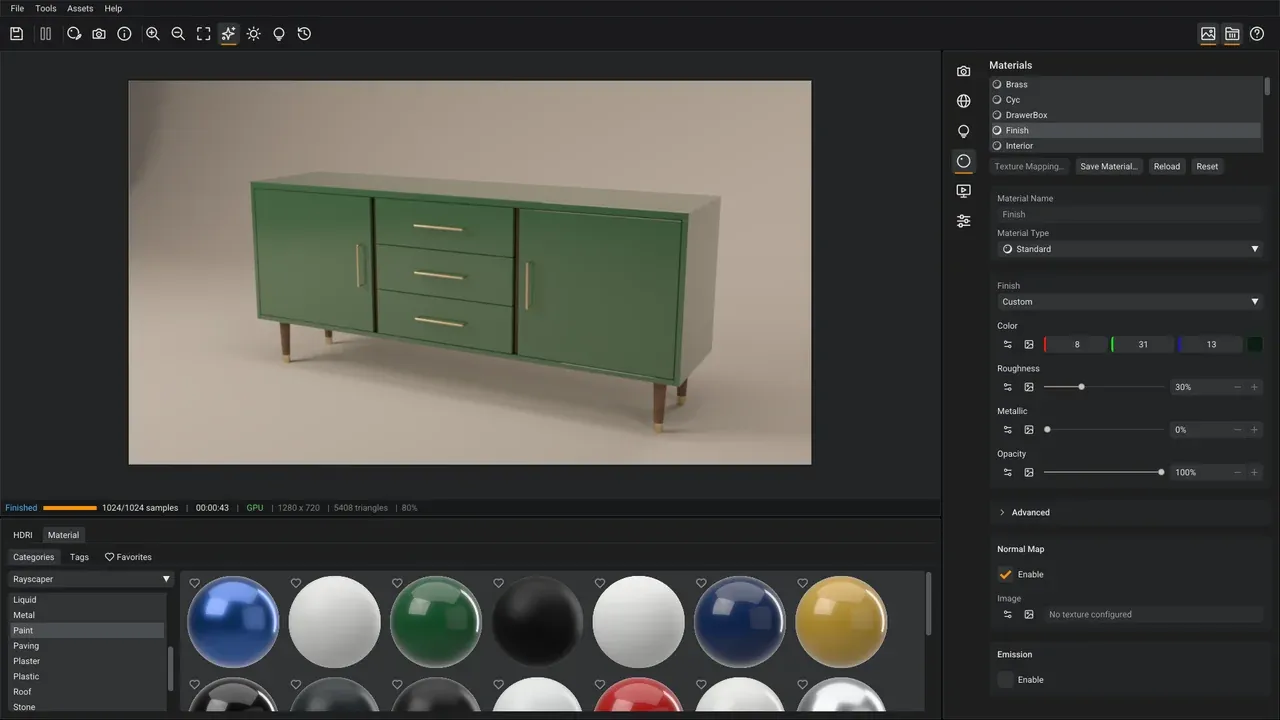
A green paint of Rayscaper’s materials dragged onto the sideboard.
A Poly Haven wood turns the material into a Standard material with three images: the color of the wood, a roughness map that makes some spots shinier than others, and a normal map that makes the grain look slightly raised. Check two things after you apply one:
- The size of the texture. A wood texture shows a piece of wood at a real size, the walnut of the example 1.8 m. If the grain looks too big or too small, click Texture Mapping… at the top of the material editor and change the Scale: above 1 makes the texture smaller, below 1 larger (see Textures). Grain that is too large makes the piece look like a toy.
- The shine. The Roughness sets how sharp the reflections are: the lower, the shinier. The easiest way is the Finish of the material: Satin for oiled wood, with soft, blurry reflections, or Lacquered for a clear, glossy coat.
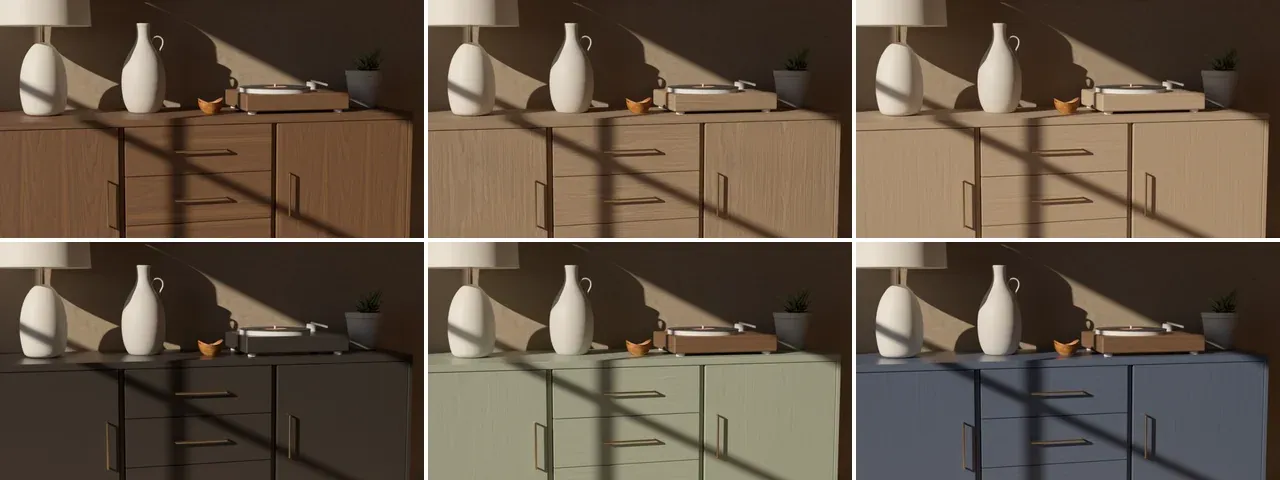
Walnut, white oak, ash, ebonized oak, sage and navy, in the same light.
On painted wood the grain still shows through the paint. To get that, start from a wood and replace only its color: click the sliders icon next to Color in the material editor, set Texture Type to Color and choose the paint color. Keep the Normal Map on, so the grain stays. The sage and navy of the video are a flat color over the normal map of white oak.
Lighting the Room
Section titled “Lighting the Room”In a room, the light comes from outside. The example has one window, in the left wall, and the sun shines through it onto the sideboard and the wall behind it.
- Set the location and the time in SketchUp. In Window > Model Info > Geo-location the example is set to Brussels; in the Shadows panel, 20 September at 17:15. The sun then stands 22° high in the west-southwest, low enough to shine deep into the room and draw the window bars across the sideboard.
- Let the sky follow it. With Extensions > Rayscaper > Use SketchUp Sun for Sky, on for a new model, the sun of Rayscaper’s sky follows SketchUp’s shadow settings. Drag the time in the Shadows panel and watch the sun stripes move in the render until they fall where you want them.
- Save the time in a scene. Open SketchUp’s Scenes panel, select the scene and click Show Details. Check Shadow Settings under Properties to save, so each scene keeps its own time of day. After you change the time, right-click the scene tab and choose Update.
The Evening scene has the same camera at 20:00, when the sun has just set. The sky still glows, the room is dim and the lamp on the sideboard takes over. Inside its shade is a Rayscaper point light with the Bulb 100 W preset (chosen under Preset in the light’s settings): 1600 lumen, the brightness, and 2700 K, a warm light color. The shade material has Translucency, which lets light through it, so the shade glows when the bulb is on.
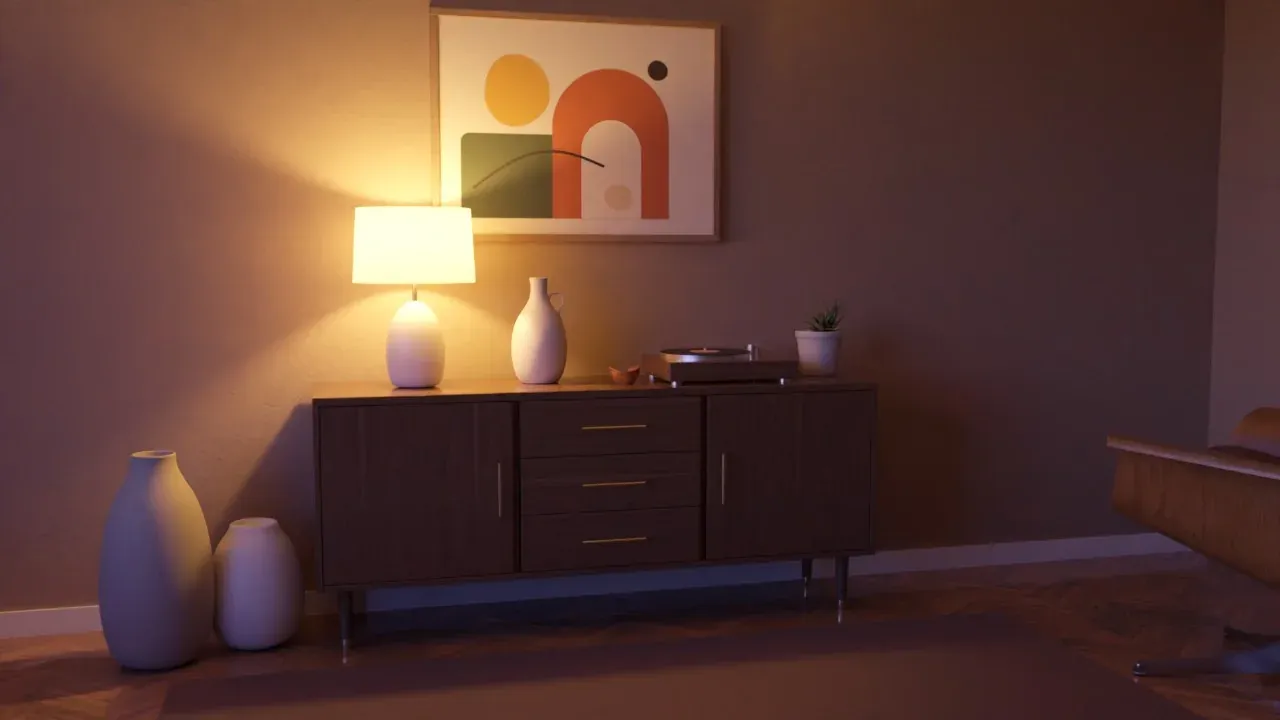
The Evening scene: after sunset, the lamp lights the room.
The sunny afternoon is far brighter than the evening. Two settings in the Post Processing section of the Scene Editor (see Post Processing) make both look right:
- Auto Exposure makes the render brighter or darker by itself, as a camera does, so the dim evening isn’t black. Lower its Compensation for a darker, moodier evening.
- Tone Mapping decides how the very bright and the dark parts of the render fit on your screen. Filmic softens the brightest parts, so the sun patches on the wall don’t turn plain white.
Staging the Room
Section titled “Staging the Room”The room tells the buyer how big the piece is and how it lives. Keep it simple, so the sideboard stays the subject:
- A wall behind it in a color that sets off the wood: a warm taupe for walnut. A painting above it fills the wall and gives the room a color accent.
- A rug in front that grounds it and fills the floor in the foreground.
- A few things on top: a lamp, a vase and a record player, grouped to one side, with empty space between them. Props on top tell what the piece is for.
- Something at the side, like the lounge chair and the floor vases of the example, cut off by the edge of the frame, so the room continues beyond it.
The props of the example are free models of Poly Haven. Check the size of every model you import: models often come at the wrong scale, and a vase at twice its size makes the sideboard look small.
Close-ups with Depth of Field
Section titled “Close-ups with Depth of Field”A close-up shows the quality: the brass of the pulls, the grain, the gap around a drawer. The Hardware, Record Player and Drawer scenes of the example are close-ups.
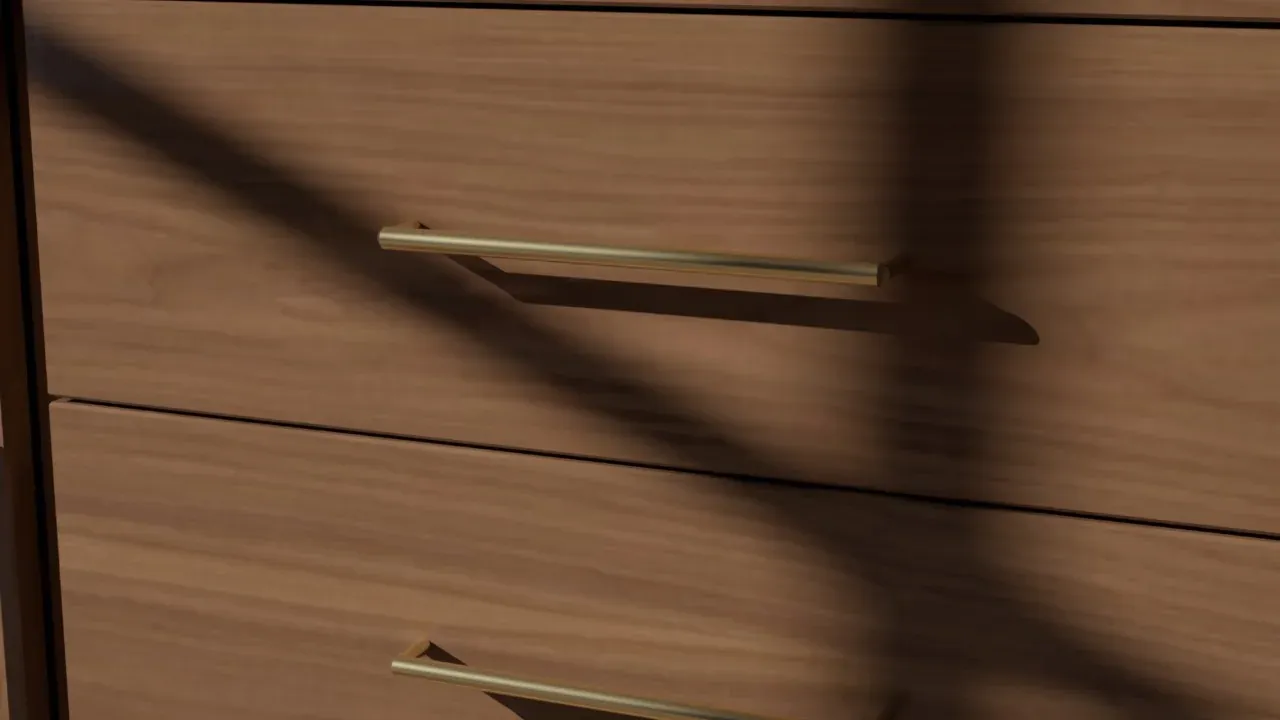
The Hardware scene: the brass pulls in the afternoon sun.
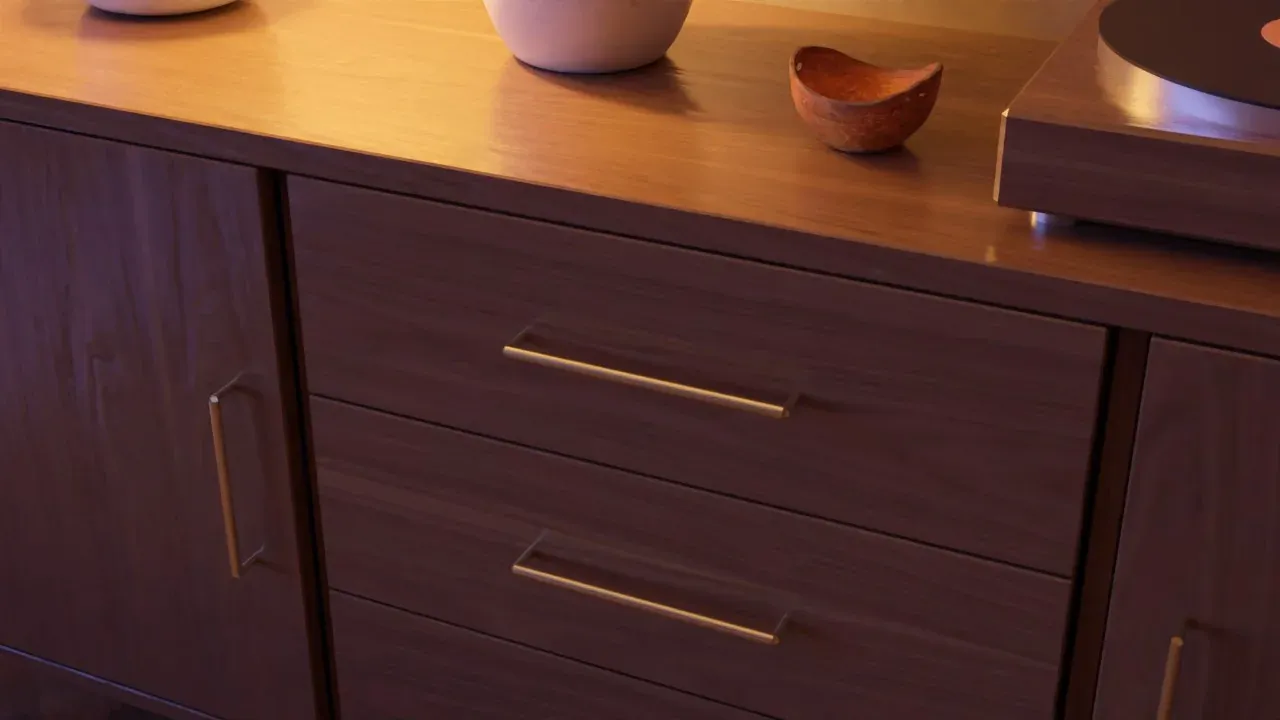
The Drawer scene: the top and the drawers in the light of the lamp.
Depth of field keeps your subject sharp and blurs what is nearer or farther away, as in a photo, so the eye goes where you want it. To use it:
- In the Scene Editor, open the Camera section and the Depth of Field (DOF) group in it (see Depth of Field). Turn on Enable and leave Autofocus off.
- Turn on Camera Focus Pick on the toolbar of the render window (Ctrl+F) and click what should be sharp in the render.
- Set the Blurriness. At 0.3 the wall and the floor of the Front scene soften while the sideboard stays sharp:
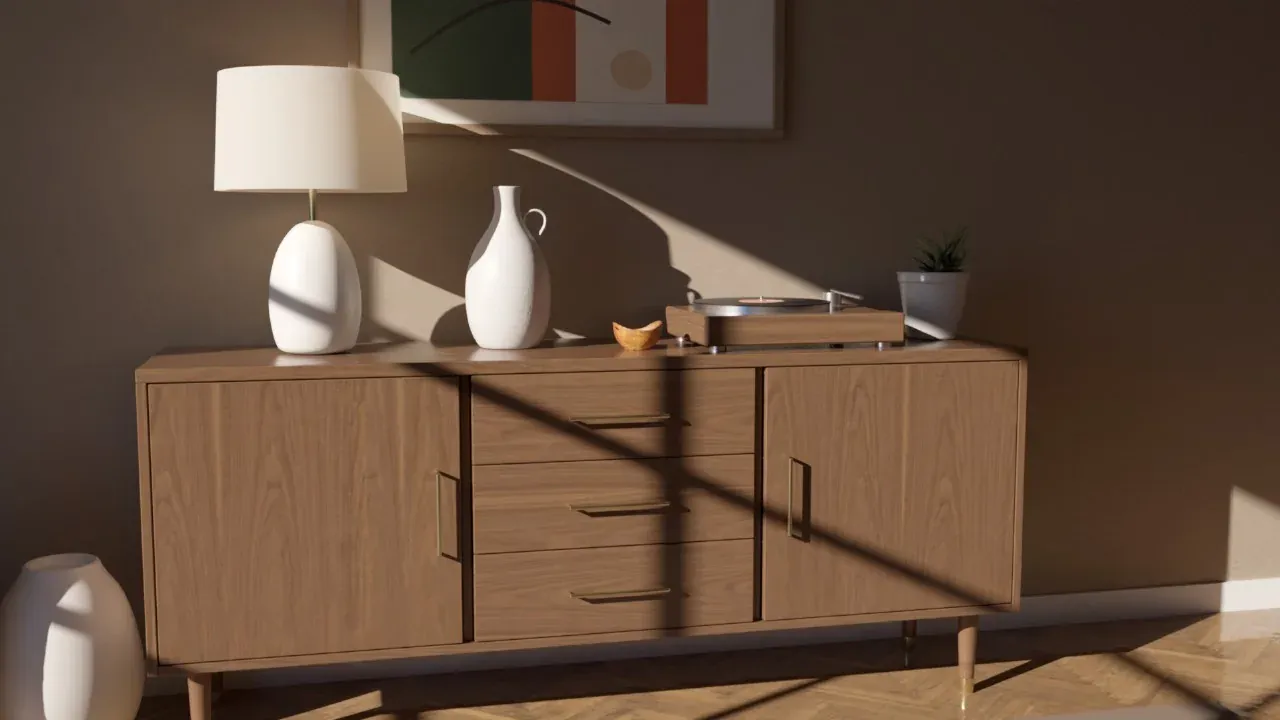
The Front scene without depth of field.
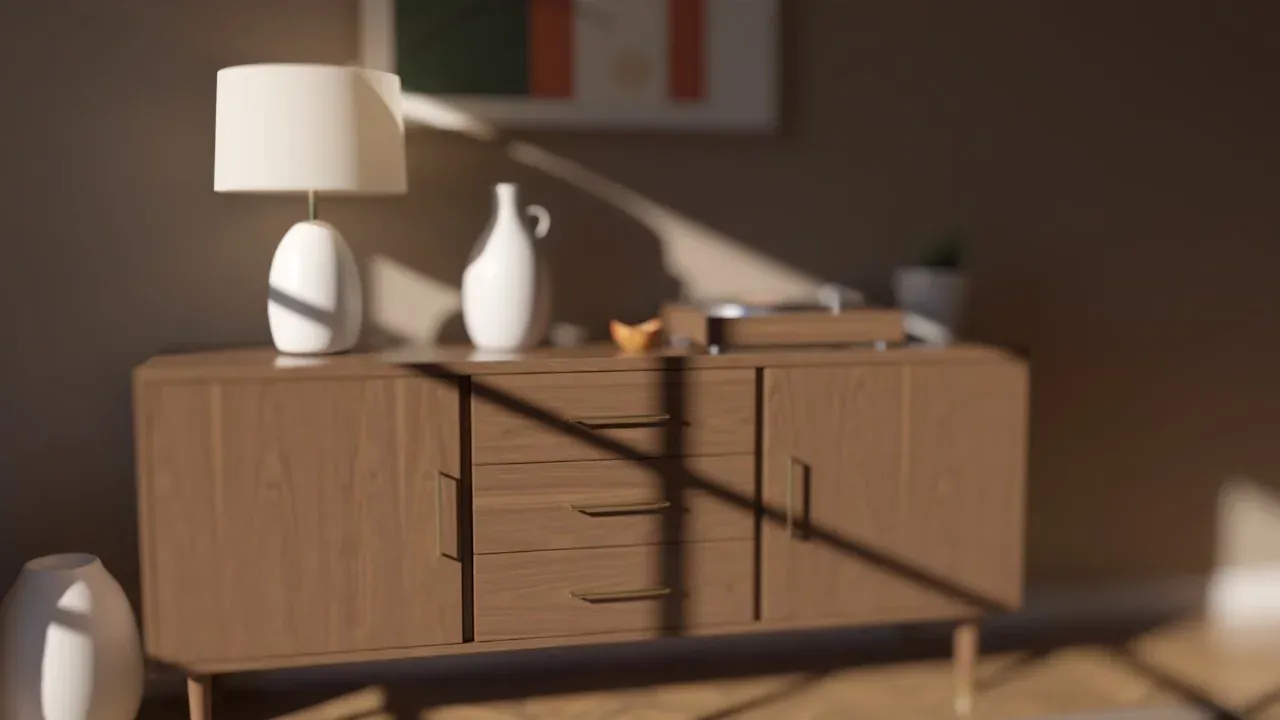
With depth of field, focused on the drawers: the eye goes to the sideboard.
The closer the camera, the stronger the blur, as with a real camera. In a close-up, start at the lowest Blurriness and raise it slowly.
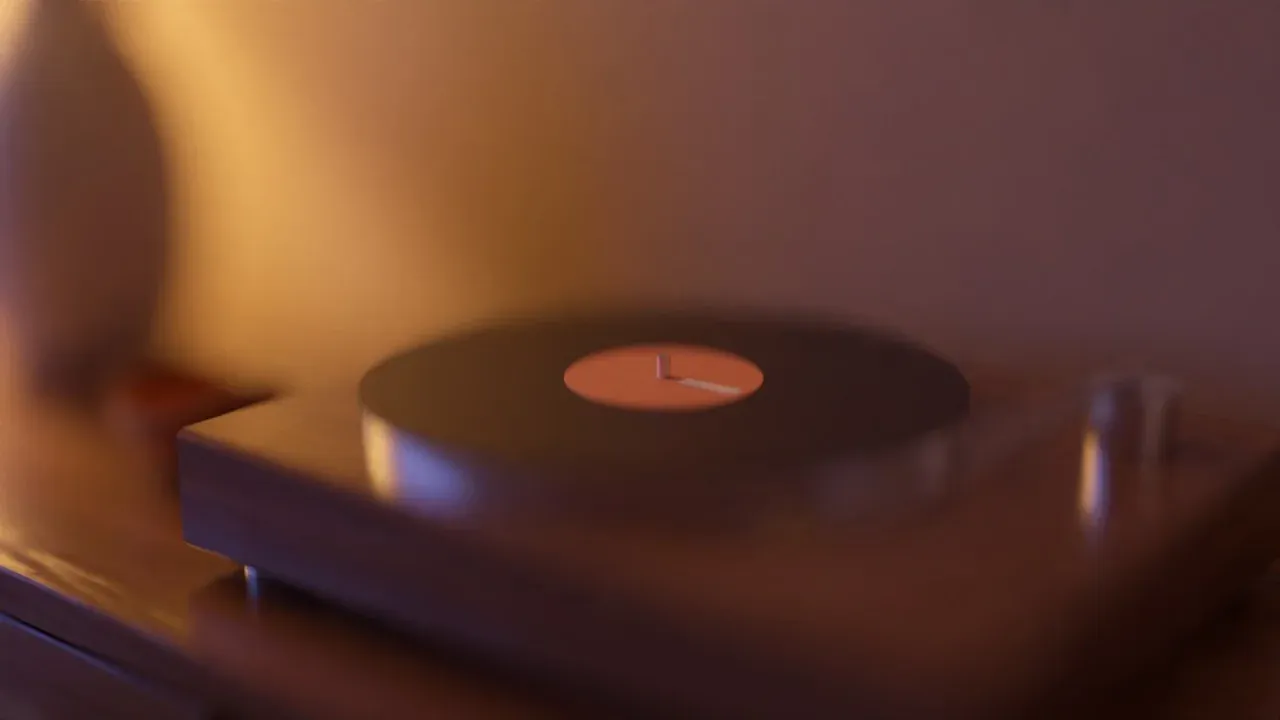
The Record Player scene with depth of field, focused on the label.
Animate with Fredo6 Animator
Section titled “Animate with Fredo6 Animator”An animation shows what pictures can’t: how a door swings open, how deep a drawer is. With Fredo6 Animator the parts of the model move, and Rayscaper renders every frame. The example scene has an Animator film, Sideboard, of 10 seconds: the camera pushes in from the room towards the sideboard while the right door swings open, the top drawer slides out onto the records and the record spins.
You need Fredo6 Animator, LibFredo6 and SketchUcation Tools installed, and an Animator license or trial activated. The Fredo6 Animator guide explains Animator’s editor and rendering in more detail.
- Open
rayscaper-furniture.skpand go to Tools > Fredo6 Collection > Animator > Clip Editor. The editor opens with the film Sideboard. - Click Play the Clip animation in Animator’s toolbar to play it.
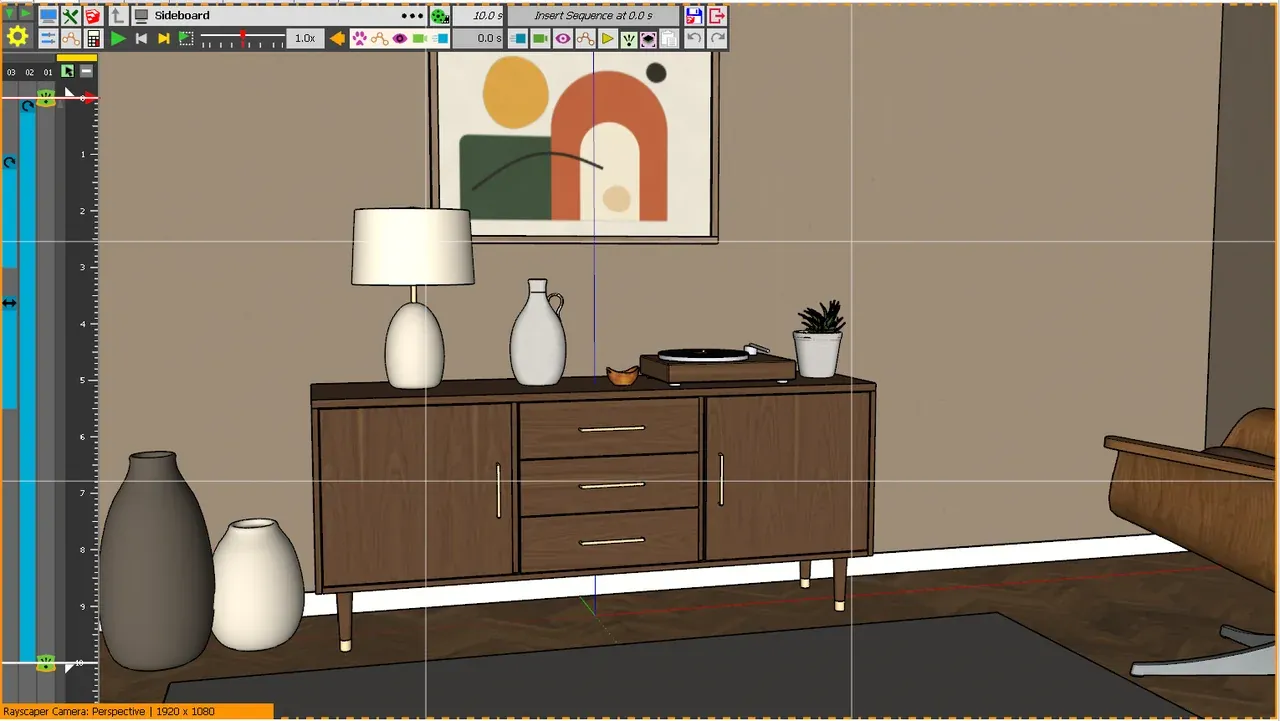
The film in Animator’s Clip Editor. The timeline runs from top to bottom: the three movements in blue, the two camera views in green.
The film has these elements:
| Element | What it does | When |
|---|---|---|
| Rotation | The Platter turns 2000°, the 33⅓ turns a minute of a record, at a steady speed | 0-10 s |
| Rotation | Door R swings 100° open around its hinge, the outer front edge of the door | 1-3 s |
| Translation | Drawer 1 slides 33 cm out | 3.5-5.5 s |
| 2 camera views | The camera moves from the view of the Room scene to a closer view from the left | 0 and 10 s |
To make the same in your own model:
- Save the model. Animator doesn’t work on a model that was never saved.
- Insert a rotation for the door. Open the Clip Editor, click the time in the timeline where the door starts to open and click Insert a Unit Movement in the timeline. Pick a rotation, click the door, and place the axis on its hinge: for a door, the vertical edge on the side of the hinges. Type the angle, 100°, and click Save the Sequence and Exit. Drag the start and the end of the movement in the timeline: 2 seconds is a calm swing.
- Insert a translation for the drawer, the same way: pick a translation, click the drawer and drag it straight out, or type the distance. Start it after the door, so the eye can follow each move.
- Add the camera views. Go to 0 s, set up the first view in SketchUp and click Insert the Current View in the timeline; go to the end and do the same for the last view. Animator moves the camera between the views. Keep the move slow: a push-in of a meter or two in 10 seconds looks calm in a video.
- Smooth the moves. The easing of a movement sets how it speeds up and slows down. Give the door and the drawer one that starts and ends slowly, InOutSine in the example, like a hand that opens a door. Keep the record Linear, so it spins at a steady speed.
- Save. Exit the editor, answer Yes to Save all data in the model, and save the model.
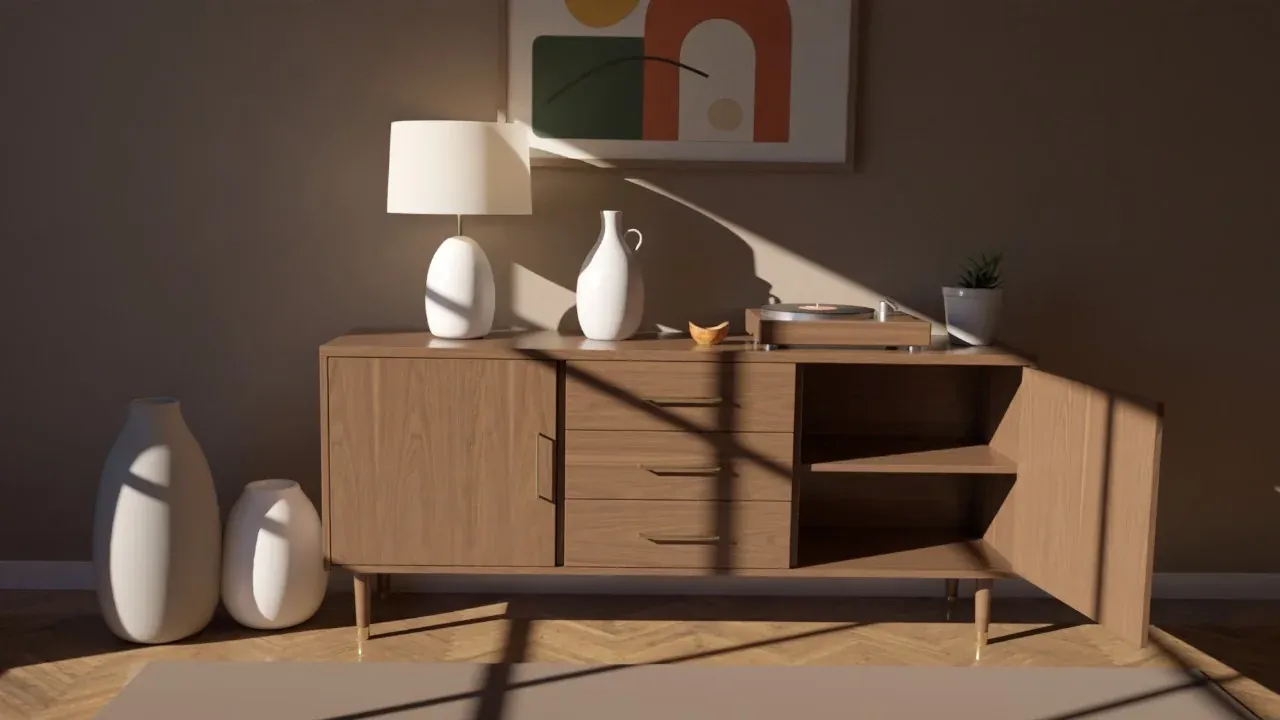
The film at 3 seconds: the door is open.
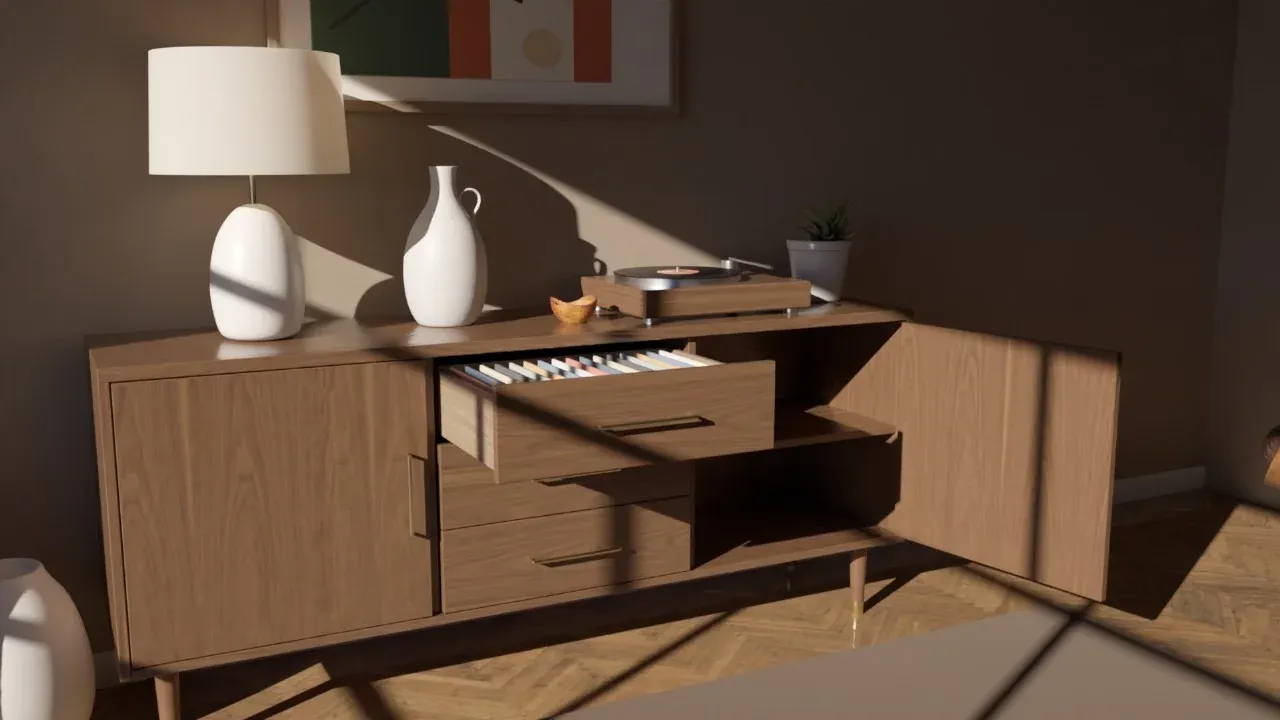
The last frame: the drawer is open on the records.
Render the Film
Section titled “Render the Film”- Save the model and close Animator’s editor, then click Start Render.
- Go to File > Render Animation in Rayscaper’s menu and choose Animator Clip under Animate. Pick the film Sideboard, an Output Directory for the images and 24 Frames Per Second: the 10 seconds are then 241 frames, 10 times 24 plus the first frame.
- Render a small preview first, to check the timing. Under Render Overrides, check Override Resolution and set 640 by 360, and check Override Samples/px and set 16. Leave Save Video on, so Rayscaper also makes an MP4 video of the frames (see Video Settings). Click Start Rendering.
- When the timing looks right, render the final frames into a new output directory, at 1920 by 1080 (1280 by 720 with the free version). Samples are how many times Rayscaper traces the light of each pixel: few samples look grainy, more look clean but take longer. The example used 256. To see how long a frame takes before you render them all, check Use Frame Range and set a Start Frame and End Frame a few frames apart.
Render Every Shot
Section titled “Render Every Shot”With a SketchUp scene per shot, File > Render Scenes… renders them one after the other and saves each as an image named after the scene, so all six shots of the example render overnight. See Render Several Scenes.
Credits
Section titled “Credits”The models and textures of the example scene are from Poly Haven, under the CC0 license: the Mid-Century Lounge Chair, Ceramic Vase 01 and 04, Potted Plant 04 and Wooden Bowl 02, and the textures Walnut Veneer, White Oak Veneer, Ash Veneer, Flamed Black Veneer, Herringbone Parquet, Beige Wall 001 and Poly Wool Herringbone. The music of the video is “Talent in the Air” by Diego Nava, under the Mixkit Stock Music Free License.