
Coming from Twilight Render


Twilight Render was discontinued at the start of 2024: no new licenses and no more updates. If you rendered with Twilight, this guide shows where everything you know from it lives in Rayscaper: the material templates, the light tool, the environment, the render presets and the post-processing.
Rayscaper works the way Twilight users are used to: it’s a SketchUp extension, it starts from the colors and textures of your SketchUp materials, it places lights with a SketchUp tool and it reads SketchUp’s own sun. The big difference is that Rayscaper renders interactively. There is no separate exploration renderer and final renderer: the render window updates while you model, orbit and change settings, and gets cleaner the longer you leave it alone.
The workflow at a glance
Section titled “The workflow at a glance”| In Twilight you… | In Rayscaper you… |
|---|---|
| opened the Material Editor, picked a surface with the eyedropper and chose a template | turn on Material Pick (Ctrl+M), click a surface in the render and choose a material type |
| placed lights with the Light Tool in three clicks and chose the type in the Light Editor | pick a light tool per type on the Rayscaper toolbar and place it in two or three clicks |
| chose a sky or background in the Environment Editor | choose a Color, HDRI or Sky environment |
| chose a render preset and a render size in the Render Editor, then rendered | click Start Render; the render runs while you work, see Rendering |
| finished the image with the post-processing tools | use the Post Processing section, live on the render |
Your first render
Section titled “Your first render”-
Install Rayscaper and open your model.
-
Click Start Render on the Rayscaper toolbar. The Rayscaper window opens and starts rendering right away, from the current SketchUp view. Every SketchUp material gets a Rayscaper material with the same color and texture.
-
Set up the light outside. For an exterior, choose Sky and the Nishita sky model under Environment, then turn on Extensions > Rayscaper > Use SketchUp Sun for Nishita Sky so the sun follows SketchUp’s Shadows panel, as in Twilight. Or drag an HDRI from the Asset Manager onto the render.
-
Add lights with the light tools on the Rayscaper toolbar, see Lights.
-
Fine-tune your materials. Turn on Material Pick on the toolbar (Ctrl+M), click a surface in the render and pick a material type for it. The table below tells you which type replaces which Twilight template.
-
Turn on Denoise on the toolbar and save the render with File > Save… (Ctrl+S).
Rayscaper saves its settings in the model, so the next time you open it, it renders the same way. For a guided first render, watch the Quick Start video.
Materials
Section titled “Materials”In Twilight you opened the Material Editor, picked a surface with the eyedropper and chose a template. In Rayscaper you turn on Material Pick in the render window and click a surface, and its material opens in the Materials section of the Scene Editor. Instead of choosing from about seventy templates, you choose one of eight material types and set its few settings, such as roughness. Every new material starts as PBR, which already looks good on most surfaces.
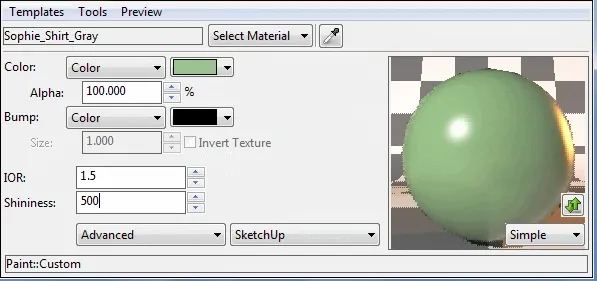
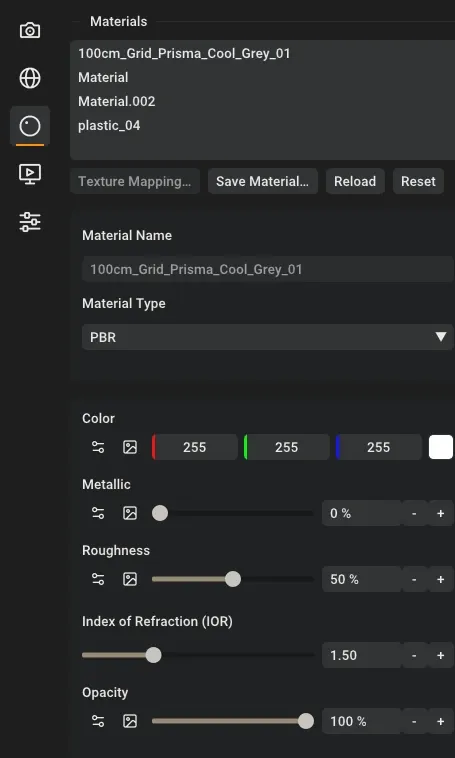
Twilight’s Material Editor with a paint template, and the same job in Rayscaper: a material type with a few settings.
| Twilight template | Rayscaper material type | Notes |
|---|---|---|
| Generic | PBR | The default for every material. |
| Paint: Matte | Diffuse | |
| Paint: Gloss, Satin | Plastic | Raise Roughness for satin. |
| Plastic: Shiny, Matte | Plastic | |
| Wood: Gloss, Satin | Coated | A matte wood texture under a clear varnish. |
| Wood: Matte | PBR | With a high roughness. |
| Ceramic: Tile Gloss | Coated | |
| Ceramic: Tile Matte, Stone: Rough | PBR | |
| Stone: Polished, Perfect Reflection: Polished Concrete | PBR or Coated | A low roughness gives the polished look. |
| Perfect Reflection: Mirror | Mirror | |
| Metal, Brushed Metal | Metal | Pick a preset (aluminium, chrome, copper, gold, …). Use Anisotropy for brushed metal. |
| Car Paint | PBR | Turn on the Coating layer under Advanced Settings. |
| Glass: Realistic, Architectural | Glass | Turn on Thin for window panes modeled as a single face. |
| Water | Water | For pools and ponds. Water in a glass is Glass with an IOR of 1.33. |
| Light Emitter | Any type, with Emission | Fake Emission is Twilight’s non-emitting emitter: it glows but doesn’t light the scene. |
| Translucent: Fabric | PBR | Use the Sheen layer for the soft edge glow of cloth. |
| Translucent: Leaf | PBR | Cut the leaf out with Opacity, see Creating Foliage. |
A few things work differently:
- Bump maps. Rayscaper uses normal maps instead of bump maps for surface detail, see Normal Map. Most texture sites offer a normal map next to the color texture. Bump (height) maps are on the Roadmap.
- Ready-made materials. Instead of templates, the Asset Manager has a library of finished materials from Poly Haven. Drag one onto a surface in the render. Materials you build yourself can be saved to the same library and reused in other models, like Twilight’s material libraries.
- Changes in SketchUp. Once Rayscaper has created a material, later changes to the SketchUp material don’t overwrite your Rayscaper settings. Click Reload to take them over, see Working with SketchUp Materials.
- Not available yet: subsurface scattering (Twilight’s skin, marble and wax), the toon texture and the bevel modifier of Twilight’s Deep Material Editor.
Lights
Section titled “Lights”Twilight placed lights with one Light Tool in three clicks (anchor, position, target) and set the type afterwards. Rayscaper has a tool per light type on its toolbar, but they work the same way: click a reference point, then the light’s position, then (for all but the point light) where it points. SketchUp’s inferences, arrow-key axis locks and the Measurements box all work. See How Light Placement Works.
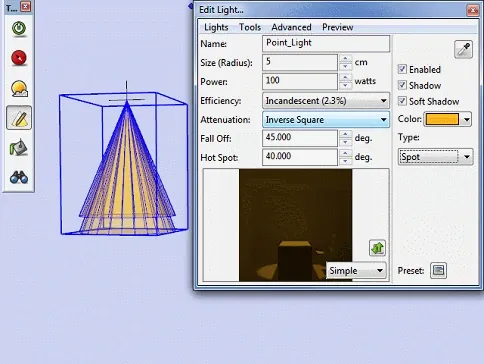
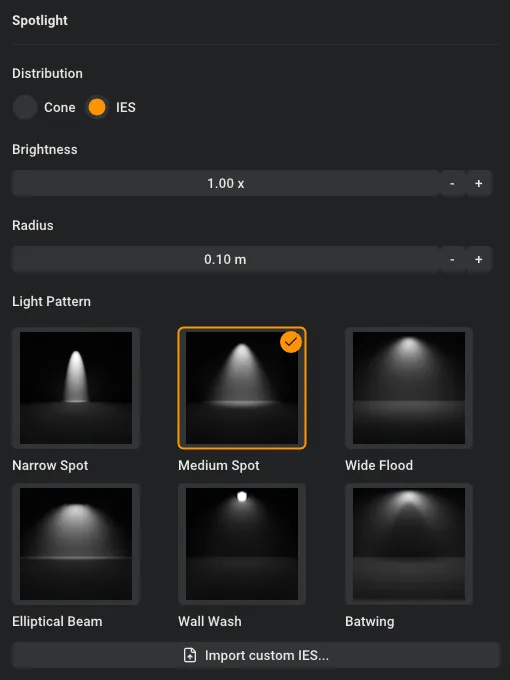
Twilight’s Light Editor with a spot light, and Rayscaper’s Spotlight settings, here with a built-in IES pattern.
| Twilight light | Rayscaper light |
|---|---|
| Omni | Point Light |
| Spot | Spotlight, with Distribution set to Cone |
| IES | Spotlight, with Distribution set to IES. Import your .ies files with Import custom IES…, or use a built-in pattern. |
| Projector | No direct counterpart. Use a Spotlight, or an Area Light for soft, even light. |
| Sun | The sun of the Nishita sky, and optionally a Directional Light that follows SketchUp’s sun too. |
| Light Emitter material | A material with Emission. |
How the settings translate:
- Power and Efficiency are one setting in Rayscaper, Intensity, in Watts. Twilight’s power values don’t carry over one to one; set the brightness by eye in the live render.
- Color can be a color or a Temperature in Kelvin, like real bulbs are rated. 2700-3000 K is the warm white of most interior lights.
- Size is Radius: a larger light gives softer shadows, just like in Twilight. A few centimeters is realistic for a bulb.
- Hot Spot and Fall Off become Cone Angle (half the beam width) and Falloff (how soft the edge is, 0 to 1).
- Shadow and Soft Shadow have no counterpart: every Rayscaper light casts physically correct shadows, and their softness follows from the radius.
- There is no limit on the number of lights and no difference between lights and light-emitting materials, so you don’t have to pick a preset that can handle them.
Environment
Section titled “Environment”Twilight’s Environment Editor is the Environment section of Rayscaper’s Scene Editor. See Environments.
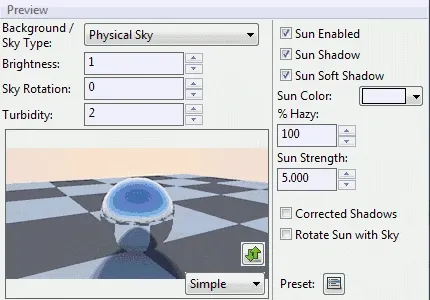
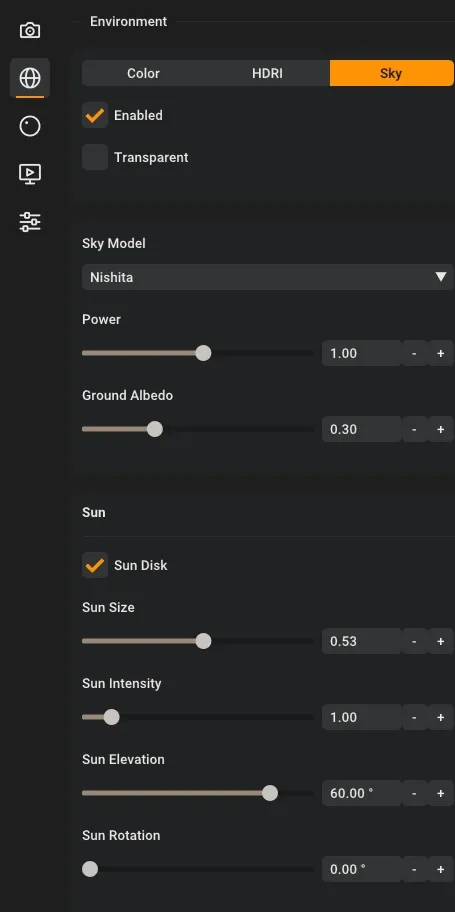
Twilight’s Physical Sky, and Rayscaper’s Nishita sky with its sun.
| Twilight environment | Rayscaper |
|---|---|
| Physical Sky | Sky, with the Nishita, Hosek/Wilkie or Preetham model. Nishita has a sun that can follow SketchUp’s Shadows panel. Hosek/Wilkie and Preetham have a turbidity, like Twilight’s. |
| Spherical Sky | HDRI, from an .hdr or .exr file. The Asset Manager has the whole Poly Haven HDRI library. |
| Sky Rotation | Rotation of the HDRI. |
| Sky Color | Color. |
| Background Color or Image | Turn on Transparent, which keeps the light of the environment but leaves the background transparent in the saved PNG, and put your color or image behind it in an image editor. |
| Hemispherical Sky, Sky Probe | Not supported. Use an equirectangular (spherical) HDRI instead. |
Rendering
Section titled “Rendering”Twilight asked you to choose a render preset first: a biased preset for quick results with few lights, Interior or Exterior for unbiased renders that you stopped when they looked good enough. Rayscaper has one way of rendering, and it handles interiors, exteriors, sunlight, IES lights and emitting materials alike.
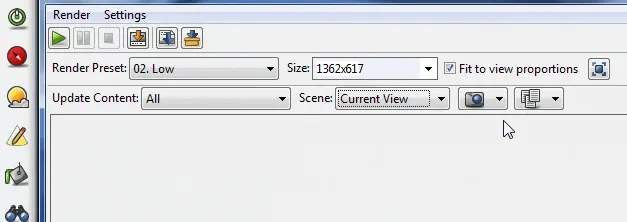
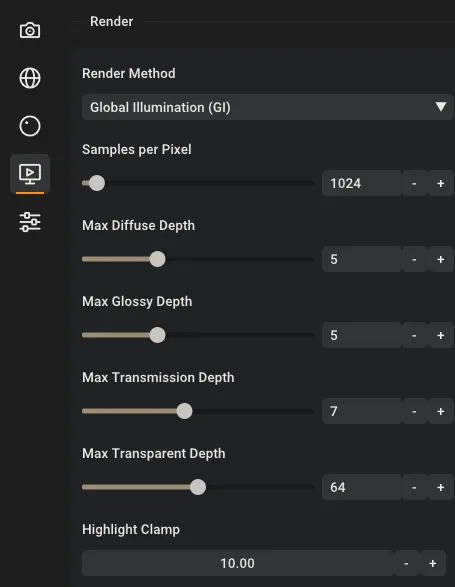
Twilight’s render presets, and Rayscaper’s Render section: one method, rendering until it reaches the samples per pixel.
- Render presets are not needed. Rayscaper renders until it reaches the Samples per Pixel you set (1024 by default), and you can save it at any moment before that. With Denoise on, a render is often clean after a few hundred samples. See Samples per Pixel.
- The exploration renderer is the Rayscaper window itself: it follows the SketchUp camera, so you frame the shot in SketchUp. Click Lock Camera on the Rayscaper toolbar to keep the shot while you look around. See Cameras.
- Render size is the Resolution in the camera settings, see Resolution.
- Depth of field, parallel and spherical projections are in the camera settings too: see Depth of Field, Orthographic and Panoramic.
- Layers to render are SketchUp tags: Rayscaper renders the tags that are visible in SketchUp. Use SketchUp scenes to keep different sets of visible tags.
- Saving is File > Save… (Ctrl+S), to a PNG or an HDR EXR. See Saving a render.
Post processing
Section titled “Post processing”Twilight’s post-processing tools are in the Post Processing section, and like in Twilight they work on the high-dynamic-range render, so you can change them after the render is done. See Post Processing.
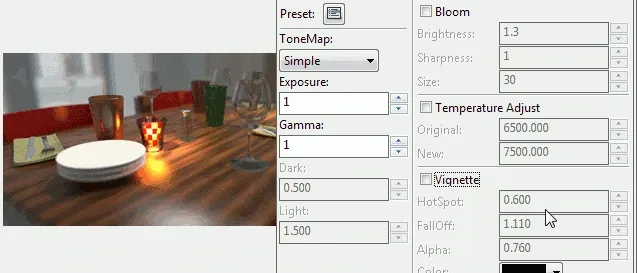
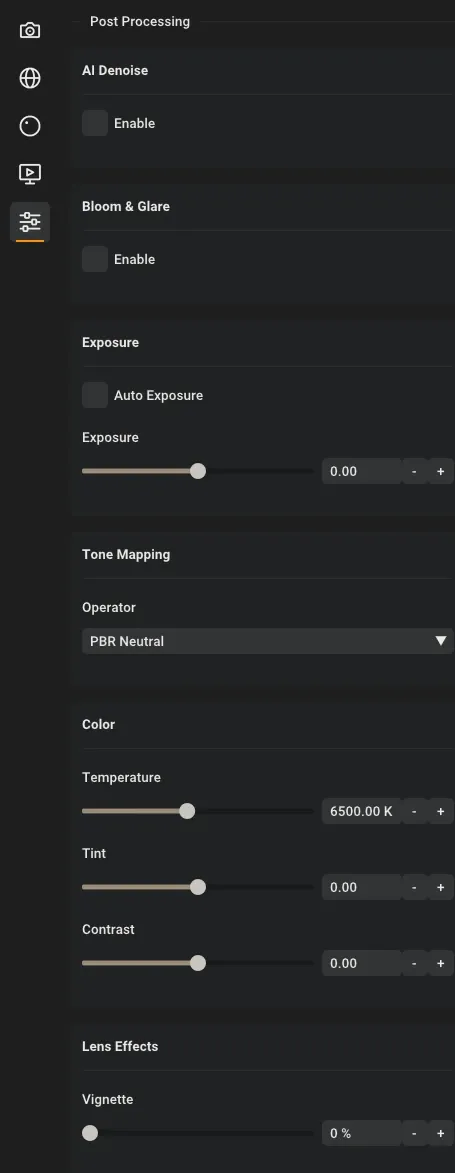
Twilight’s post-processing tools, and Rayscaper’s Post Processing section.
| Twilight | Rayscaper |
|---|---|
| Tone mapping: Exposure, Gamma, Light/Dark | Exposure, Tone Mapping and Contrast under Color |
| Bloom | Bloom & Glare |
| Temperature Adjust | Temperature and Tint under Color |
| Vignette | Vignette under Lens Effects |
| Denoising | AI Denoise |
Animation and other tools
Section titled “Animation and other tools”- Animation: Rayscaper renders animations from your SketchUp scenes, including the sun moving between scenes. See the Animation Guide.
- Section planes: Rayscaper doesn’t render section cuts yet. They’re on the Roadmap.
- Batch rendering of several scenes in one go isn’t available yet. Switch scenes in SketchUp and save a render of each.
- Proxies and scattering: Rayscaper’s Scatter covers terrain with grass, plants and trees, and it renders Skatter compositions.
- Twilight Pro’s modeling tools (bevel, subdivide, texture projection) have no counterpart in Rayscaper. Rayscaper does have tri-planar mapping, which puts textures on curved and irregular objects without UV mapping.
Licensing
Section titled “Licensing”You can try everything with the free version: it has every feature, but its renders carry a watermark and can’t be used commercially. A license is a one-time payment for a perpetual license, like Twilight Pro was. See the Licensing FAQ.
Missing something you relied on in Twilight? Let us know, it helps us decide what to build next.
Credits
Section titled “Credits”The Twilight Render logo and screenshots come from Twilight Render’s tutorials, as archived by the Internet Archive.