
Installation Guide
Installing Rayscaper for the first time
Section titled “Installing Rayscaper for the first time”Installing via the SketchUcation Tools Extension
Section titled “Installing via the SketchUcation Tools Extension”Step 1: Install the SketchUcation Tools extension, see these instructions.
Step 2: Open the SketchUcation Tools extension via the menu Extensions > SketchUcation > ExtensionStore. You
should see a window like the one below. You can use the search functionality to find the Rayscaper extension and click
the button to install it.
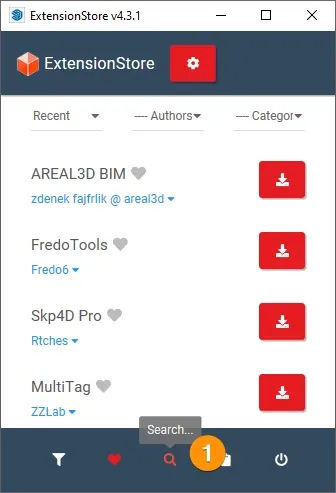
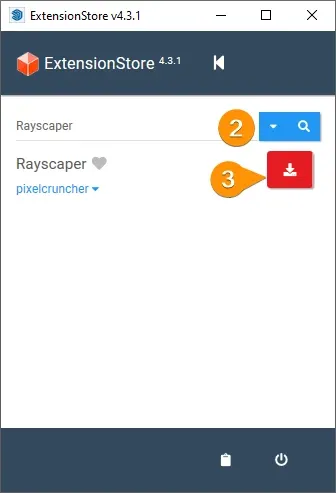
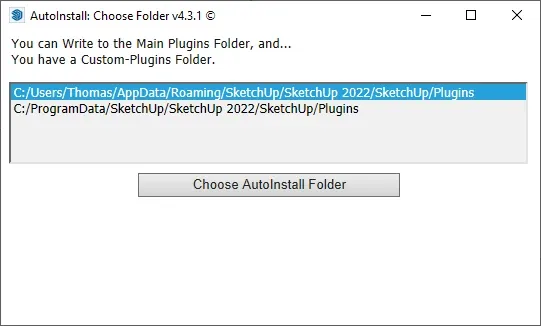
Step 3: Next, you need to select the preferred installation location of the extension. After confirming the installation location, the download of Rayscaper starts. The download can take a few seconds, depending on your connection speed.
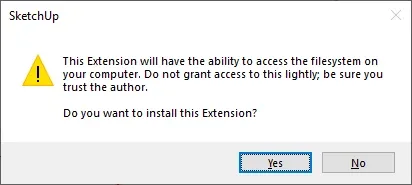
Step 4: Once the download is finished, you need to confirm its permissions:
After these steps, you have correctly installed Rayscaper. You should see the Rayscaper toolbar:

Download and install via the SketchUp Extension Manager
Section titled “Download and install via the SketchUp Extension Manager”Step 1: Download the Rayscaper rbz file from the SketchUcation plugin store. You can also enter your email address on the Rayscaper homepage and we’ll send you a download link.
Step 2: In SketchUp, open the Extension Manager via Extensions > Extension Manager and click
Install Extension. Select the rbz file and confirm.
Step 3: The Rayscaper toolbar appears. If it doesn’t, see I lost my toolbar.
Upgrading to a newer version
Section titled “Upgrading to a newer version”Manual Upgrade
Section titled “Manual Upgrade”If you have successfully installed Rayscaper, you can follow these steps to upgrade to a newer version.
Step 1: Download the new Rayscaper rbz file from the SketchUcation plugin store.
Step 2: In SketchUp, open the Extension Manager via Extensions > Extension Manager and click
Install Extension. Select the new rbz file and confirm. This is the same as a fresh install: you don’t need to
uninstall the old version first.
Step 3: Restart SketchUp. The running session keeps using the old version’s engine files until SketchUp closes, so the new version only works correctly after a restart.
When the new version starts for the first time, it removes the files of the previous versions automatically. Your settings, saved materials and downloaded assets are kept.
To confirm the upgrade worked, check the version number as described in What version of Rayscaper am I running?.
Uninstalling Rayscaper
Section titled “Uninstalling Rayscaper”Step 1: In SketchUp, open the Extension Manager via Extensions > Extension Manager.
Step 2: Open the Manage tab, find Rayscaper in the list and click Uninstall. Confirm when SketchUp asks.
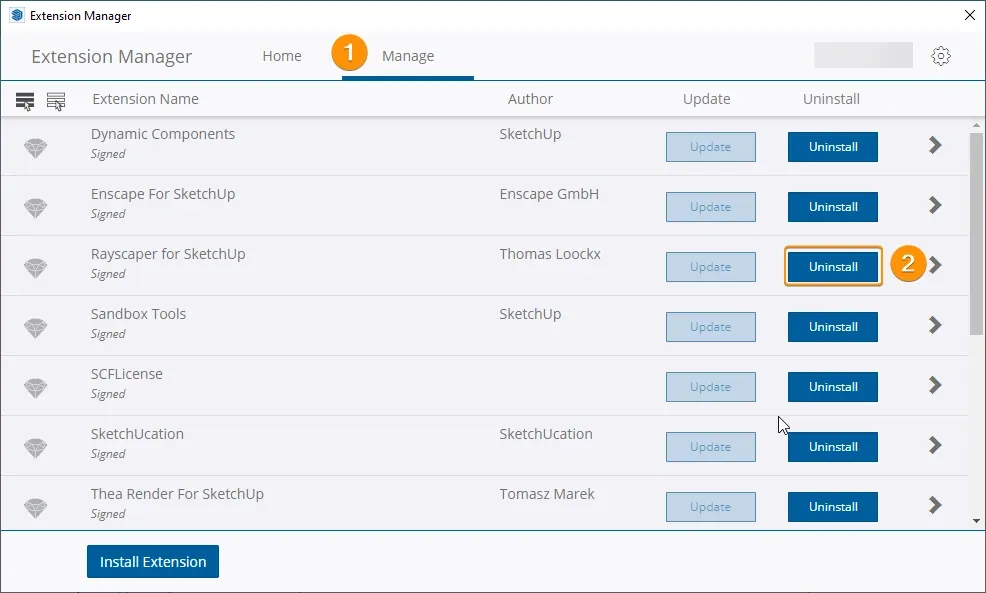
Step 3: Restart SketchUp.
Removing the remaining files
Section titled “Removing the remaining files”Uninstalling removes the extension itself, but Rayscaper keeps your settings, logs, saved materials and downloaded assets in a separate folder, so they survive an upgrade or reinstall. To remove them as well, close SketchUp and delete this folder:
- Windows:
%APPDATA%\Rayscaper(usuallyC:\Users\<you>\AppData\Roaming\Rayscaper) - macOS:
~/Library/Application Support/Rayscaper
If a rayscaper folder or rayscaper.rb file is still in the SketchUp plugins folder after the restart, you can
delete them too. On Windows, the plugins folder is
%APPDATA%\SketchUp\SketchUp <version>\SketchUp\Plugins, for example SketchUp 2026.
Your license is managed by the SketchUcation Tools extension, so uninstalling Rayscaper doesn’t affect it.