
Environments
The environment surrounds your whole scene, like an infinitely large sphere (other software calls it a sky dome or environment map). It does two jobs at once:
- It is the backdrop. Whatever the camera sees past your model is the environment.
- It lights the scene. Light from every direction of the environment falls on your model and shows up in reflections, so the environment sets the mood of the whole render.
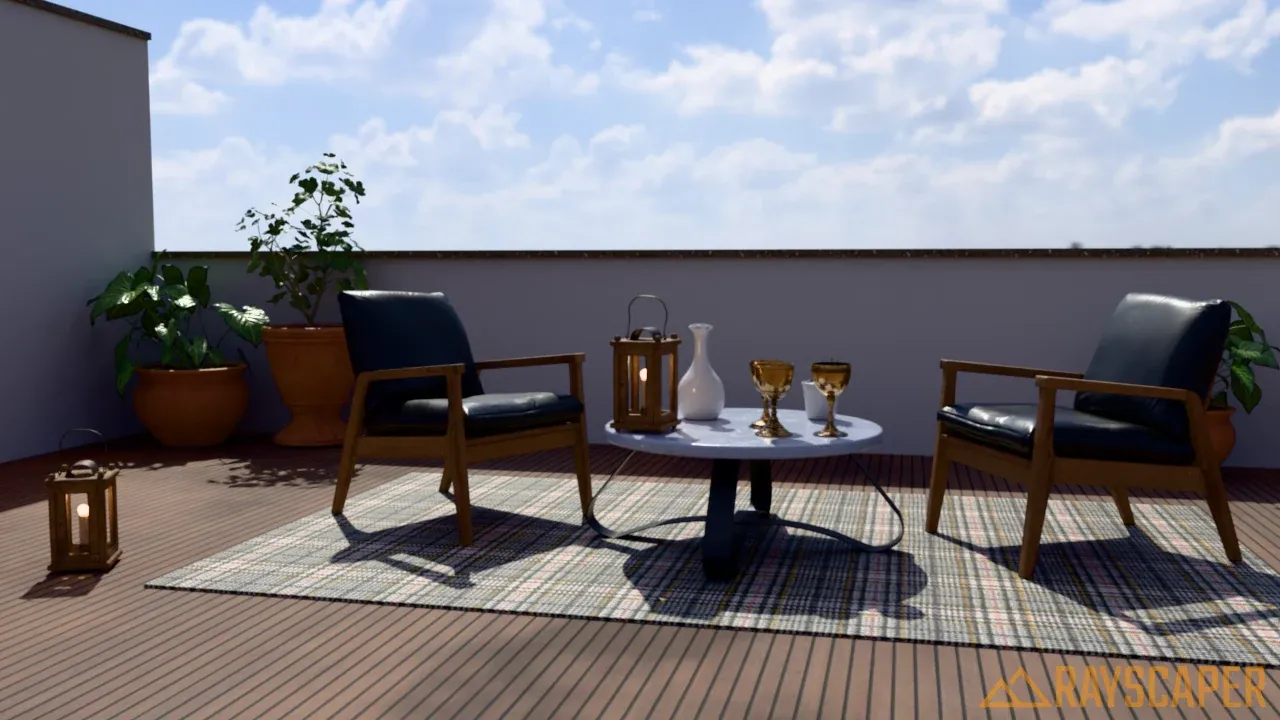
One HDRI provides the sky, the distant landscape, the sunlight and the soft shadows. There are no other lights in this scene apart from two dimmed lanterns.
Choosing an Environment Type
Section titled “Choosing an Environment Type”Rayscaper has three environment types. Pick the one that matches what you are making:
| Type | What it is | Best for |
|---|---|---|
| Color | A single color in every direction | Product shots, clean studio renders, quick tests |
| HDRI | A 360° photo of a real place, including its light | Realistic lighting with minimal setup, interiors and exteriors |
| Sky | A computed sky, with a sun you can position | Exteriors where you control the time of day |
A new model starts with a Nishita sky whose sun follows SketchUp’s Shadows panel, so the first render has the sunlight and the shadows you see in SketchUp. Auto Exposure is on as well, so rooms lit through a window come out as bright as a sunny exterior.
Environment Settings
Section titled “Environment Settings”All environment settings live in the Environment section of the Scene Editor. Choose a type with the Environment Type buttons at the top; the controls below them change with the type.
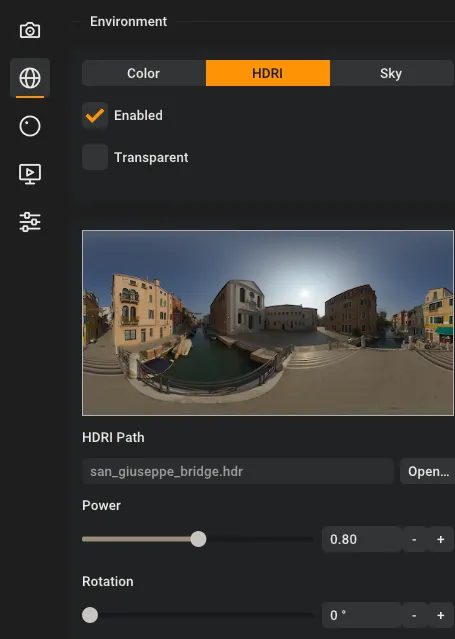
The Environment section with an HDRI selected.
Two switches apply to every environment type:
Enabled
Section titled “Enabled”Turns the environment off completely. The background turns black and only the lights you placed yourself, such as point lights, spotlights and emissive materials, light the scene.
The environment provides the backdrop and most of the light.
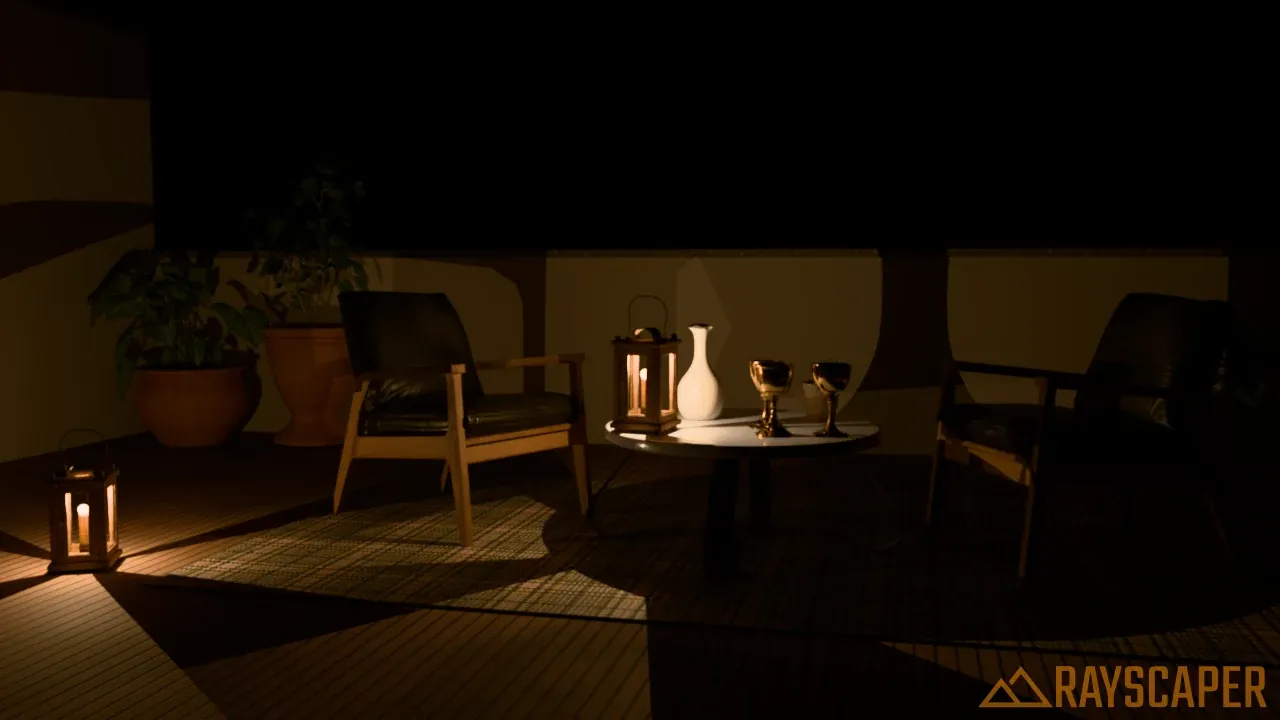
With the environment disabled, the two lanterns are the only light sources.
Transparent
Section titled “Transparent”Hides the environment from the camera but keeps its light. Your model is lit and reflects exactly as before, while the background becomes transparent in the saved PNG. Transparent only appears while Enabled is on.
The HDRI is visible behind the terrace.
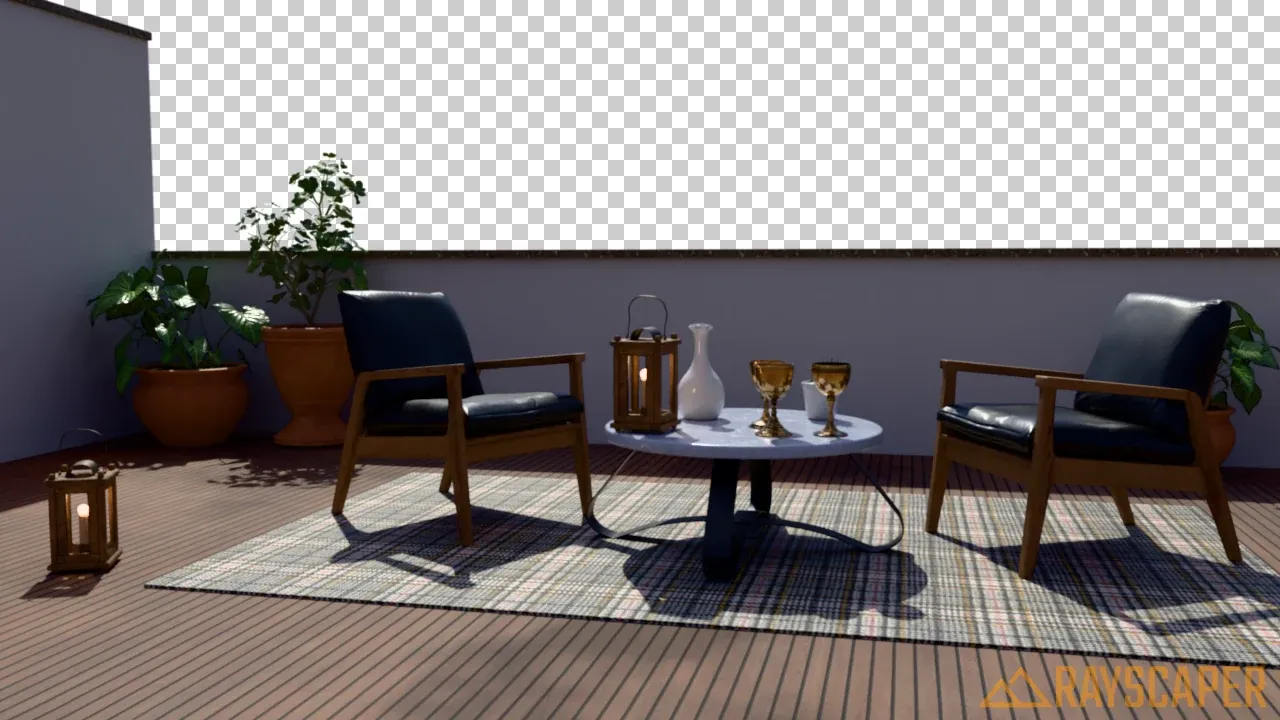
The same lighting, with a transparent background. The checkerboard shows where the image is transparent.
Environment Types
Section titled “Environment Types”Color Environment
Section titled “Color Environment”The simplest environment: one color in every direction. It lights the scene evenly from all sides, which gives soft, shadowless light, a clean backdrop and reflections without distractions.
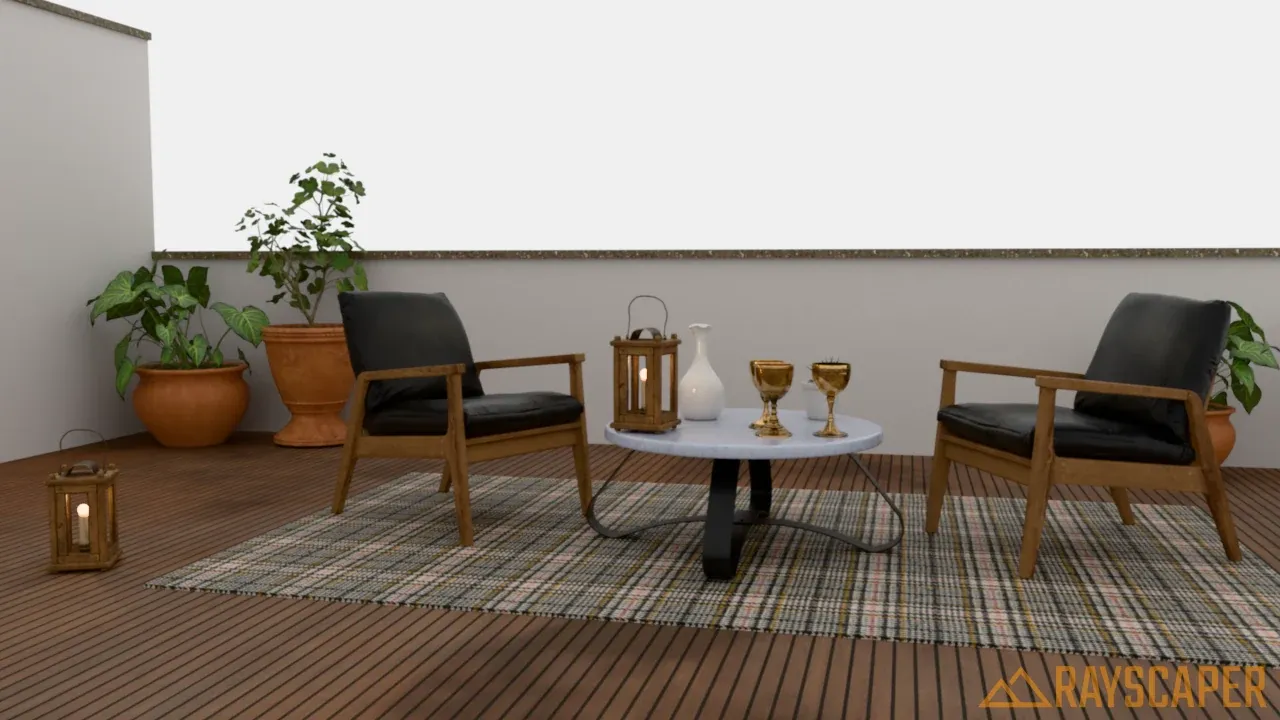
White gives neutral, even light, the classic product shot look.
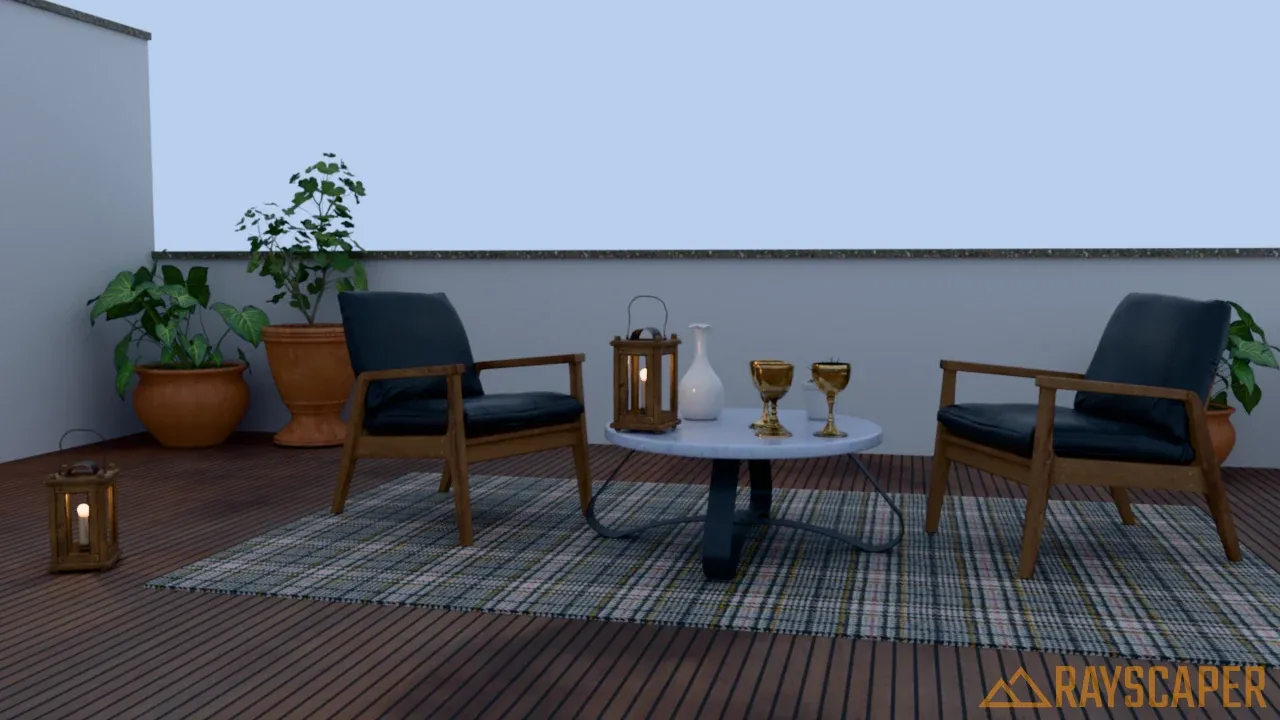
A light blue tints the shadows and the light, like an overcast sky.
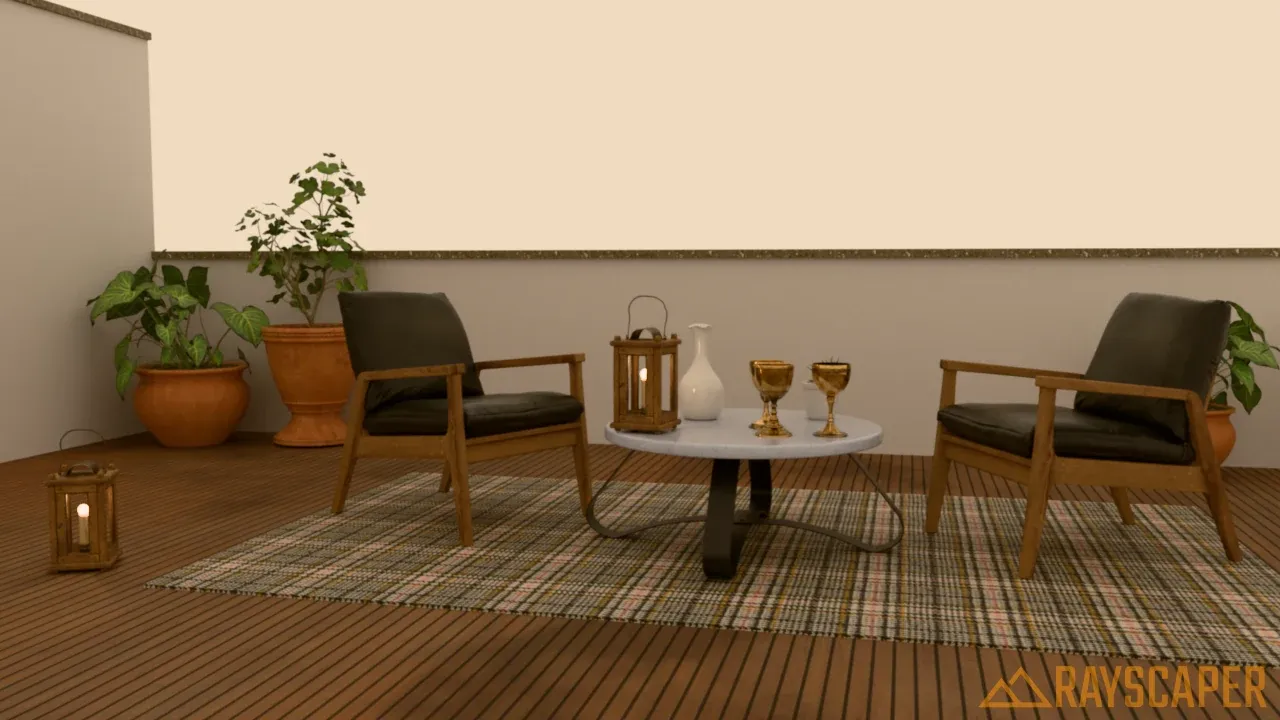
A warm beige gives a softer, cozier mood.
Best for: product renders, catalog images, clay renders and quick lighting checks.
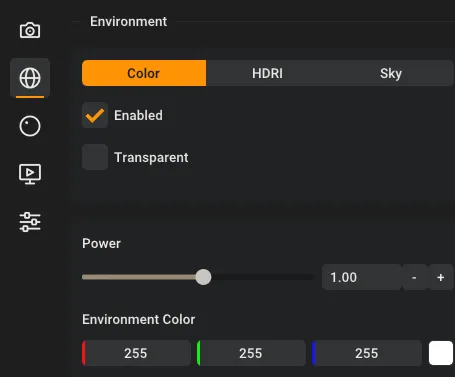
| Setting | Default | Description |
|---|---|---|
| Power | 0.8 | Brightness of the background and of the light it casts. The slider runs from 0.01 to 100 on a logarithmic scale, so small values are easy to set. |
| Environment Color | White | The color of the background and of the light. Click the swatch to pick a color. |
HDRI Environment
Section titled “HDRI Environment”An HDRI (High Dynamic Range Image) is a 360° photo of a real place that also stores how bright every part of it is, from the deepest shadow to the sun itself. Used as an environment, it lights your model the way that place would: direct sunlight, soft skylight, light bouncing off nearby buildings, and realistic reflections. It is the fastest way to a realistic render.
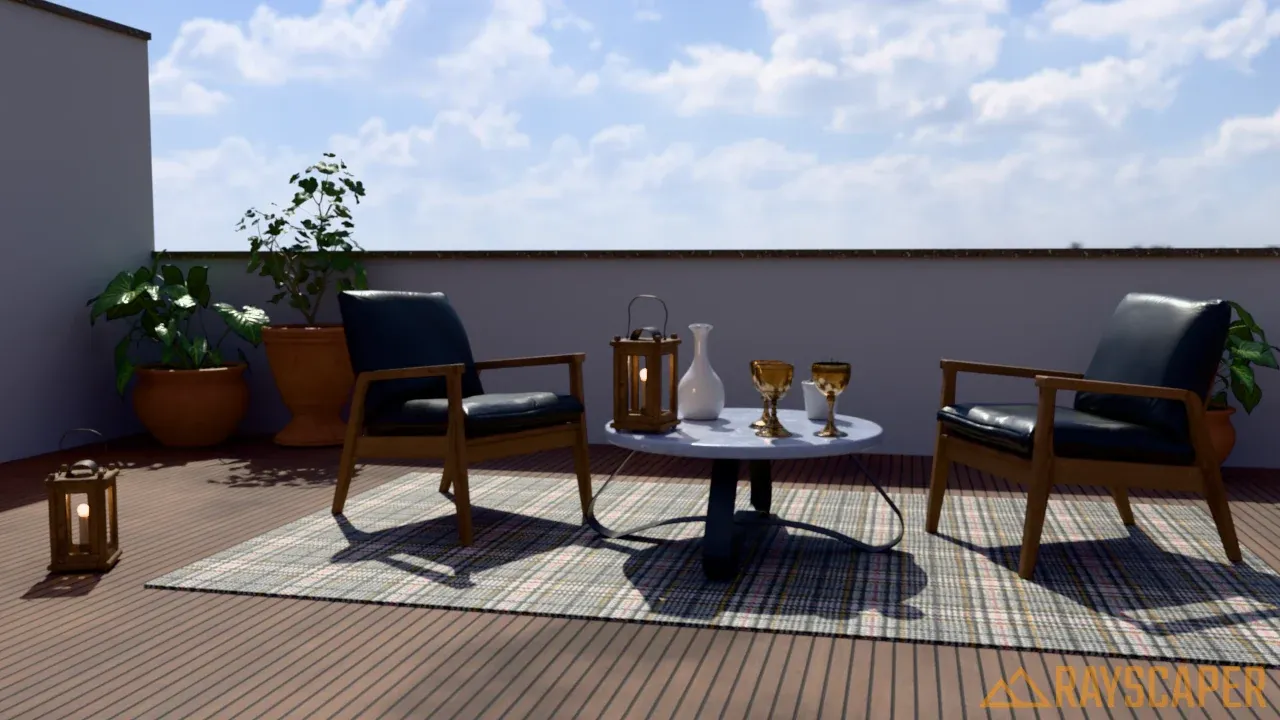
A sunny sky with clouds: crisp shadows and a bright, fresh look.
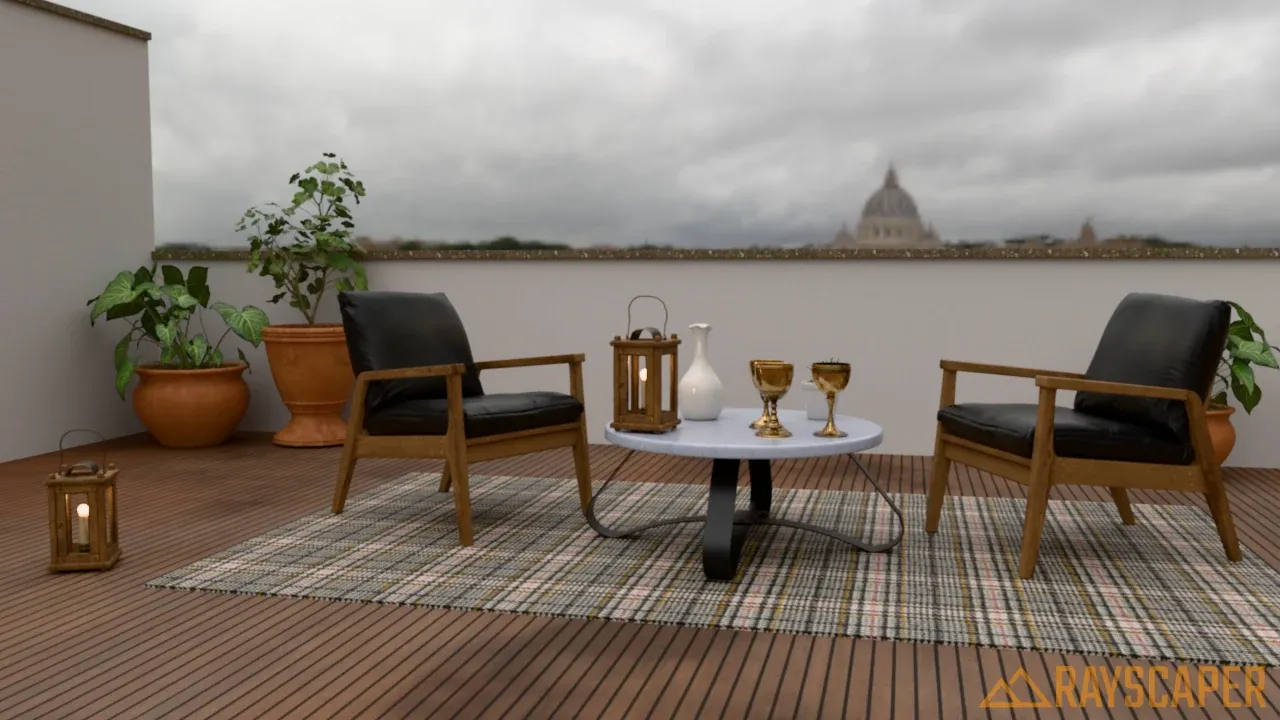
An overcast sky over a city: soft, even light with barely any shadows.
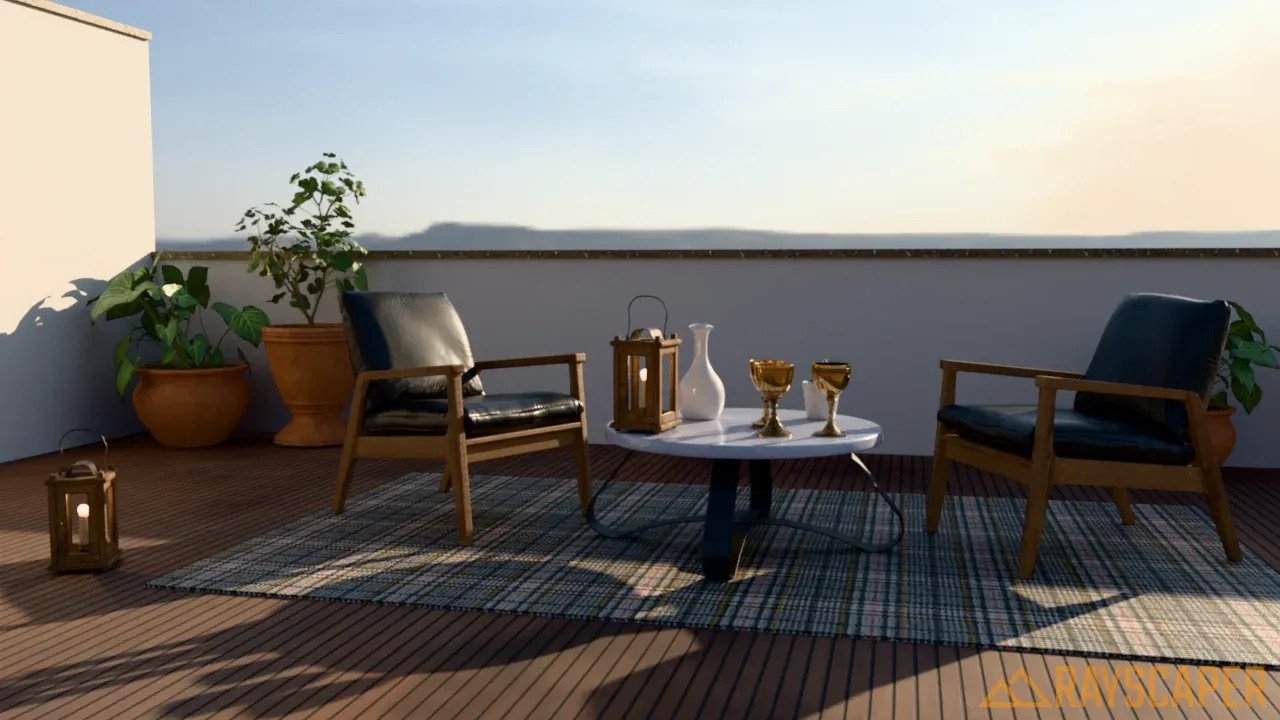
A late afternoon sun, low behind the parapet on the right: warm light and long shadows.
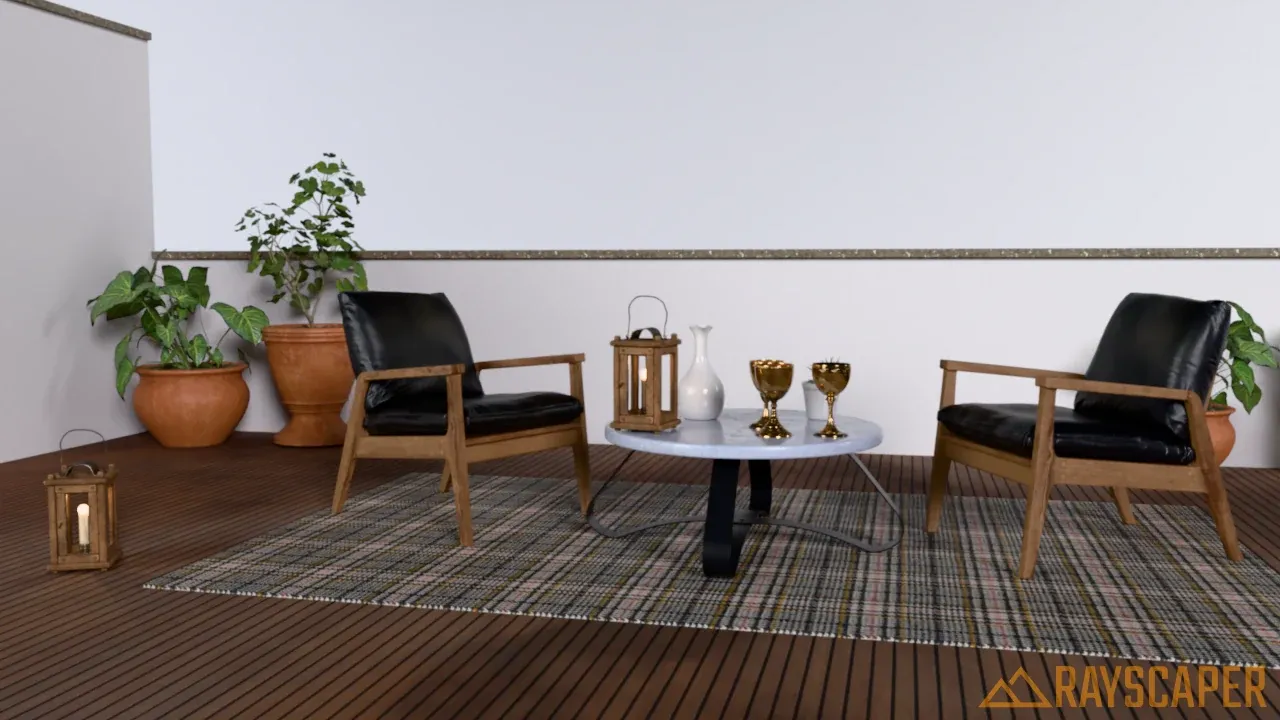
A photo studio with softboxes: controlled light and a neutral backdrop, made for product shots.
Best for: architectural exteriors and interiors, products shown in context, and any render where realism matters.
Using an HDRI
Section titled “Using an HDRI”- Select HDRI as the environment type. A file dialog opens right away, choose an
.hdror.exrfile. - Turn Rotation until the sun or the brightest part of the HDRI is where you want it.
- Adjust Power until the brightness is right.
- To switch to a different file later, click Open… next to the HDRI path.
Where to Get HDRIs
Section titled “Where to Get HDRIs”The quickest source is the built-in Asset Manager. It gives you the full Poly Haven HDRI library inside Rayscaper: drag an HDRI onto the viewport and Rayscaper downloads and applies it.
You can also download HDRIs yourself from Poly Haven or ambientCG. Both offer hundreds of free, high-quality HDRIs under the CC0 license, so you can use them in any project, including commercial work.
HDRI Settings
Section titled “HDRI Settings”| Setting | Default | Description |
|---|---|---|
| HDRI Path | The HDRI file. Click Open… to choose a different one. | |
| Power | 0.8 | Brightness multiplier, from 0.01 to 100 on a logarithmic scale. |
| Rotation | 0° | Turns the HDRI around the vertical axis, from 0° to 360°. Use it to move the sun, and with it the shadows and reflections. |
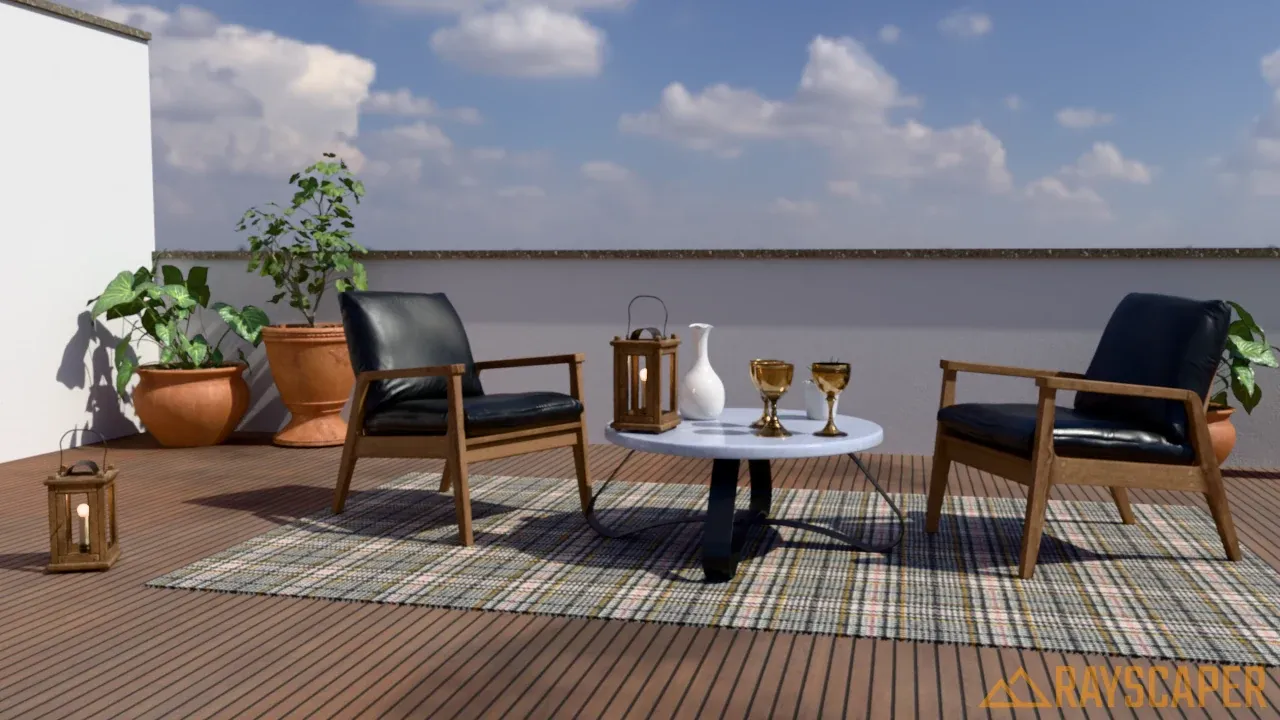
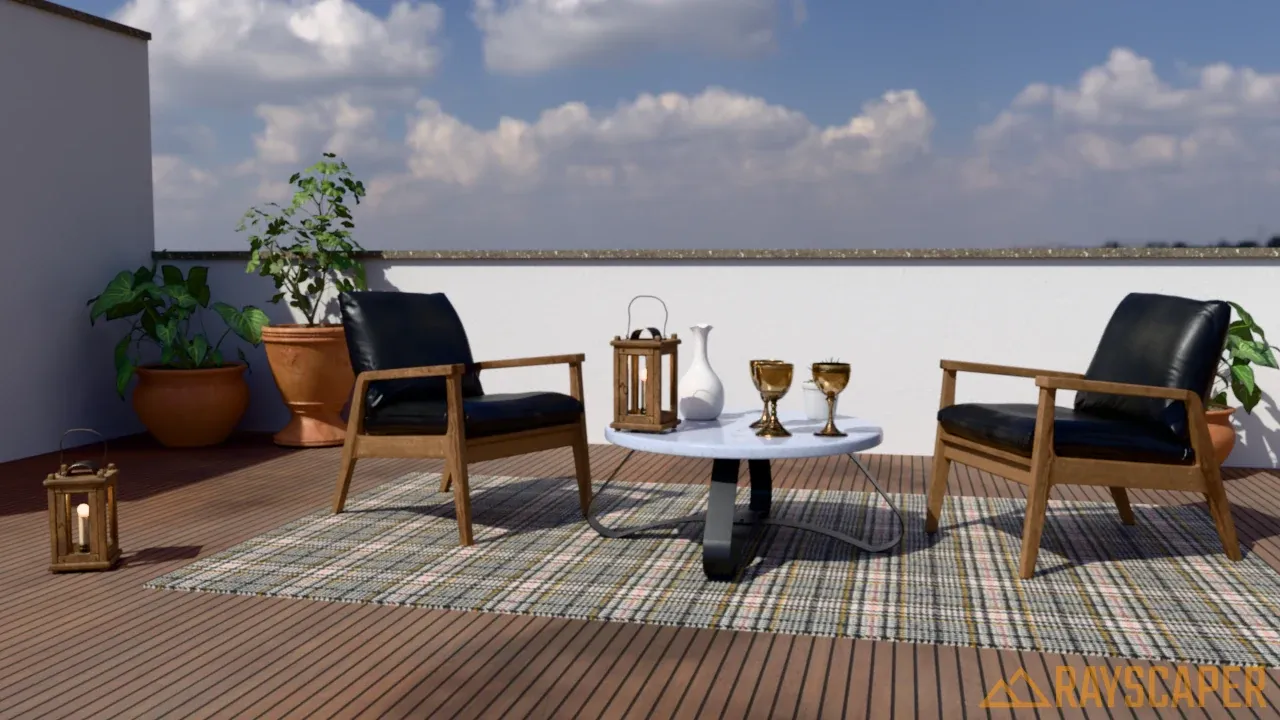
Rotation is the most useful HDRI setting. Turning the HDRI moves the sun around your model, which changes the direction of the shadows, which side of the model is lit, and what you see in the background:
The sun is behind the terrace on the left. The furniture is backlit and the shadows fall towards the camera.
The sun comes from the right. The side wall catches the full light and the shadows fall to the left.
The sun is behind the camera. The parapet is fully lit and the shadows fall away from the camera.
Power scales all the light of the HDRI. Lower it when the render is too bright or when the environment overpowers your own lights, and raise it when the render is too dark.
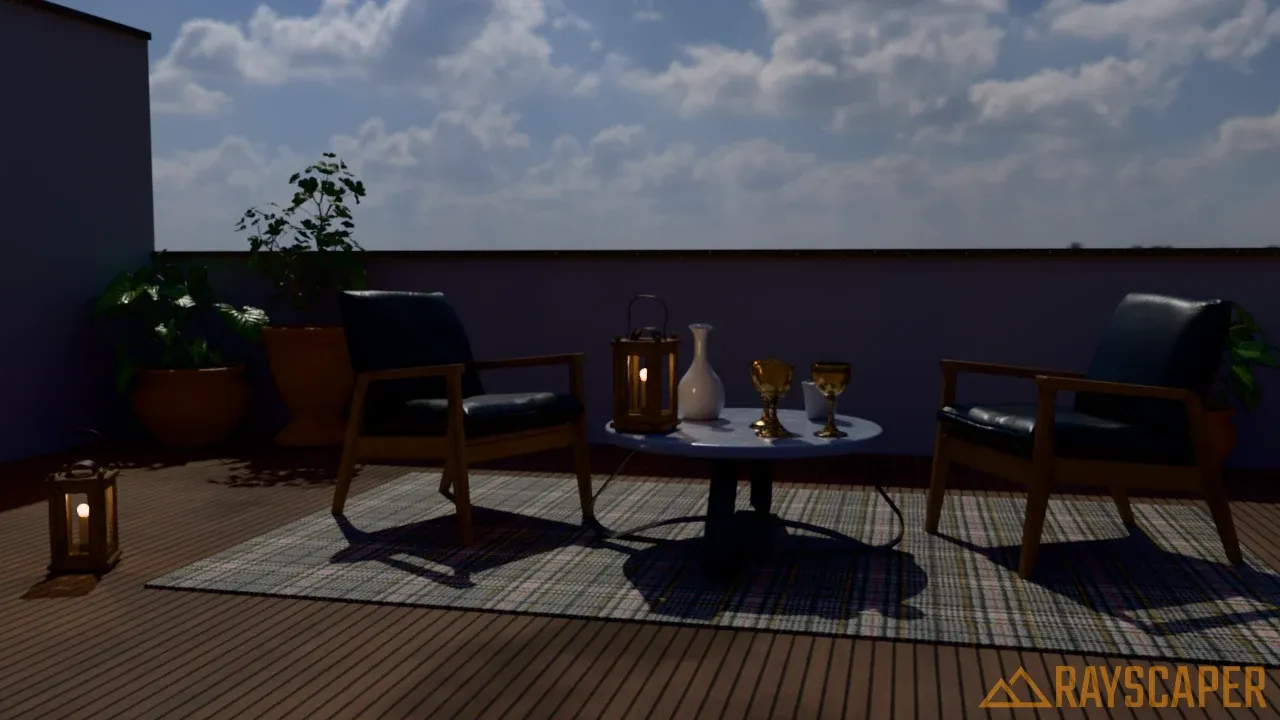
Too dark: the lanterns now stand out, but the scene looks underexposed.
Balanced: bright sunlight with detail in the shadows.
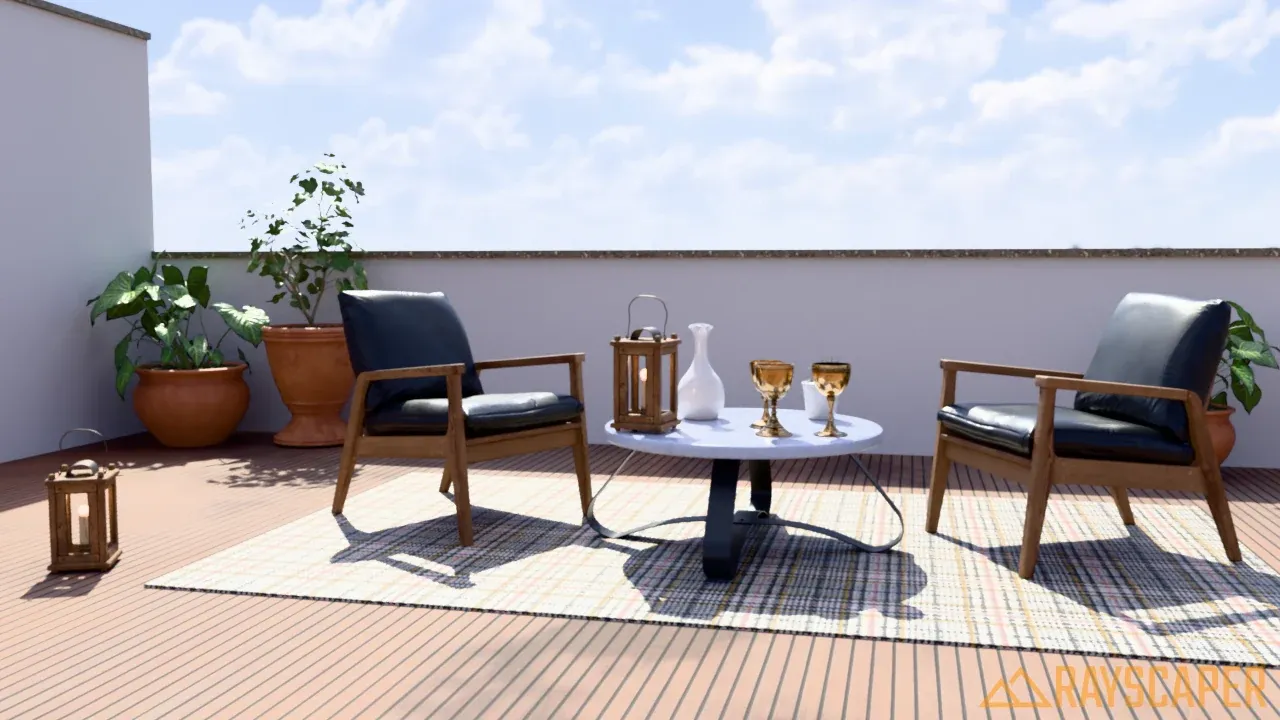
Too bright: the sky and the walls wash out.
SketchUp Environment for HDRI
Section titled “SketchUp Environment for HDRI”If you already picked an environment in SketchUp’s Environments panel (in the Default Tray), Rayscaper can use it directly. Rayscaper then syncs:
- HDRI image: the SketchUp environment image becomes Rayscaper’s HDRI.
- Rotation: SketchUp’s environment rotation becomes Rayscaper’s Rotation.
- Exposure: SketchUp’s skydome exposure becomes Rayscaper’s Power.
- Linked sun: if Set Sun Location is on in SketchUp, Rayscaper adds a directional light called SketchUp Environment Sun that matches the sun direction of the environment.
To turn it on, choose Extensions > Rayscaper > Use SketchUp Environment for HDRI. A checkmark shows that it is active.
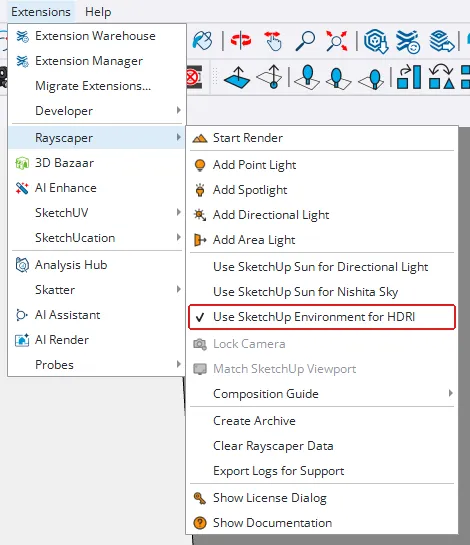
Turn on environment tracking in Extensions > Rayscaper > Use SketchUp Environment for HDRI.
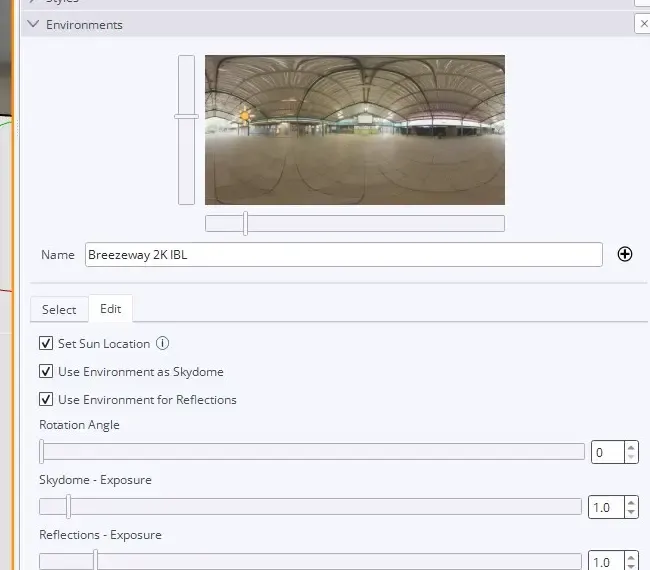
SketchUp’s Environments panel. The HDRI, rotation, exposure and sun are all synced to Rayscaper.
While tracking is on, the Environment section shows Tracking SketchUp Environment and SketchUp controls the HDRI settings. Changes in SketchUp’s Environments panel update the render right away.
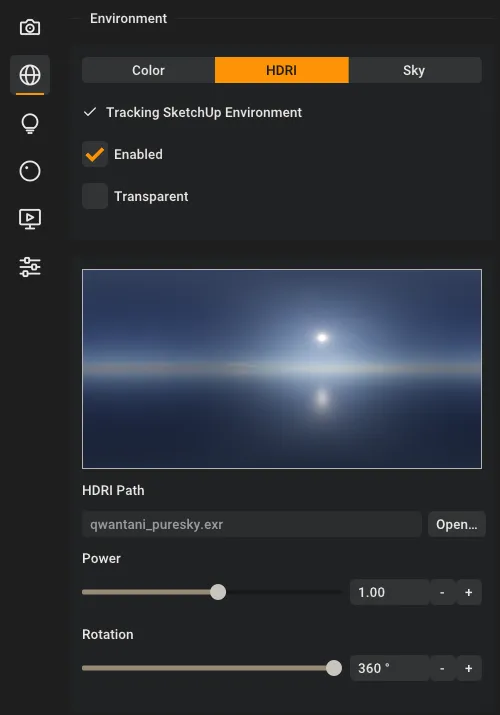
The Environment section while tracking a SketchUp environment.
The SketchUp Environment Sun light appears in the Lights section. You can change its intensity and color temperature there, but its direction always follows the environment.
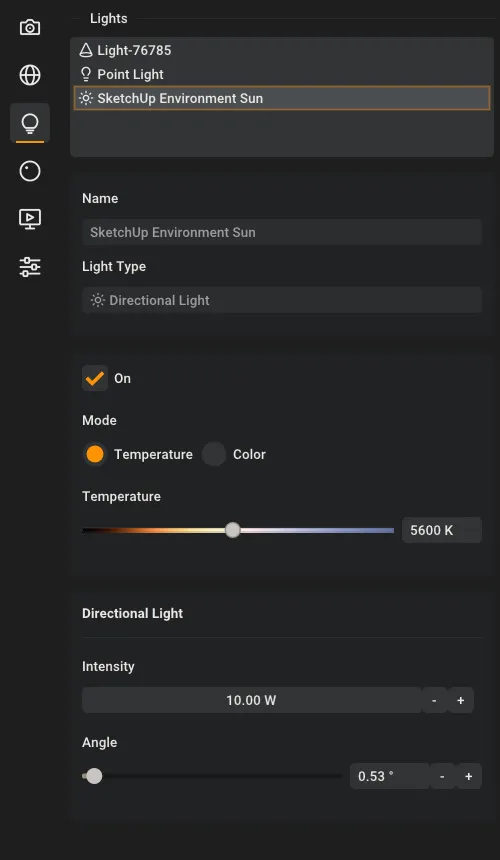
The SketchUp Environment Sun directional light that Rayscaper creates for you.
Sky Environment
Section titled “Sky Environment”A sky environment computes the sky from a physical model of the atmosphere, so no image file is needed. The sky is always sharp, whatever your resolution, and with the Nishita model you can put the sun exactly where you want it, for any time of day.
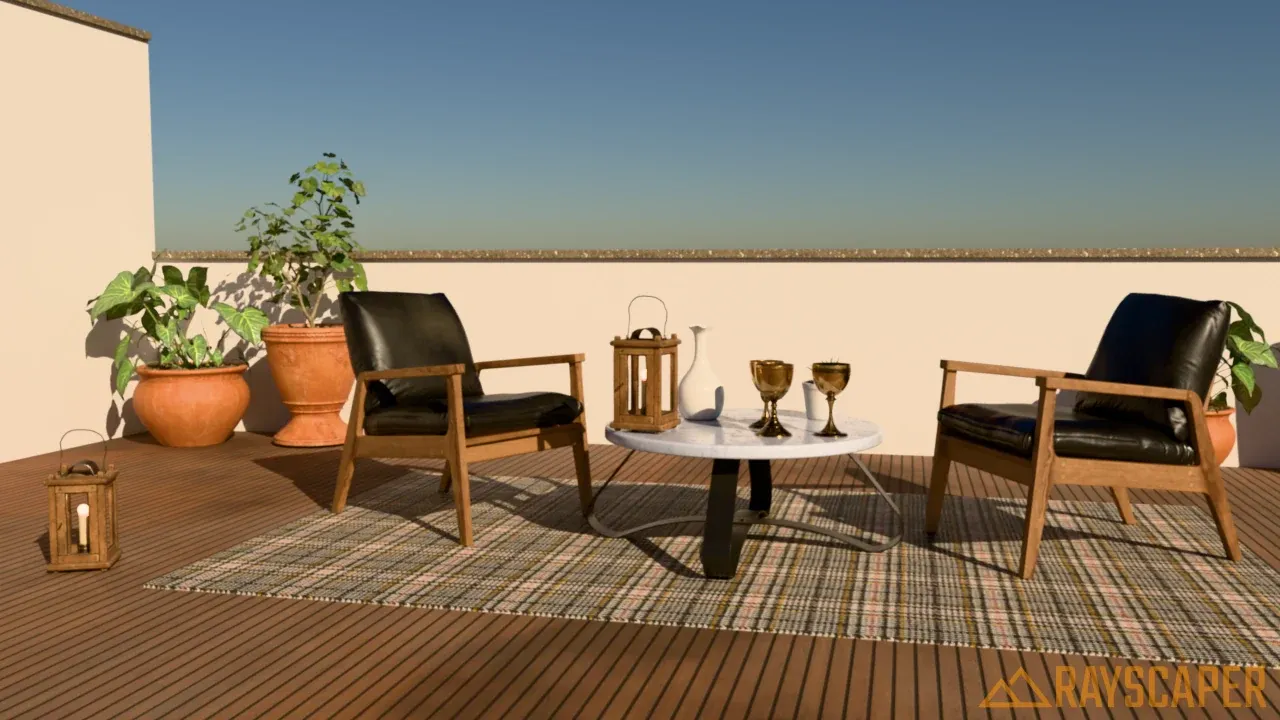
Nishita with the sun at 30°: realistic sunlight, a soft blue sky and a visible sun.
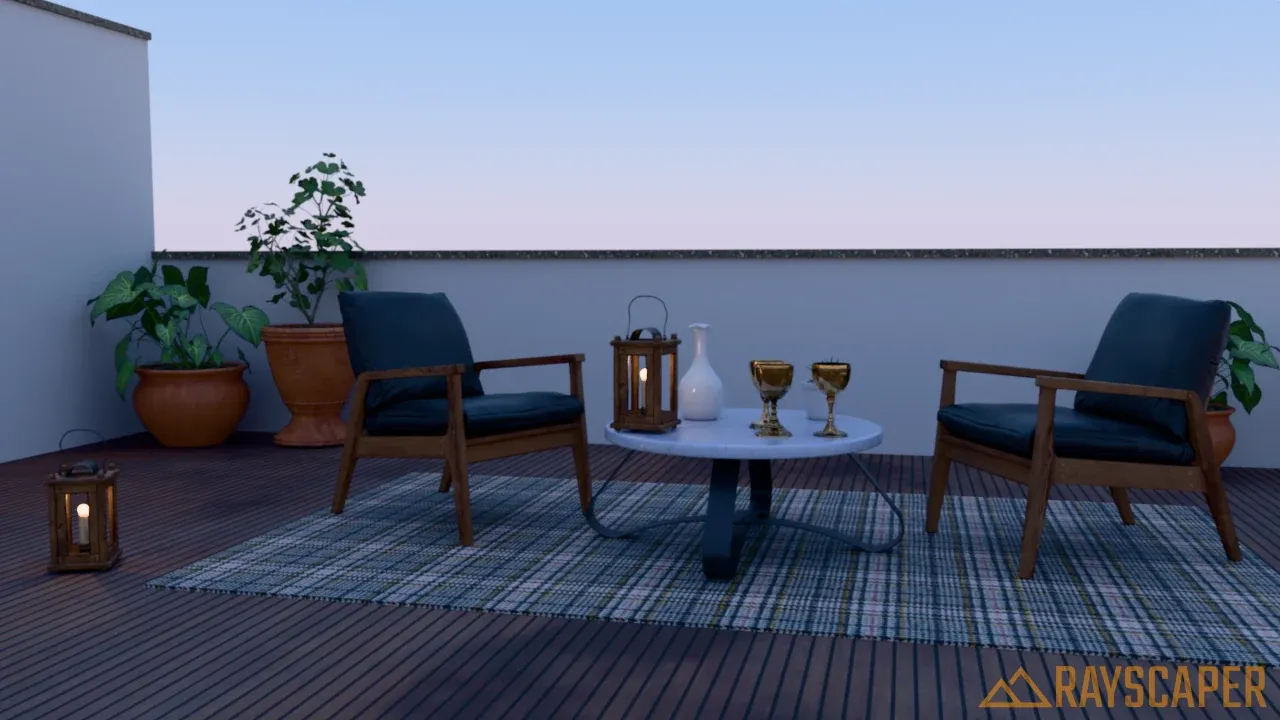
Hosek/Wilkie at Power 3: soft light from a clear sky, without a sun.
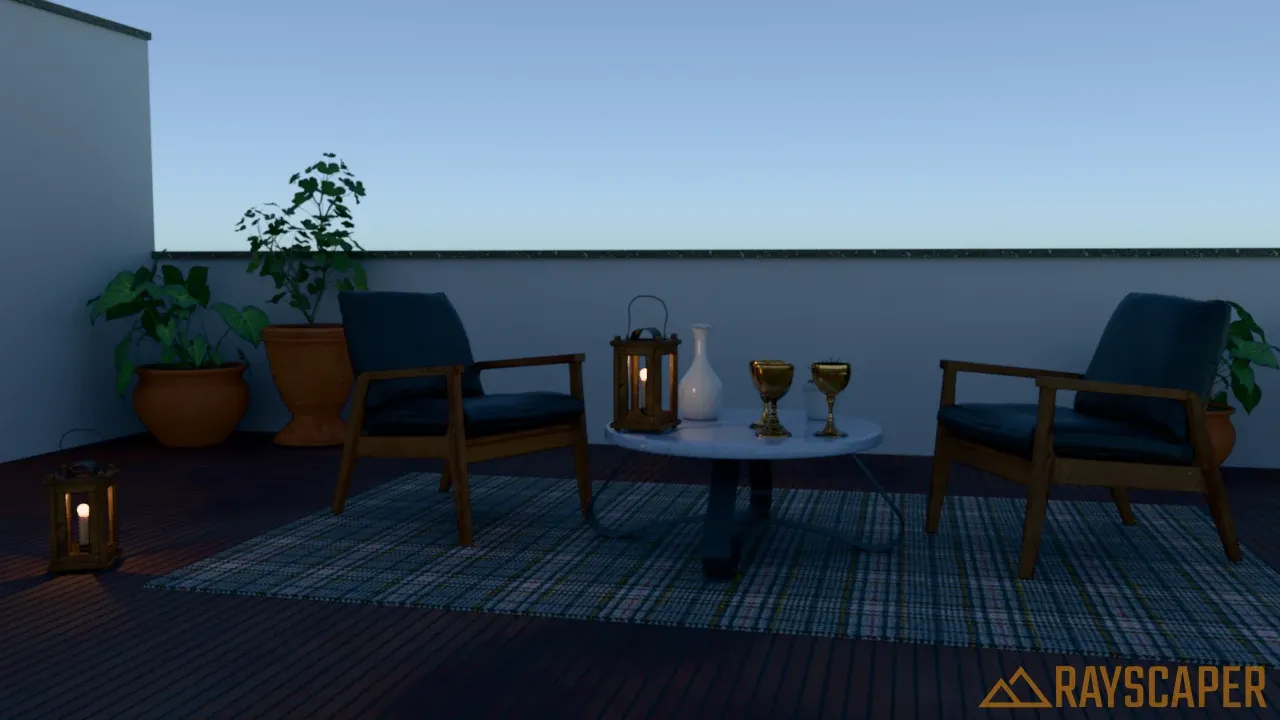
Preetham: a simple, bright sky, also without a sun.
Best for: exteriors and architectural renders where you control the sun, sun studies, and golden hour or dusk shots.
Choose the model with Sky Model. Each model is explained below.
Sky Models
Section titled “Sky Models”| Model | Sun | Best for |
|---|---|---|
| Nishita | Yes, with a visible sun disk and full control over its position | Realistic exteriors, any time of day, sunsets |
| Hosek/Wilkie | No | Soft daylight from a clear or hazy sky |
| Preetham | No | Quick previews and stylized renders |
Nishita
Section titled “Nishita”The most realistic sky model. It simulates how sunlight scatters in Earth’s atmosphere: on air molecules, which make the sky blue, on dust, which makes it hazy, and in the ozone layer. It renders a visible sun and lets you set its height and direction, so you get a matching sky for every time of day.
Sun Elevation sets the time of day. The same sky turns from a deep blue noon sky into a warm sunset and then into dusk:
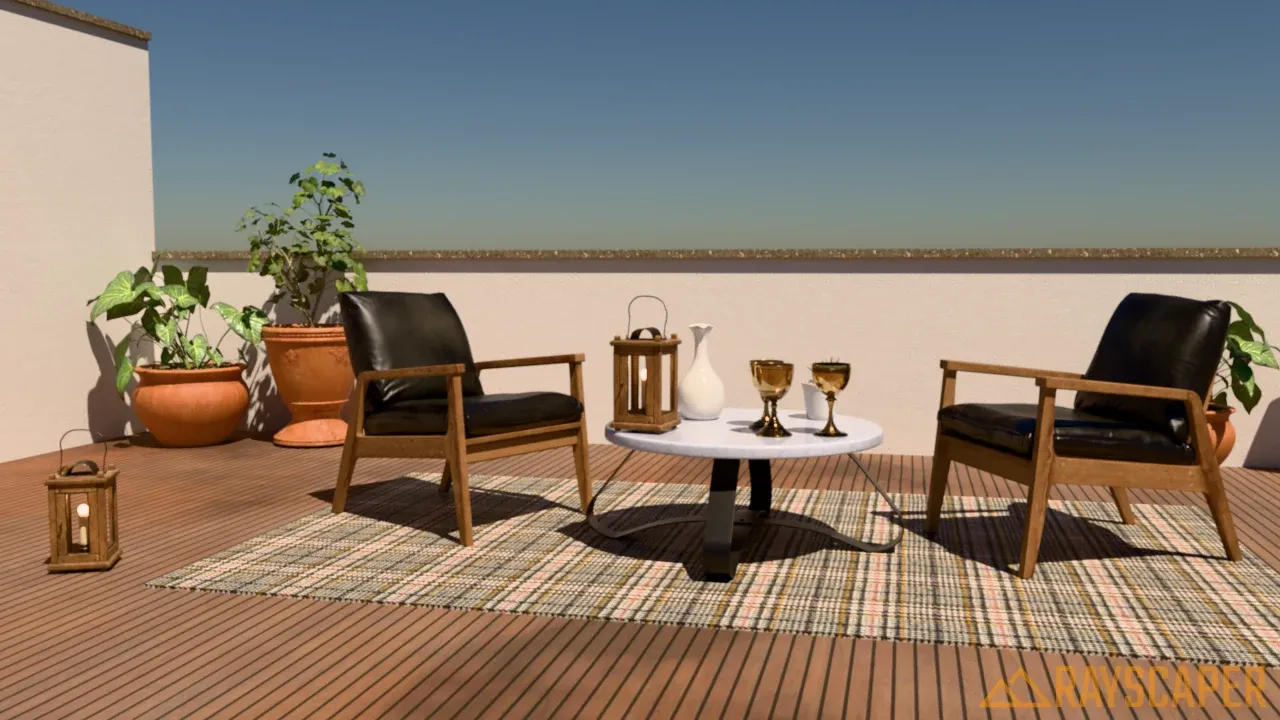
Sun Elevation 60°: bright, neutral light and short shadows.
Sun Elevation 30°: slightly warmer light and longer shadows.
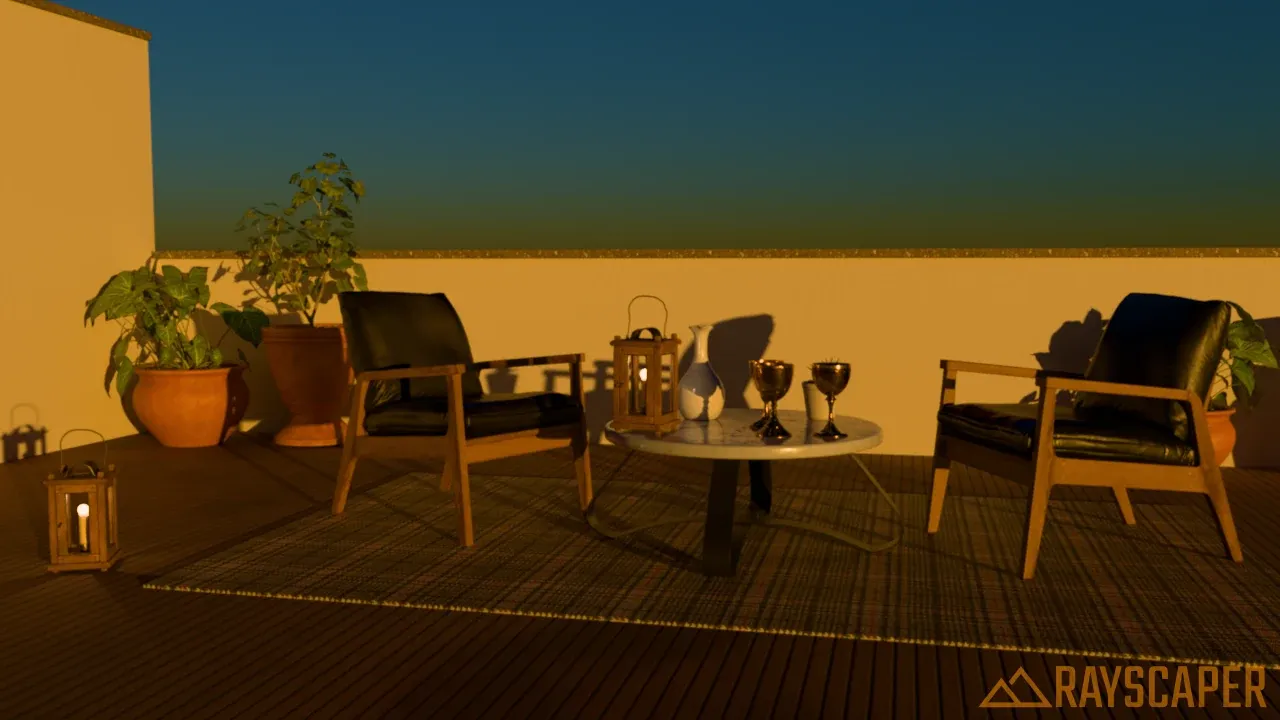
Sun Elevation 4°: orange light skimming across the terrace.
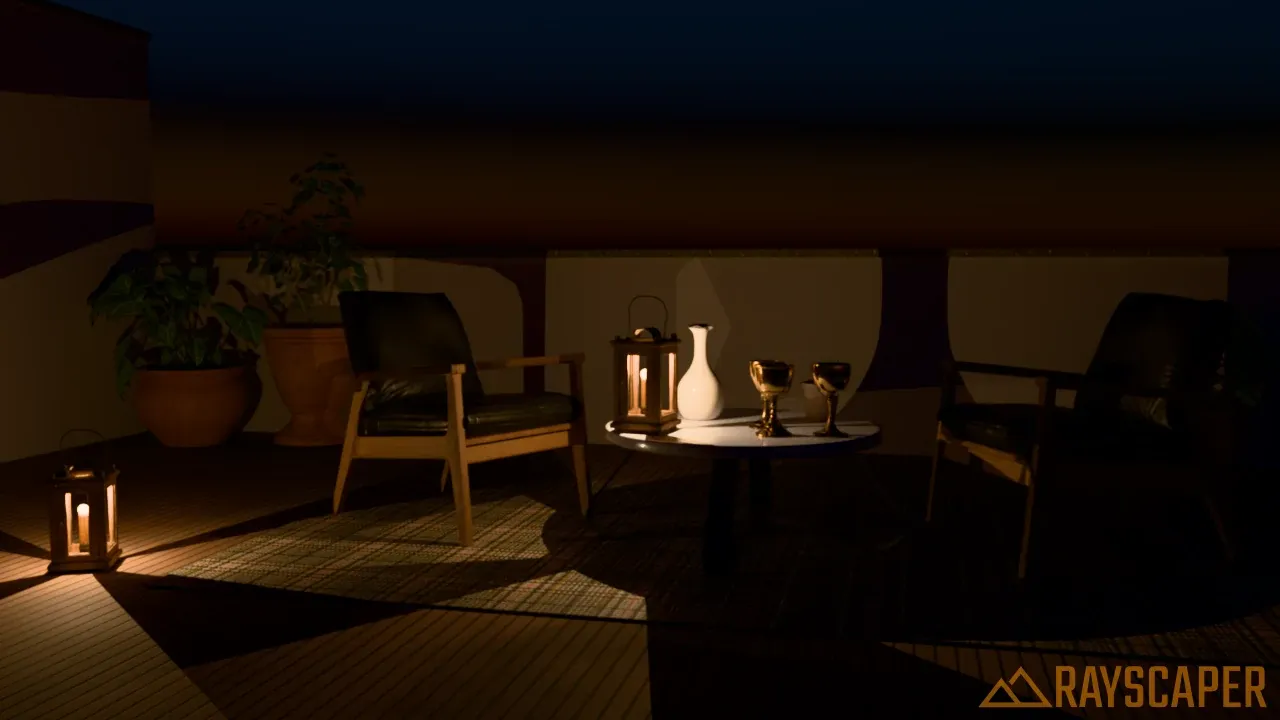
Sun Elevation -0.5°: the sun has just set, the sky glows faintly and the lanterns take over.
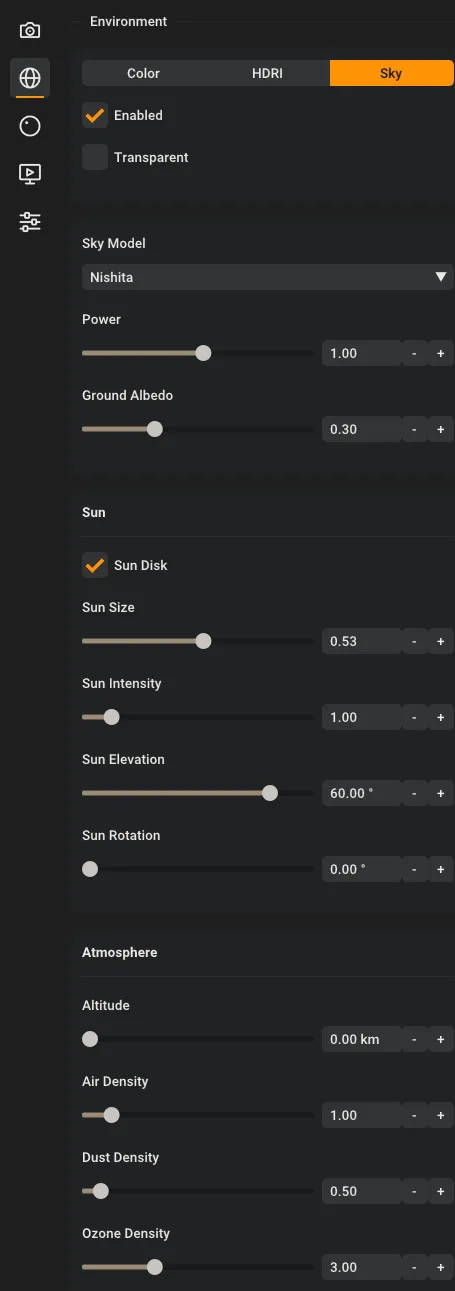
The Nishita settings are grouped into the sky, the sun and the atmosphere.
Nishita Settings
Section titled “Nishita Settings”| Setting | Default | Description |
|---|---|---|
| Power | 1.0 | Brightness of the sky and the sun together, from 0.01 to 100 on a logarithmic scale. |
| Ground | On | Shows a ground below the horizon instead of black. See Ground. |
| Ground Albedo | 0.3 | How much light the ground reflects, from 0 to 1: about 0.1 for dark soil or asphalt, 0.3 for grass or concrete, 0.8 for fresh snow. Only shown while Ground is on. |
| Sun Disk | On | Shows the sun in the sky. Turn it off to keep the sky light without a visible sun. |
| Sun Size | 0.53° | Angular diameter of the sun, from 0.01° to 1°. The real sun is about 0.53°. A larger sun gives softer shadows. |
| Sun Intensity | 1.0 | Brightness of the sun disk, from 0 to 10, without changing the sky. |
| Sun Elevation | 60° | Height of the sun above the horizon, from -90° to 90°. 0° is sunrise or sunset, 90° is straight overhead. Below 0° the sun has set. |
| Sun Rotation | 0° | Compass direction of the sun, from 0° to 360°. Turns the sun, and so the shadows, around your model. |
| Altitude | 0 km | Height of the viewer above sea level, from 0 to 60 km. Higher altitudes give a thinner atmosphere and a darker, deeper blue sky. |
| Air Density | 1.0 | Amount of air, from 0 to 10. Air scatters blue light, so this changes the color and brightness of the sky. |
| Dust Density | 0.5 | Amount of dust and haze, from 0 to 10. Higher values give hazier conditions and warmer sunlight. |
| Ozone Density | 3.0 | Amount of ozone, from 0 to 10. Mostly visible at sunset, where higher values add purple and pink tones. |
Sun Size and Sun Intensity only appear while Sun Disk is on.
Ground
Section titled “Ground”The atmosphere ends at the horizon, so below it a sky is black. Wherever your model doesn’t cover the view, for example in an aerial view or with a model without a ground surface, that black shows. With Ground on, Rayscaper fills everything below the horizon with a plain ground, lit by the same sun and sky as your model: light grey at midday, dimmer and bluer at sunset, dark at night. It also lights the scene from below, like a real ground does. A ground surface in your model covers it.
Skies made before Rayscaper had this setting keep their black below the horizon until you turn Ground on.
Dust Density changes how clear the air is. More dust scatters and absorbs more sunlight:
The default: a clear blue sky and crisp shadows.
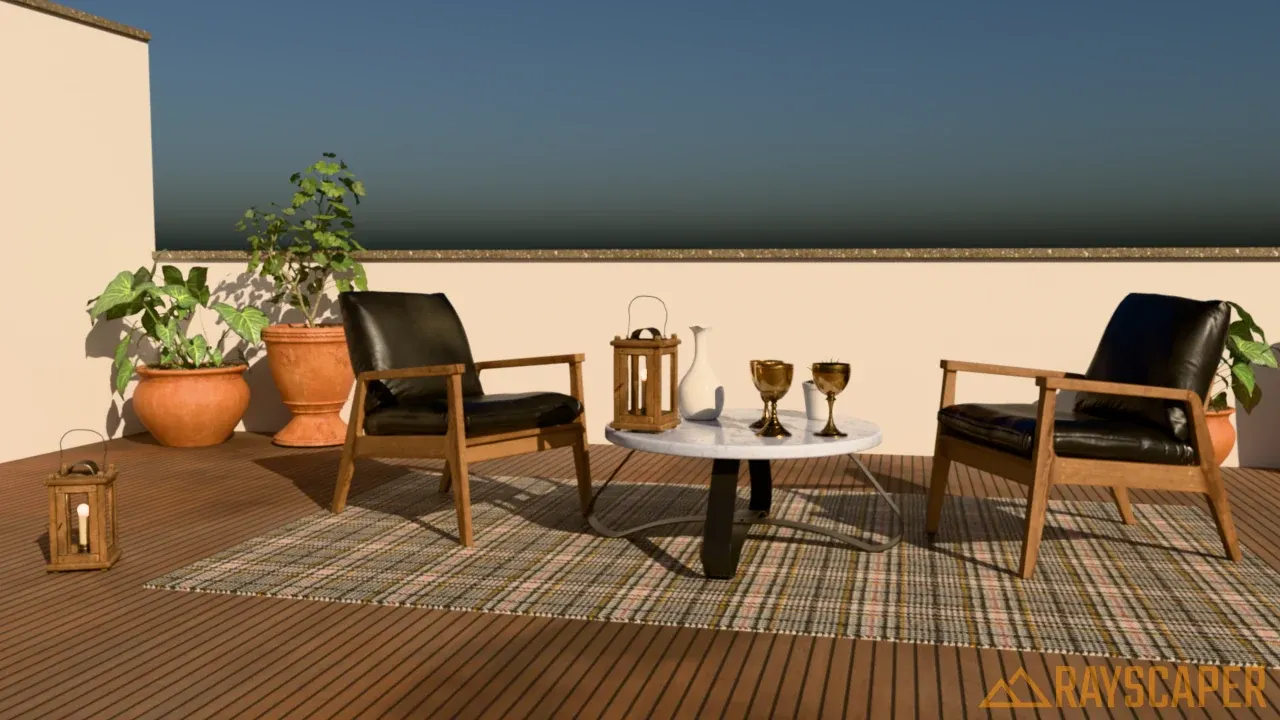
More dust: a darker, greyer sky and warmer sunlight.
Syncing with SketchUp Sun
Section titled “Syncing with SketchUp Sun”Rayscaper’s Nishita sky can follow the sun position from SketchUp’s Shadows panel. This is useful when:
- you already set up the shadows in SketchUp for a specific date and time,
- you want to compare sun positions quickly with SketchUp’s shadow sliders,
- the render has to match a SketchUp shadow study.
It’s on for a new model. To turn it on or off, choose Extensions > Rayscaper > Use SketchUp Sun for Nishita Sky. While it’s on, the Nishita sun follows SketchUp’s shadow settings.
Changing the time in SketchUp’s Shadows panel moves the Nishita sun in real time.
While tracking is on, the Environment section shows ✓ Tracking SketchUp Sun, and Sun Elevation and Sun Rotation are disabled because SketchUp controls them.
Hosek/Wilkie
Section titled “Hosek/Wilkie”A sky model that is more accurate than Preetham, especially near the horizon. It has no sun: it gives the soft light of a clear or hazy sky, with the brightest part straight overhead.
The default turbidity, with Power raised to 3: a clear blue sky.
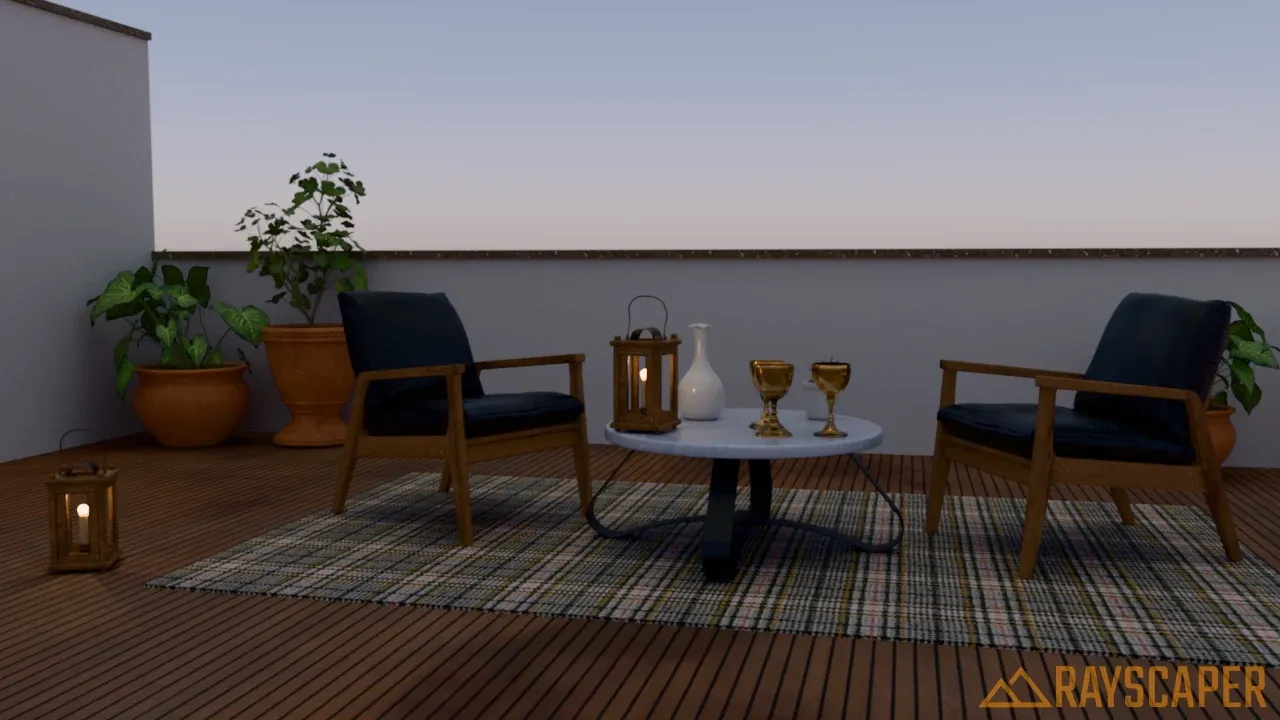
A high turbidity: a paler, hazier sky.
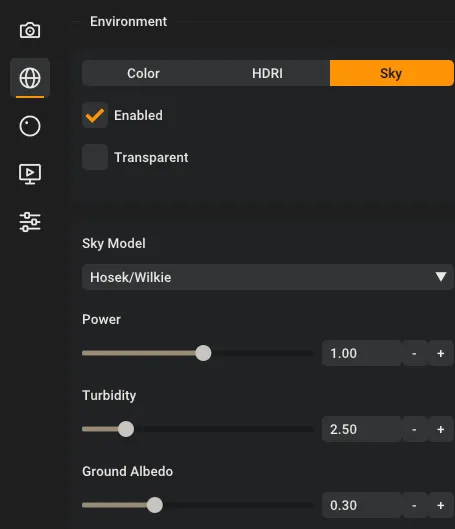
| Setting | Default | Description |
|---|---|---|
| Power | 1.0 | Brightness of the sky, from 0.01 to 100 on a logarithmic scale. Without a sun, the default is rather dark, raise it to 2 or 3 for daylight. |
| Turbidity | 2.5 | Haze in the air, from 1 (crystal clear) to 10 (very hazy). Low values give a deep blue sky, high values a pale, milky one. |
| Ground Albedo | 0.3 | How much light the ground reflects, from 0 to 1. A bright ground, like snow, brightens the sky near the horizon. |
Preetham
Section titled “Preetham”The oldest and simplest sky model. It gives a bright, plausible sky from just a turbidity value, but with less nuance than the other models, and without a sun.
The Preetham sky with the default settings.
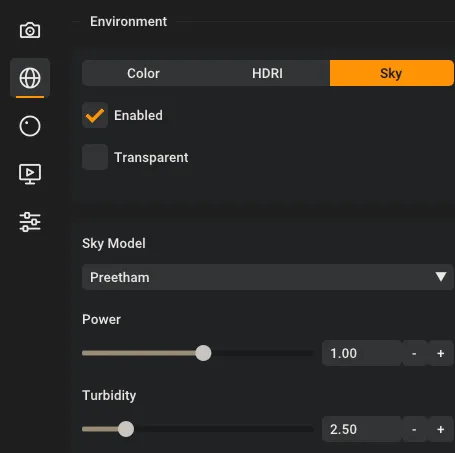
| Setting | Default | Description |
|---|---|---|
| Power | 1.0 | Brightness of the sky, from 0.01 to 100 on a logarithmic scale. |
| Turbidity | 2.5 | Haze in the air, from 1 (crystal clear) to 10 (very hazy). |
Practical Tips
Section titled “Practical Tips”Quick Recipes
Section titled “Quick Recipes”Product shot on white
- Choose Color and keep the color white.
- Set Power to 1.0 to 1.5 for bright, even light.
- Turn on Transparent if you want to place the product on another background later.
Sunny exterior
- Choose HDRI and pick a clear or partly cloudy sky from the Asset Manager, or choose Sky with Nishita.
- Turn Rotation (HDRI) or Sun Rotation (Nishita) until the sun lights the side of the building the camera sees.
- For Nishita, set Sun Elevation for the time of day: around 60° for midday, below 15° for golden hour.
Interior
- Choose an HDRI that fits the view through your windows. An overcast HDRI gives soft, even daylight.
- Rooms get most of their light through windows, so raise Power until the room is bright enough, or add lights.
- When you add lights, lower Power again so the environment doesn’t wash them out.
Night scene
- Turn off Enabled, or use a Nishita sky with Sun Elevation just below 0° for a dusk glow.
- Light the scene with lights and emissive materials.
Credits
Section titled “Credits”The example scene on this page is built from CC0 models, textures and HDRIs from Poly Haven.