
Render Methods
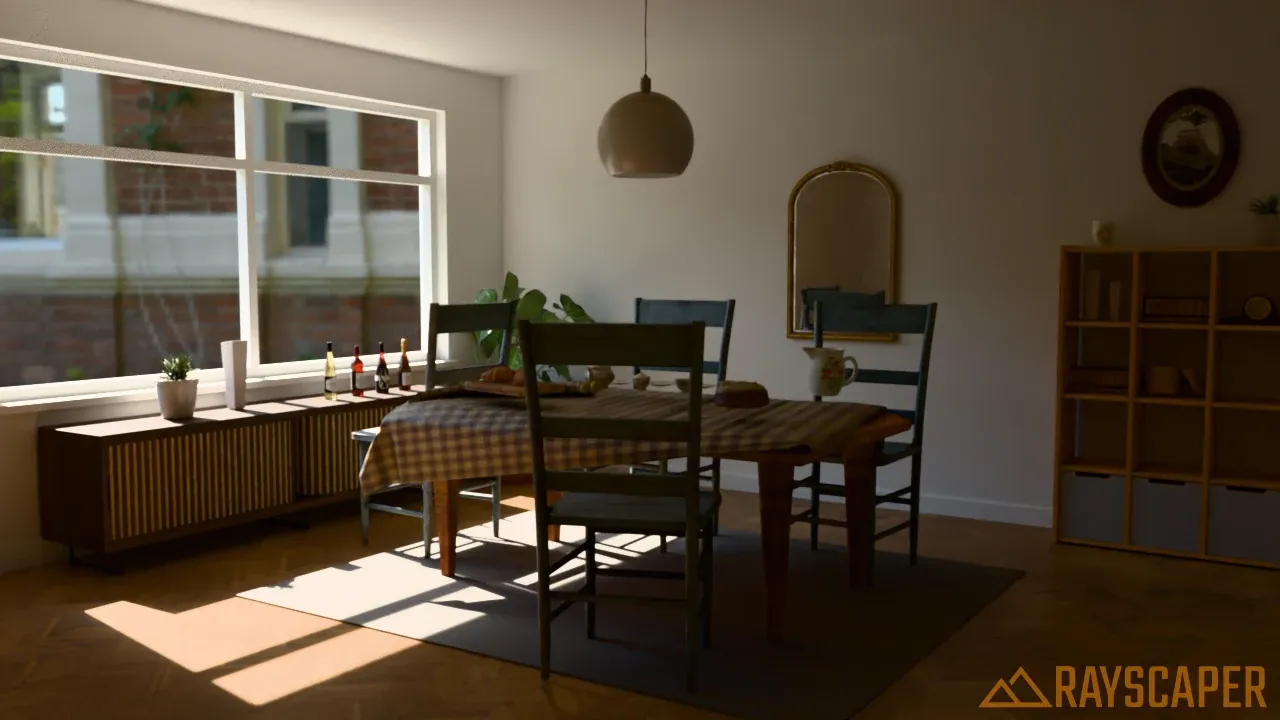
A breakfast room lit only by daylight through the window, rendered with Global Illumination. Apart from the patch of sunlight, every surface is lit by light that bounced off the floor, the walls and the ceiling.
The render method decides how Rayscaper computes the image. Global Illumination gives photorealistic results, Approximate Global Illumination trades some realism for speed, and the diagnostic methods show a single property of the scene, such as its colors or surface directions, for checking a model or for compositing.
Choose the method with the Render Method dropdown in the Render section of the Scene Editor. Its settings appear below it.
| Render Method | Use it for |
|---|---|
| Global Illumination (GI) | Final, photorealistic renders. The default. |
| Approx. Global Illumination | Faster previews, without bounced light from matte surfaces. |
| Albedo, Ambient Occlusion (AO), Geometric Normals, Shading Normals, Texture Coordinates, World Coordinates | The diagnostic methods: one property of the scene each. |
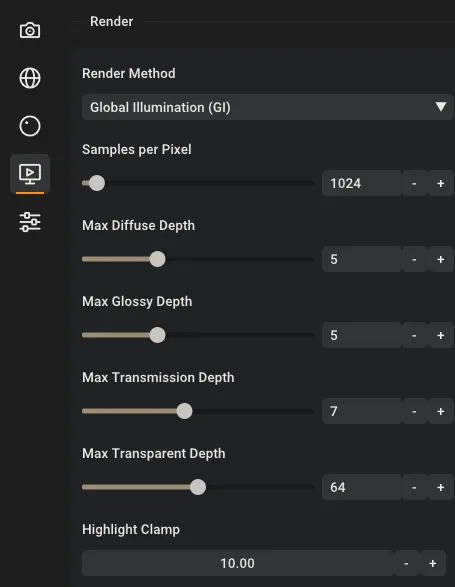
The Render section of the Scene Editor.
Quality
Section titled “Quality”With Global Illumination, the Quality dropdown sets the samples per pixel, the bounces and the highlight clamp in one go:
| Quality | Samples | Diffuse / Glossy / Transmission Depth | Highlight Clamp | Use it for |
|---|---|---|---|---|
| Draft | 64 | 2 / 2 / 4 | 5 | Checking the lighting and the composition. |
| Preview | 256 | 4 / 4 / 6 | 10 | A closer look before the final render. |
| Final | 1024 | 5 / 5 / 7 | 10 | Most final renders. The default. |
| High | 4096 | 8 / 8 / 12 | 20 | Interiors with a lot of bounced light, glass and mirrors that stay grainy or dark. |
Changing one of these settings yourself shows Custom. The Max Transparent Depth isn’t part of the presets.
Samples per Pixel
Section titled “Samples per Pixel”Rayscaper renders by tracing many random light paths through every pixel. Each path is one sample. A few samples give a grainy image, and every extra sample averages the grain away. Samples per Pixel sets when the render is finished, from 1 to 32,000. The default is 1024.
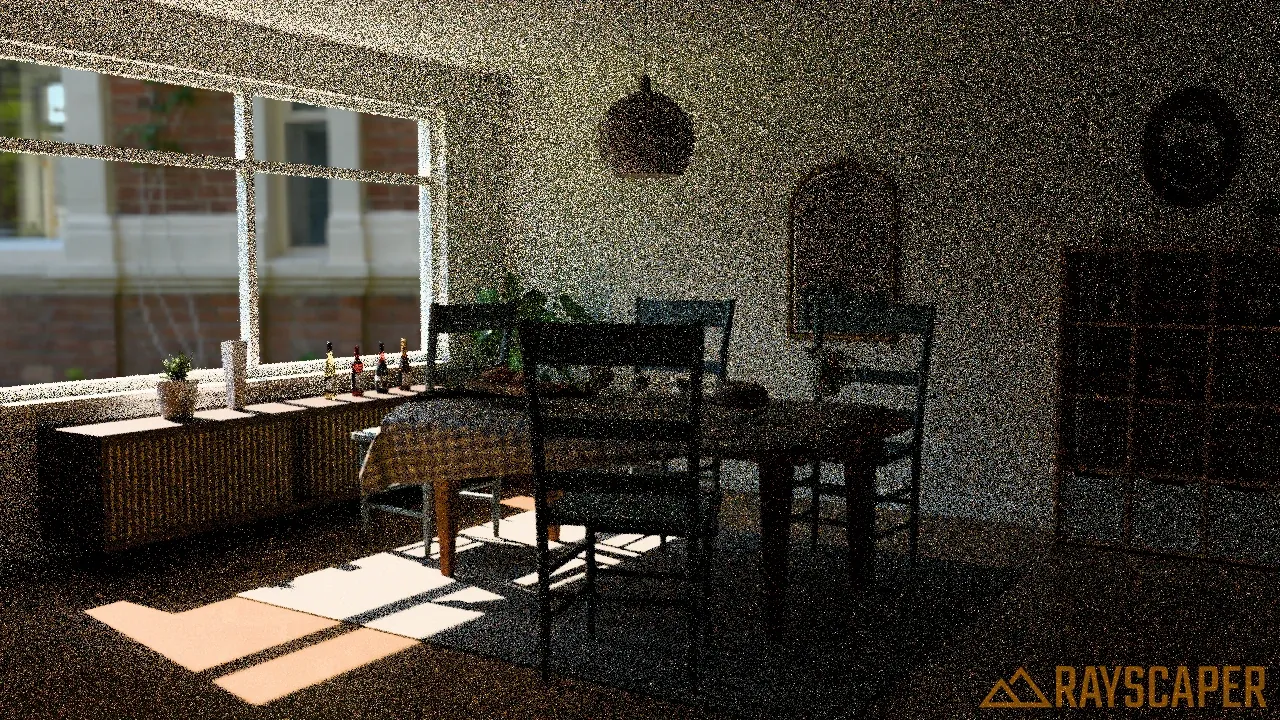
16 samples: the shapes and the light are there, the grain hides the details.
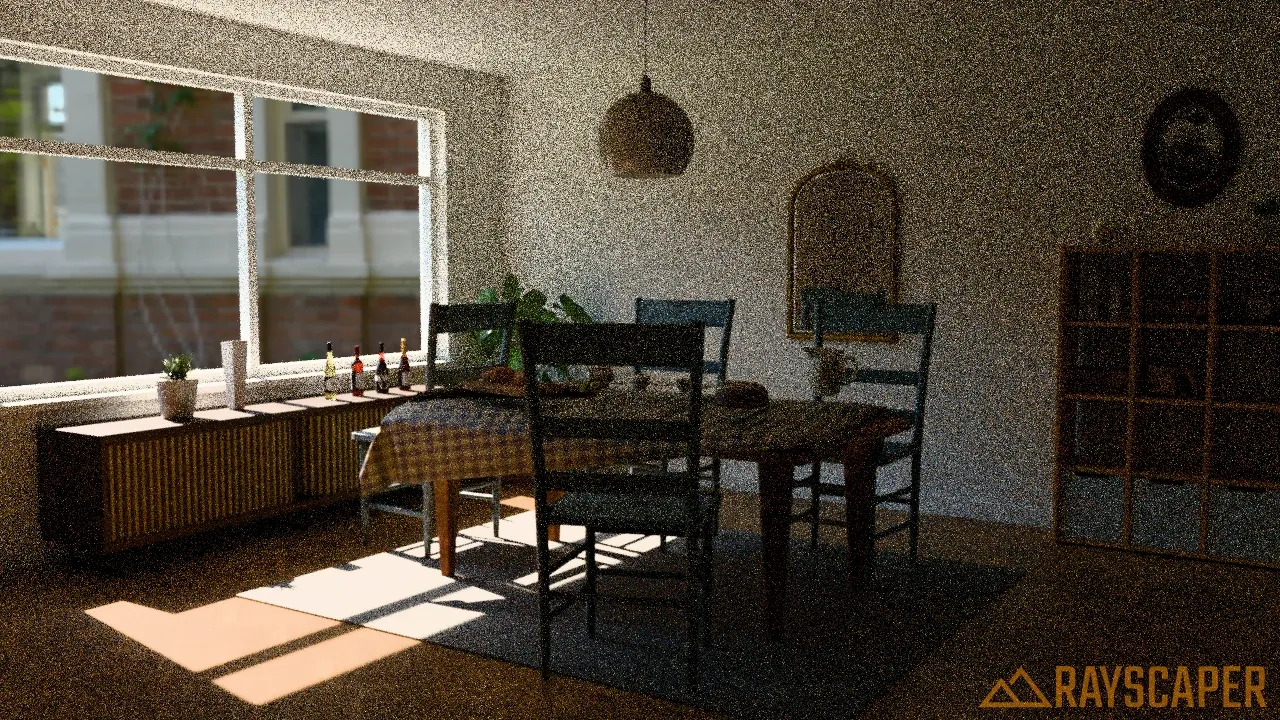
64 samples: good enough to judge the lighting and the composition.
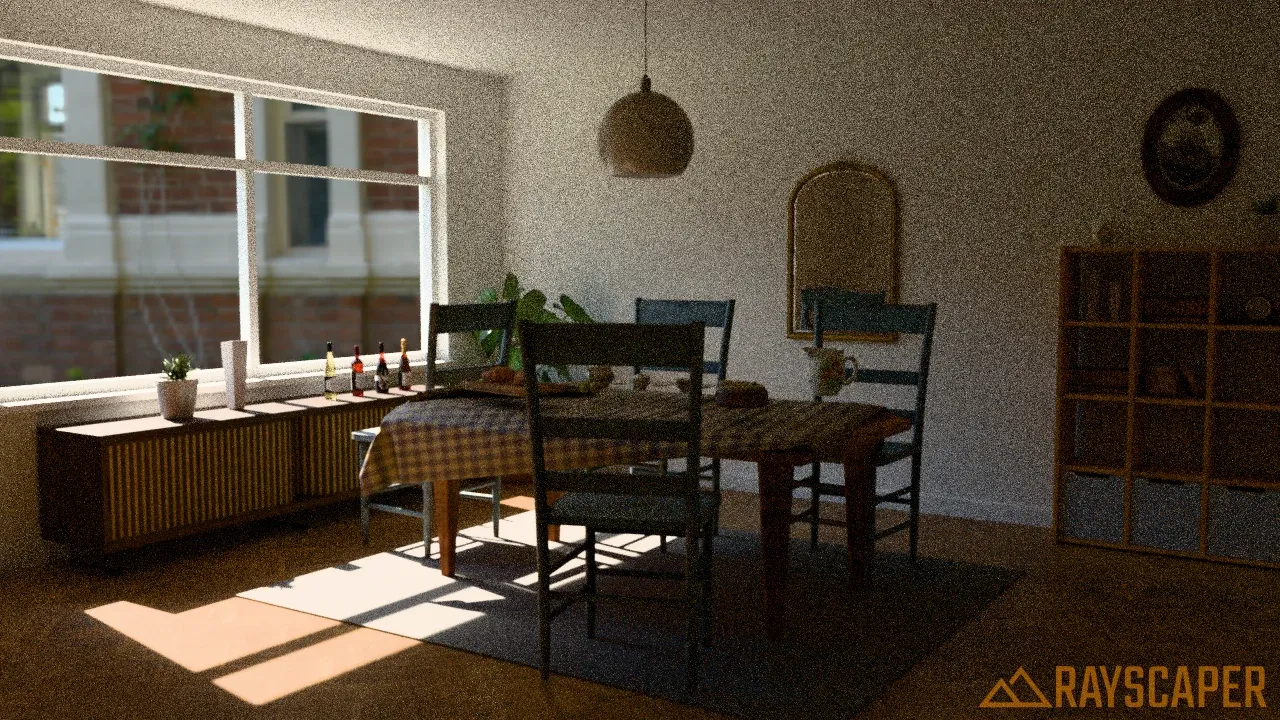
256 samples: only fine grain is left, in the darker areas.
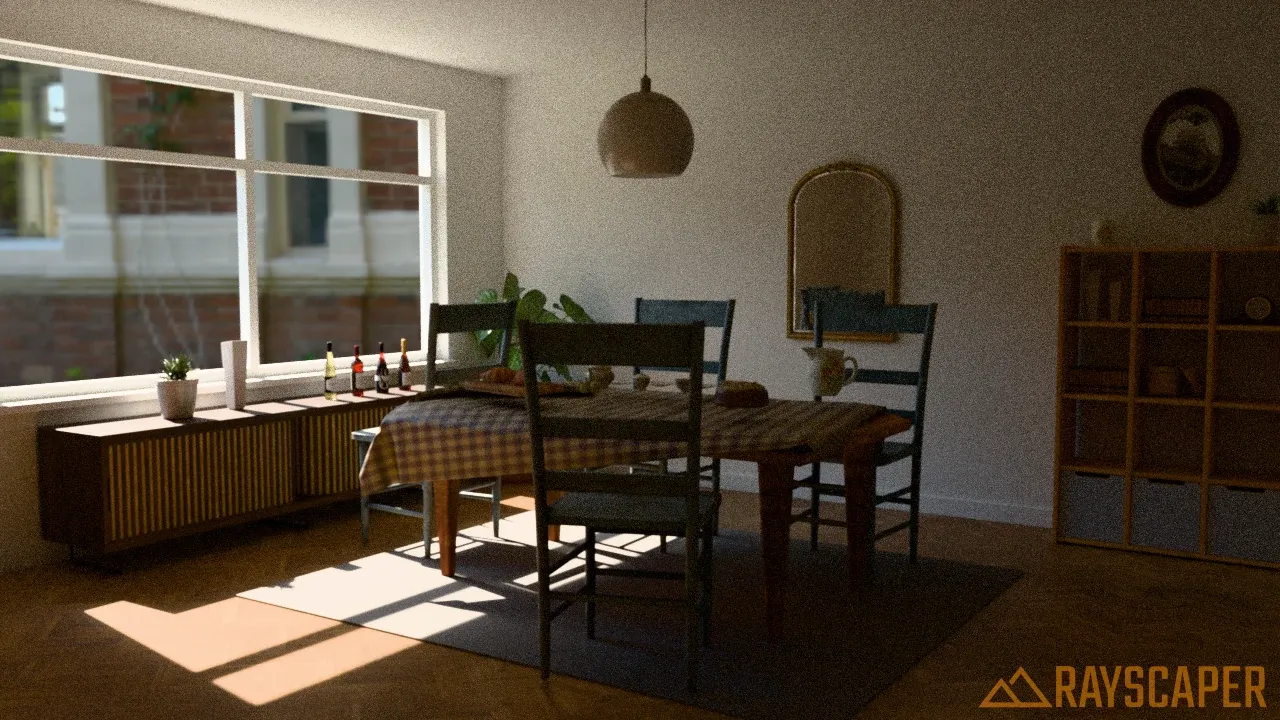
1024 samples: almost clean.
These renders have the AI denoiser turned off, to show the grain itself.
Rooms lit by daylight through a window, like this one, need more samples than outdoor scenes: most of their light arrives after several bounces, and every bounce adds randomness. Brightly lit exteriors are often clean after a few hundred samples.
Photorealistic Methods
Section titled “Photorealistic Methods”Global Illumination
Section titled “Global Illumination”Global Illumination (GI) simulates how light really behaves: it bounces off walls, floors and furniture, picks up their color and lights the rest of the scene. It’s the most realistic method and the one to use for final renders.
The Global Illumination settings.
| Setting | Default | Description |
|---|---|---|
| Max Diffuse Depth | 5 | How many times light can bounce off matte surfaces, 0 to 16. |
| Max Glossy Depth | 5 | How many times light can bounce off shiny surfaces, such as mirrors and polished floors, 0 to 16. |
| Max Transmission Depth | 7 | How many times light can pass through glass, water and other transparent materials, 0 to 16. |
| Max Transparent Depth | 64 | How many see-through surfaces a ray can pass straight through, 0 to 128. See below. |
| Highlight Clamp | 10 | Limits the brightness of single light paths to prevent fireflies. 0 turns it off. |
The defaults suit most scenes. More bounces capture more light, but take longer to render. Too few bounces make the render darker and can turn mirrors and glass black, as the examples below show.
Max Diffuse Depth
Section titled “Max Diffuse Depth”In a room lit through a window, most surfaces only get light that bounced off something else first. Each bounce lets the light reach deeper into the room:
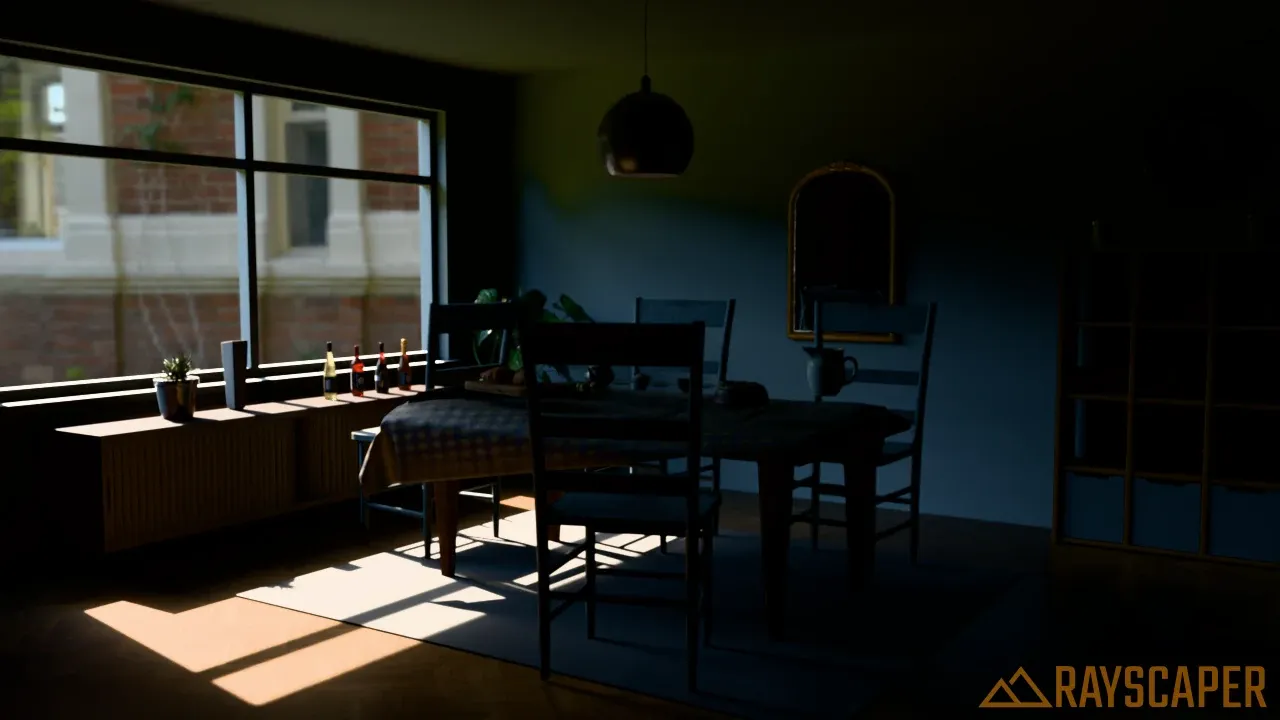
Direct light only: the patch of sunlight and the view outside, the room itself is almost black.
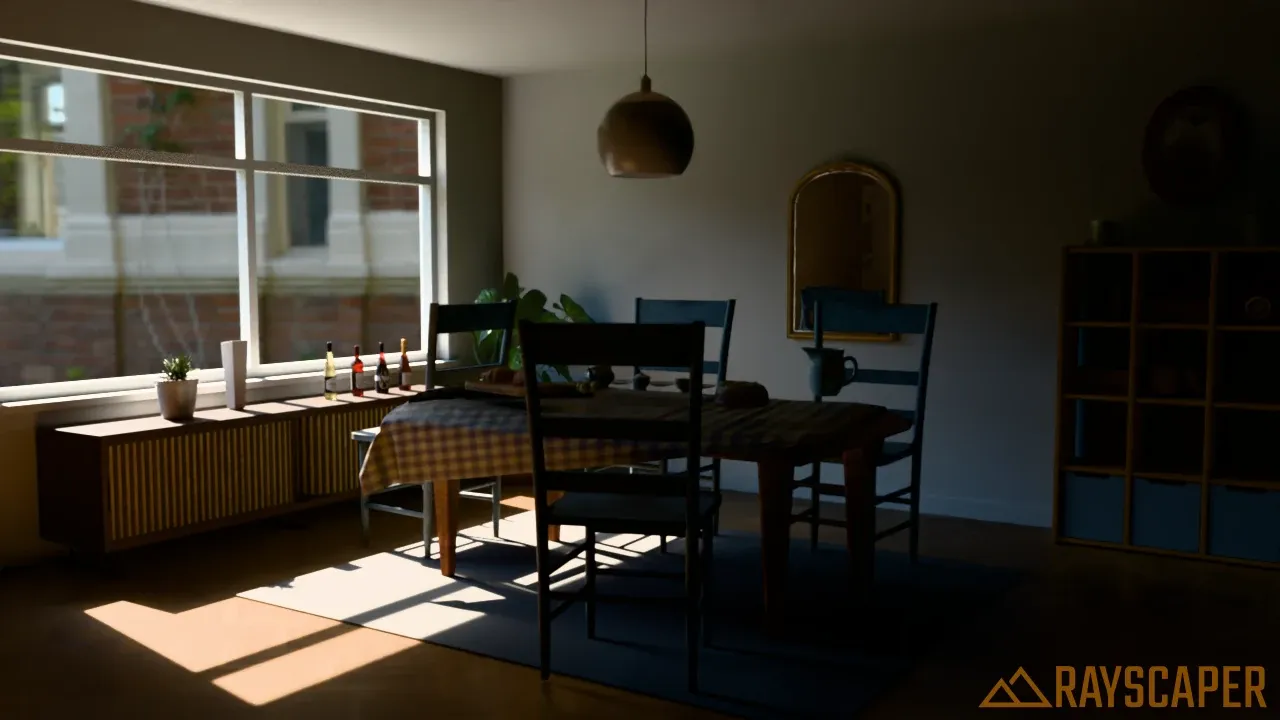
One bounce: the light from the floor and the window reaches the walls and the furniture.
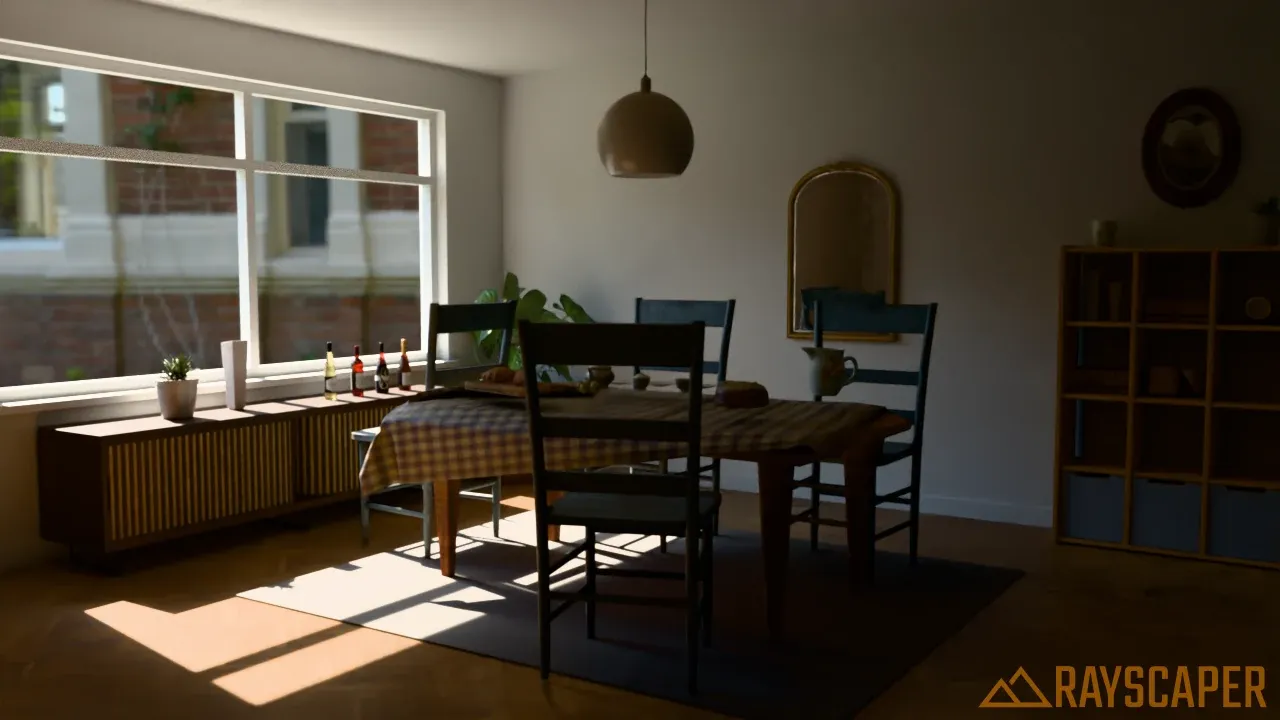
Two bounces: the corners and the ceiling fill in.
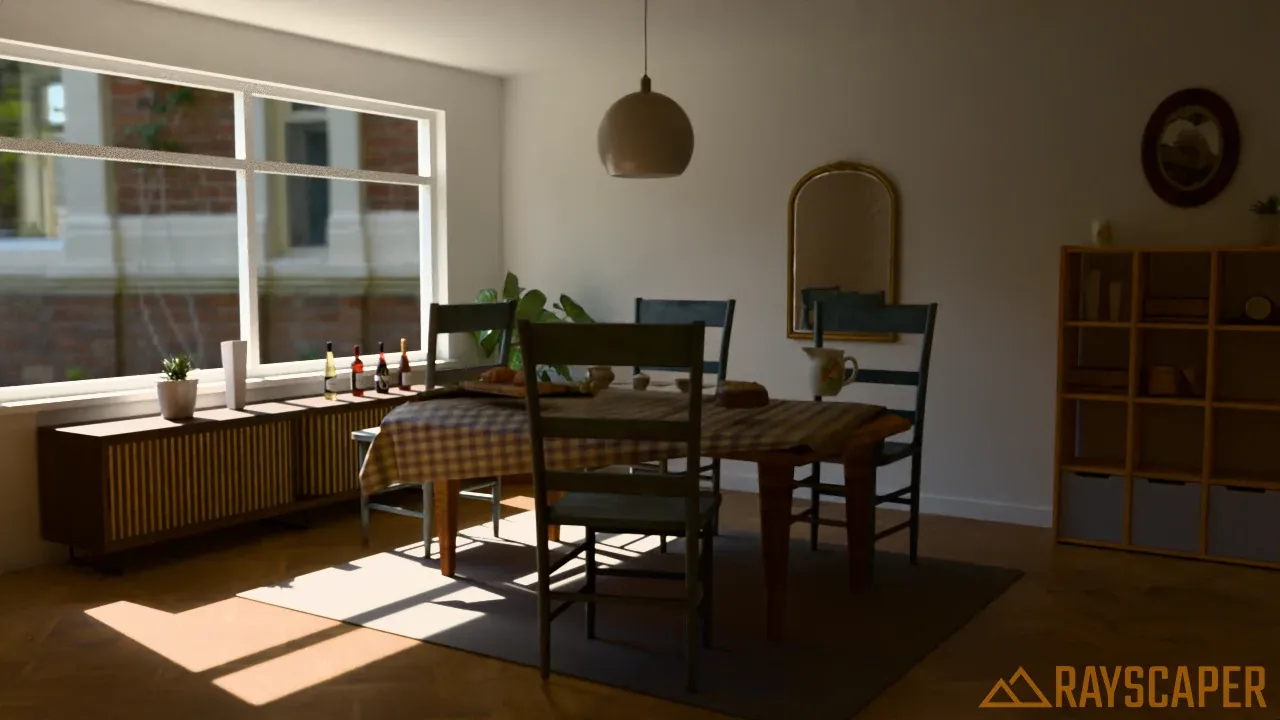
Five bounces, the default: the room is fully lit. More bounces hardly change this scene.
Max Glossy Depth
Section titled “Max Glossy Depth”Reflections are glossy bounces. Without them, the mirror on the back wall has nothing to show:
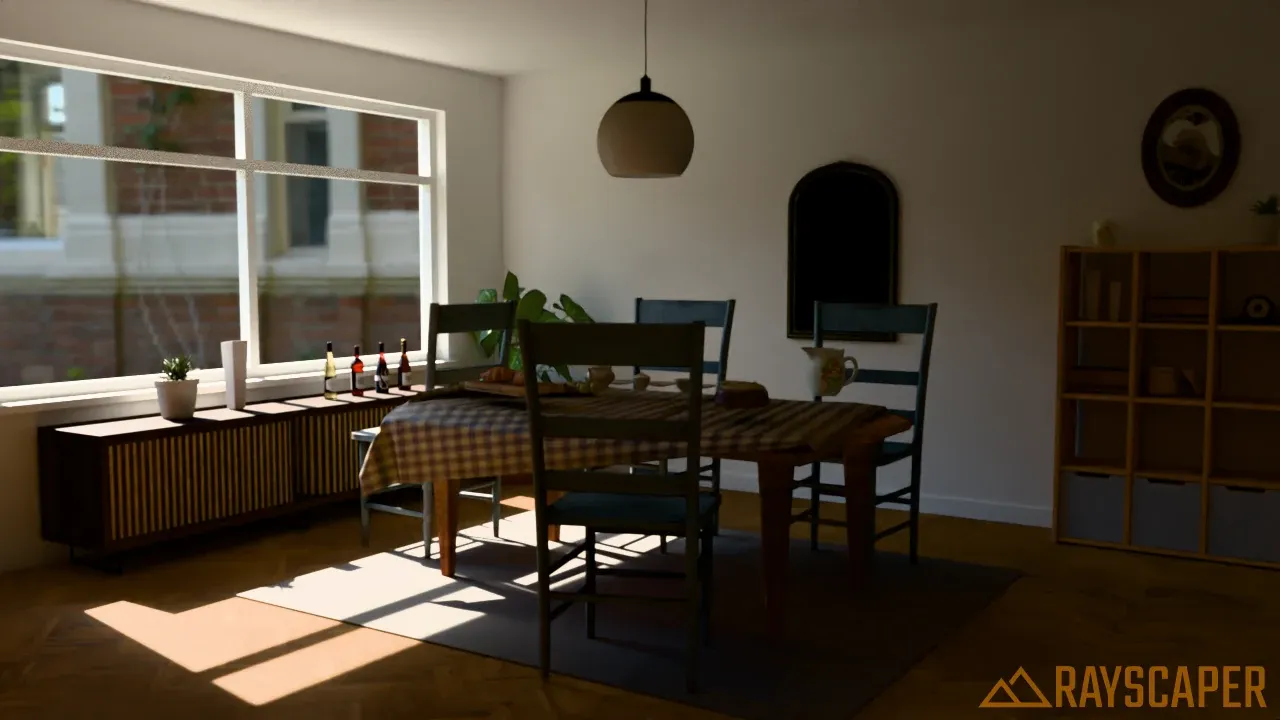
No glossy bounces: the mirror is black and the floor loses its sheen.
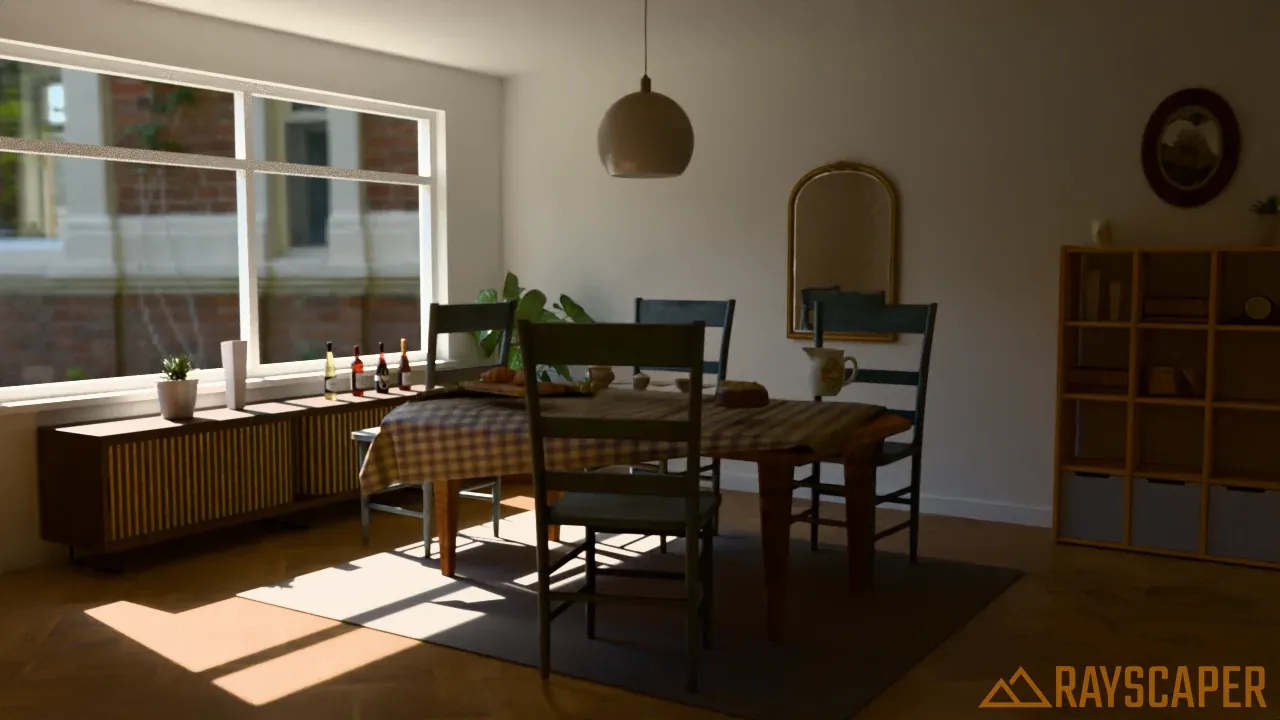
Five bounces, the default: the mirror reflects the chairs and the room.
Max Transmission Depth
Section titled “Max Transmission Depth”Every time light enters or leaves glass counts as a transmission bounce. A bottle has a front and a back wall, and the wine inside adds two more surfaces, so it takes several bounces to see through it:
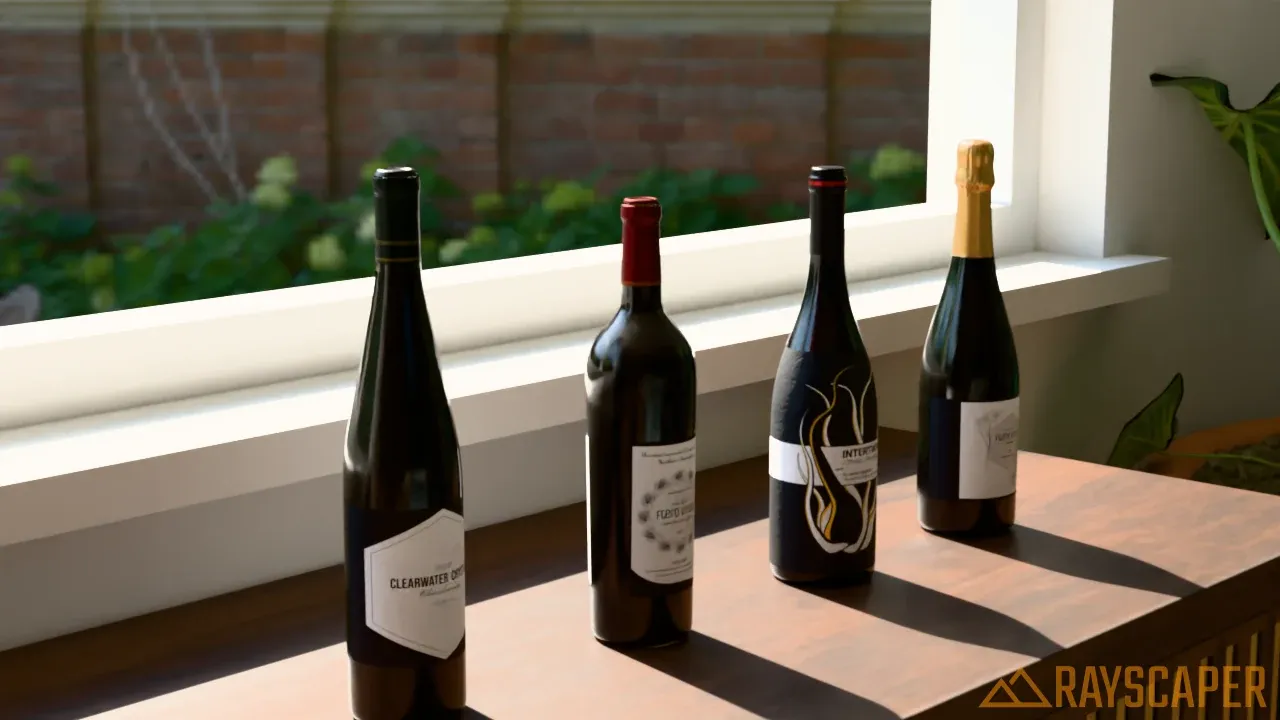
One bounce: the light can’t make it through, the bottles are black.
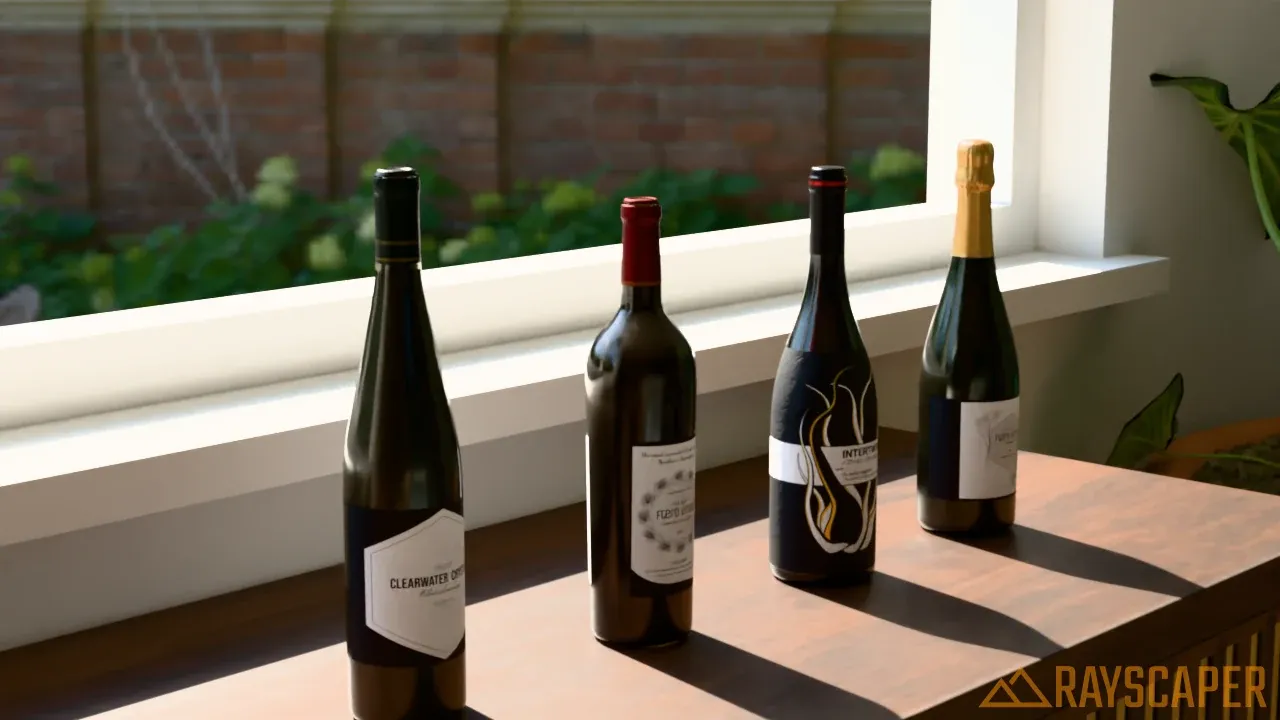
Two bounces: still too few for the glass and the wine.
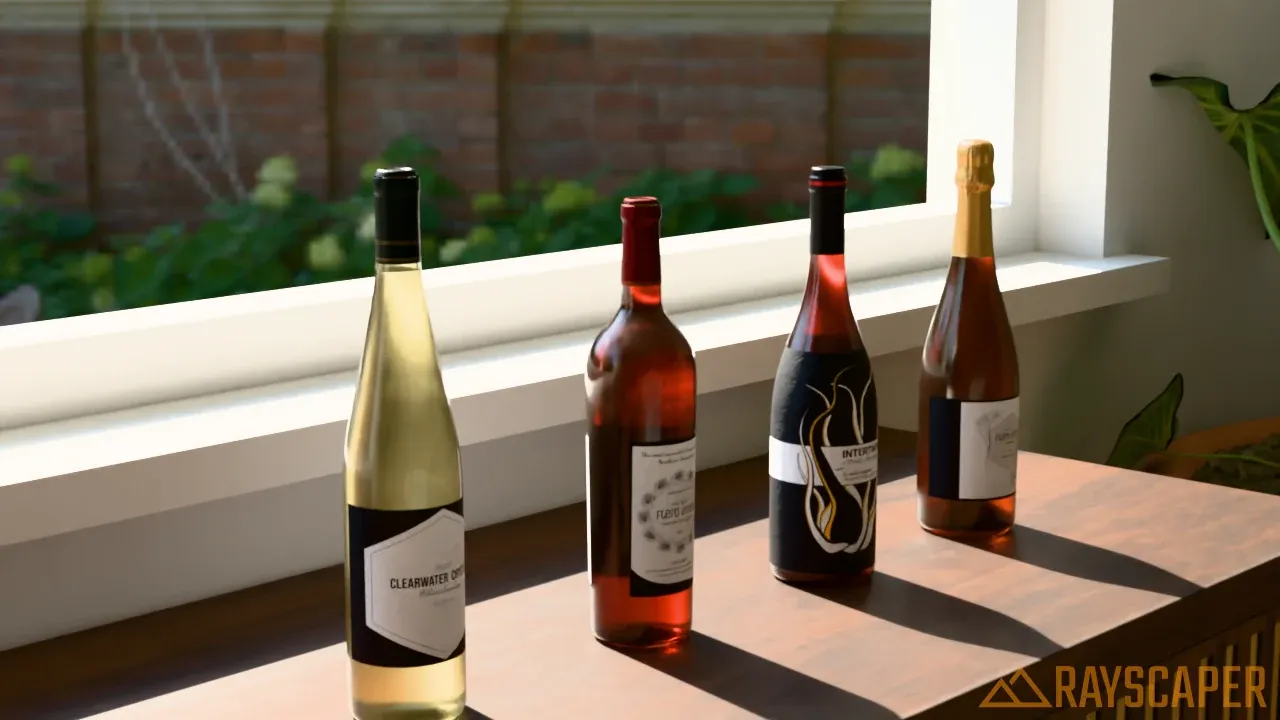
Seven bounces, the default: the sunlight shines through the bottles and the wine glows.
Max Transparent Depth
Section titled “Max Transparent Depth”Max Transparent Depth is separate from Max Transmission Depth:
- Transmission counts light that refracts, that bends, through glass, water and other transmissive materials.
- Transparent counts surfaces that are see-through because of their opacity: leaves with an opacity cutout, see-through fences and screens, and SketchUp materials with lowered opacity, such as simple window panes.
When a ray passes through more of these surfaces than the limit, it stops and that spot renders black. Both render methods share this setting, so changing it for one also changes it for the other.
Highlight Clamp
Section titled “Highlight Clamp”Sometimes a single light path finds a rare route to a very bright light, for example sunlight reflected off a polished surface, and leaves a lone bright pixel: a firefly. Highlight Clamp limits how bright a single path can be, which removes them. Lower values remove more fireflies, but can also dim real highlights. The default of 10 works for most scenes, and 0 turns the clamp off.
Approximate Global Illumination
Section titled “Approximate Global Illumination”A faster alternative to Global Illumination for previews and slower computers. It computes direct light, one bounce of reflections and light through glass, but no bounced light from matte surfaces. Instead, Fake GI can add an even, ambient light to fill in the shadows.
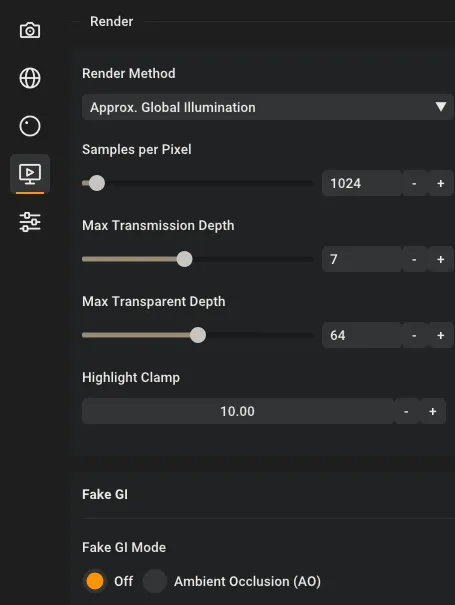
The Approximate Global Illumination settings.
| Setting | Default | Description |
|---|---|---|
| Max Transmission Depth | 7 | As for Global Illumination. |
| Max Transparent Depth | 64 | As for Global Illumination, the two methods share this setting. |
| Highlight Clamp | 10 | As for Global Illumination. |
| Fake GI Mode | Off | Off, or Ambient Occlusion (AO) to fake the bounced light. |
Fake GI
Section titled “Fake GI”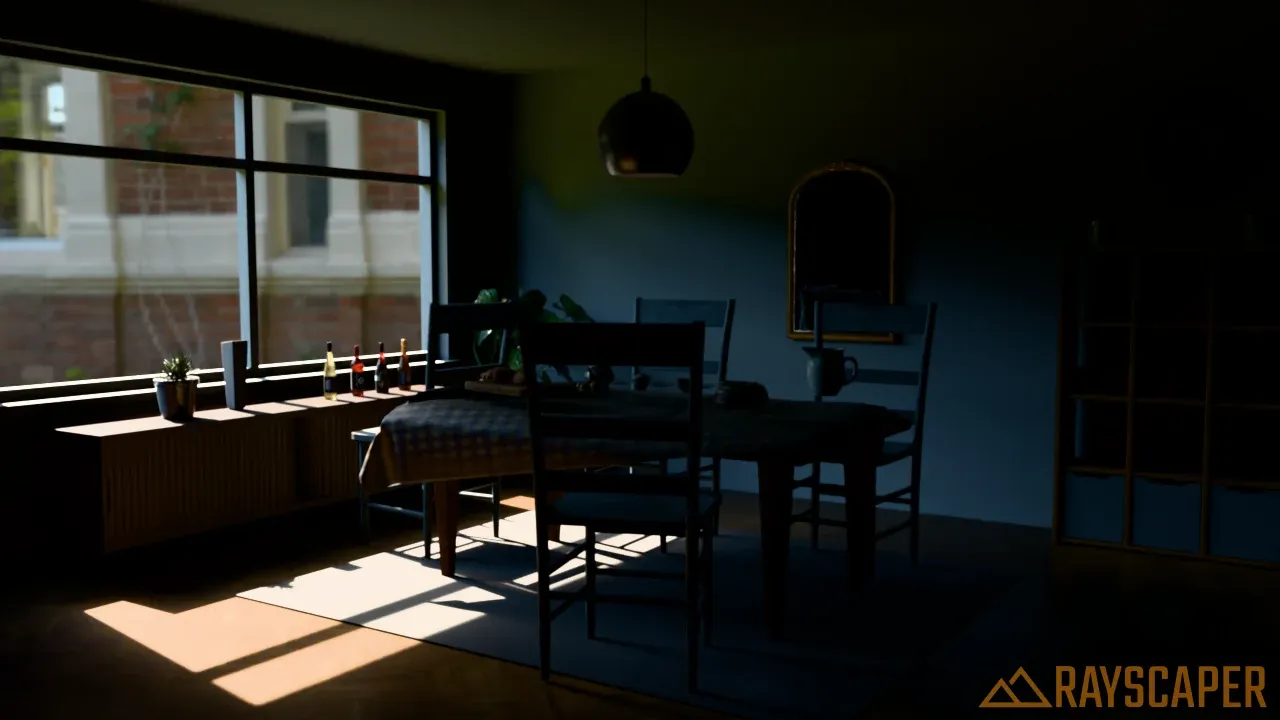
Off: only direct light. Everything the sun and the sky don’t reach directly is dark.
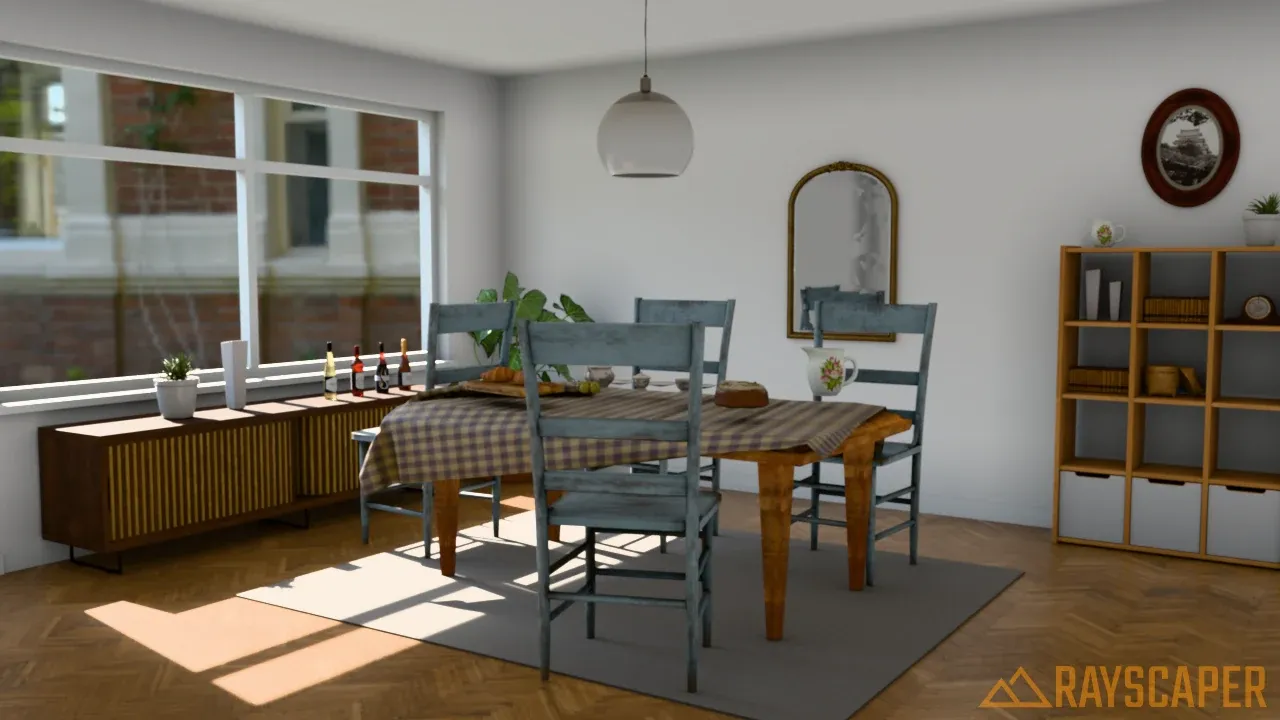
Ambient Occlusion: an ambient light fills the room, a little weaker in corners and under the furniture. Compare it with the Global Illumination render at the top of the page.
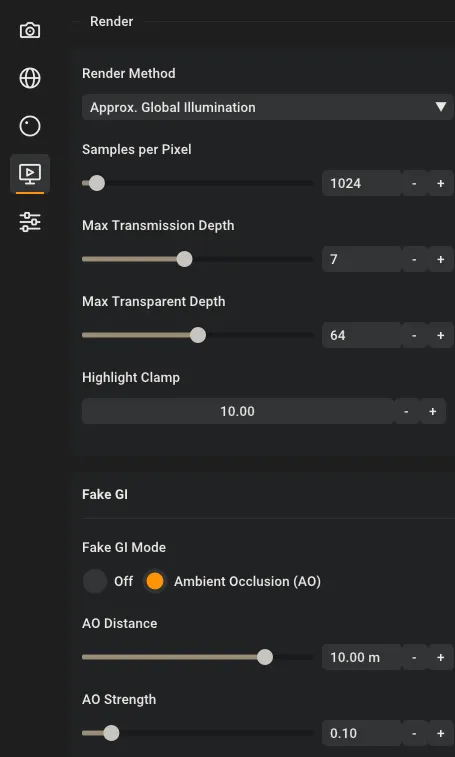
The ambient occlusion settings.
| Setting | Default | Description |
|---|---|---|
| AO Distance | 10 m | How far to look for nearby surfaces that block the ambient light, from 0.001 to 100 m. |
| AO Strength | 0.1 | How bright the ambient light is, from 0.001 to 1. |
AO Distance decides how much of the ambient light reaches a point. Surfaces within this distance block it, so a larger distance darkens larger areas. In a room, keep it well below the size of the room: at the default of 10 m, every point in this room is “occluded” by the walls and the ambient light disappears.
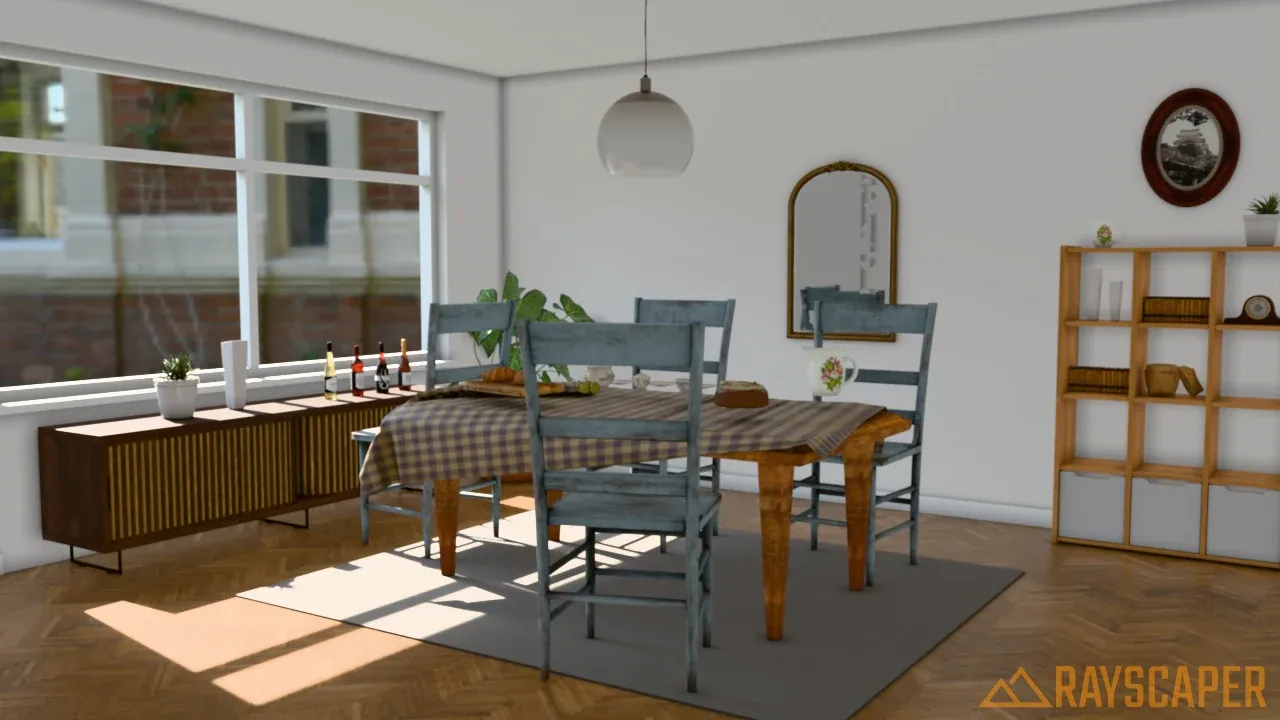
Only tight gaps and contact shadows are darker.
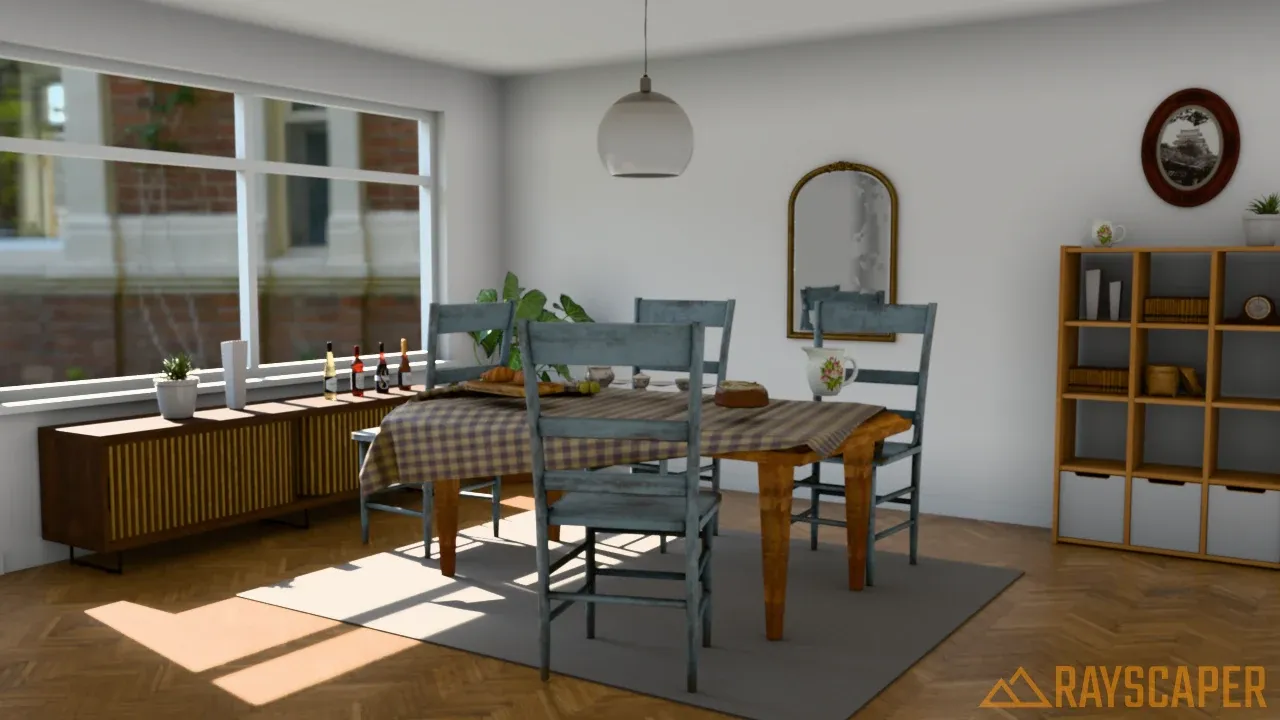
Soft darkening under the table and in the corners, a good start for interiors.
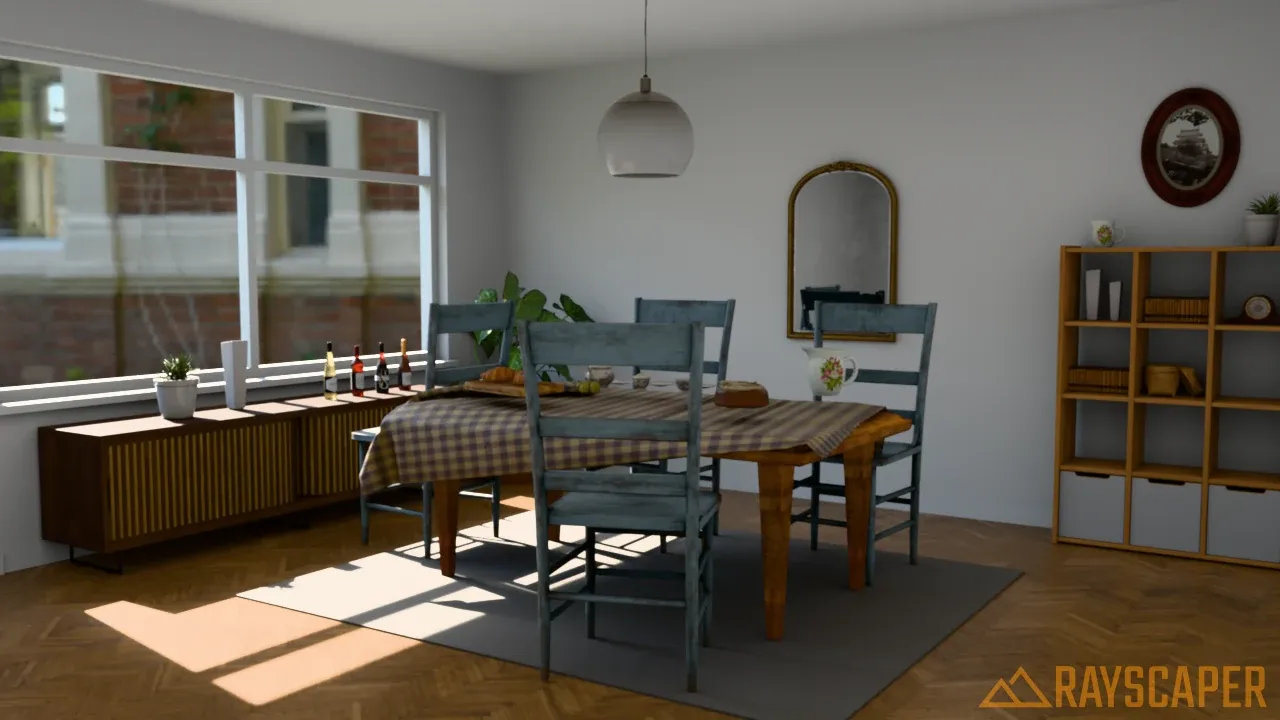
Large areas near walls and furniture get darker.
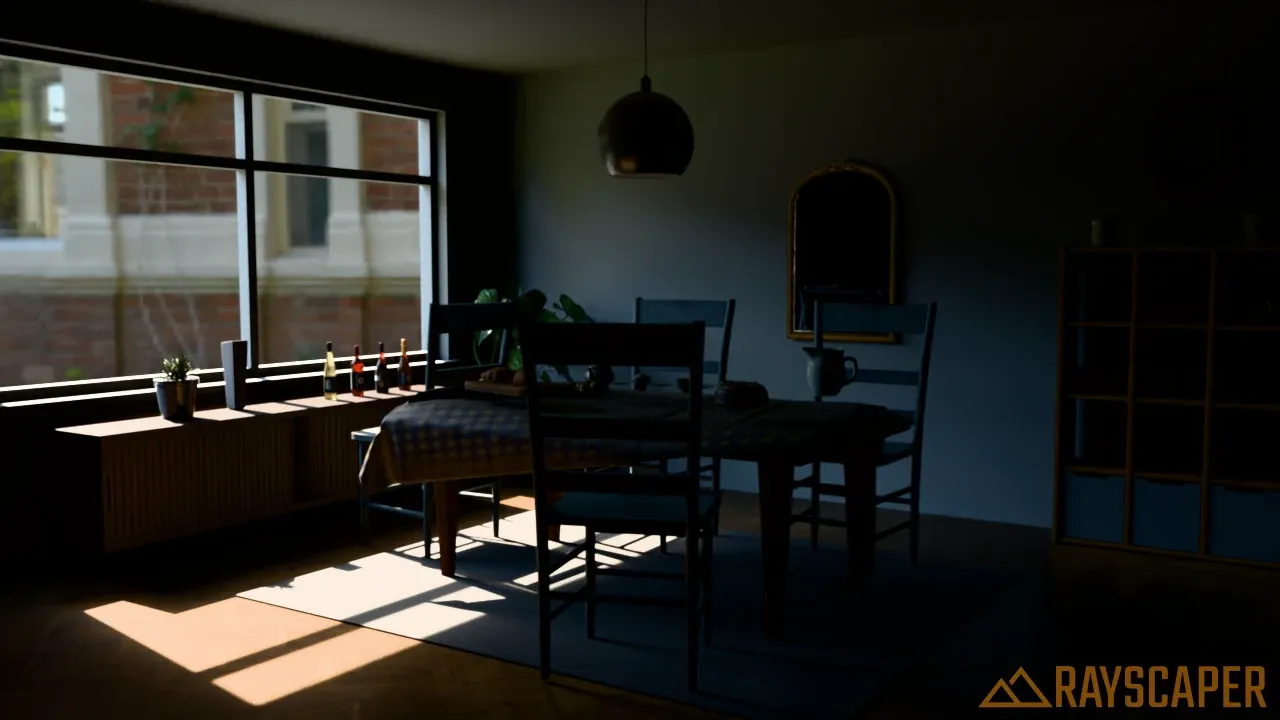
The default: larger than the room, so almost no ambient light gets through. Better suited to exteriors.
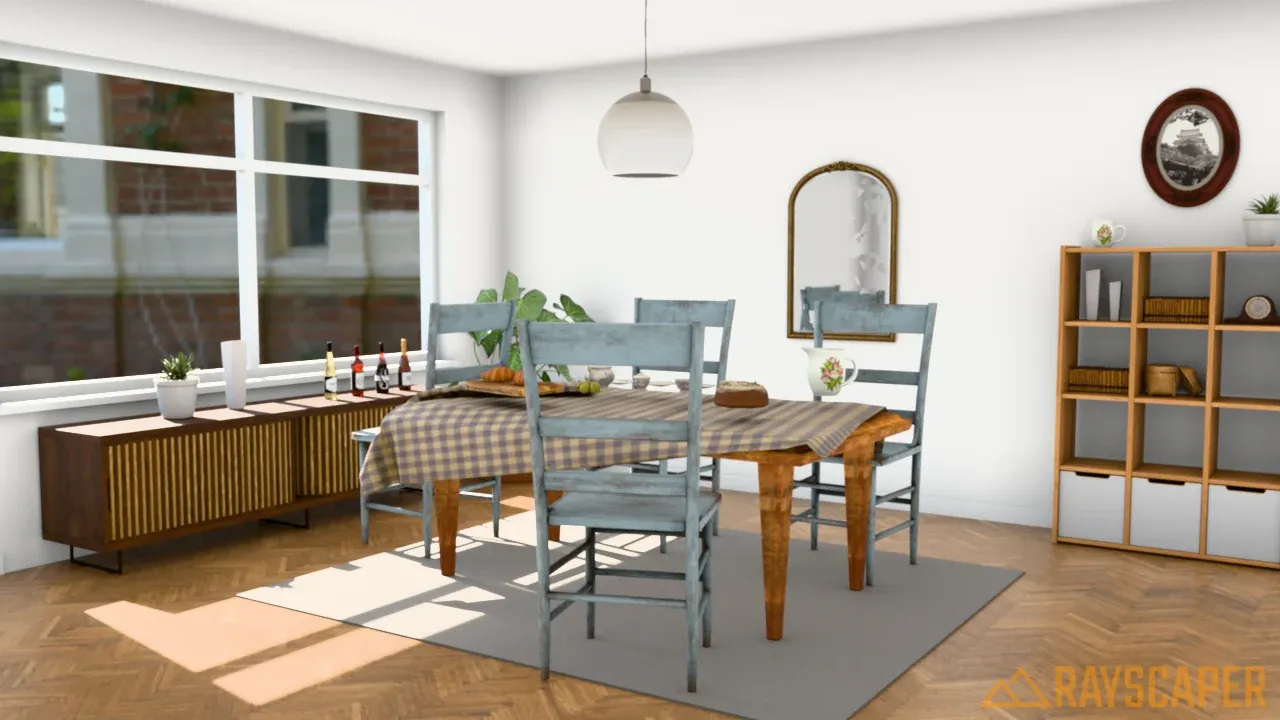
AO Strength sets how bright the ambient light is. These examples use an AO Distance of 0.5 m:
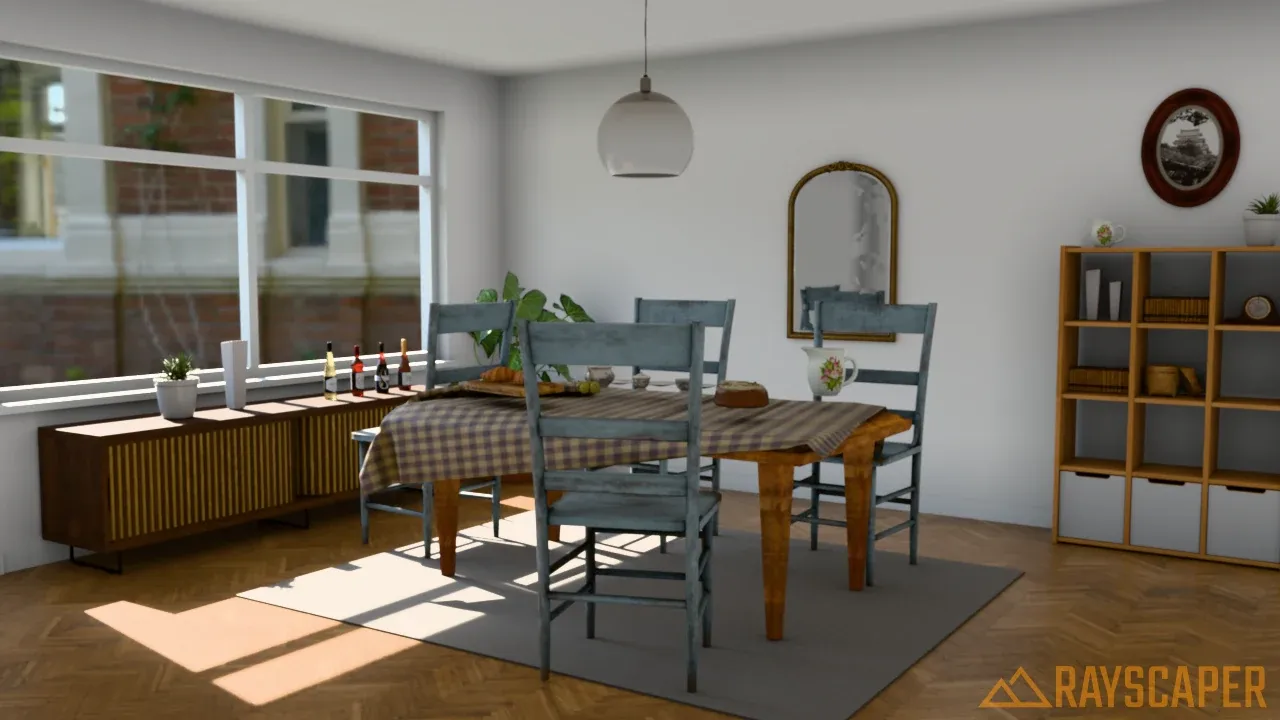
The default: a gentle fill.
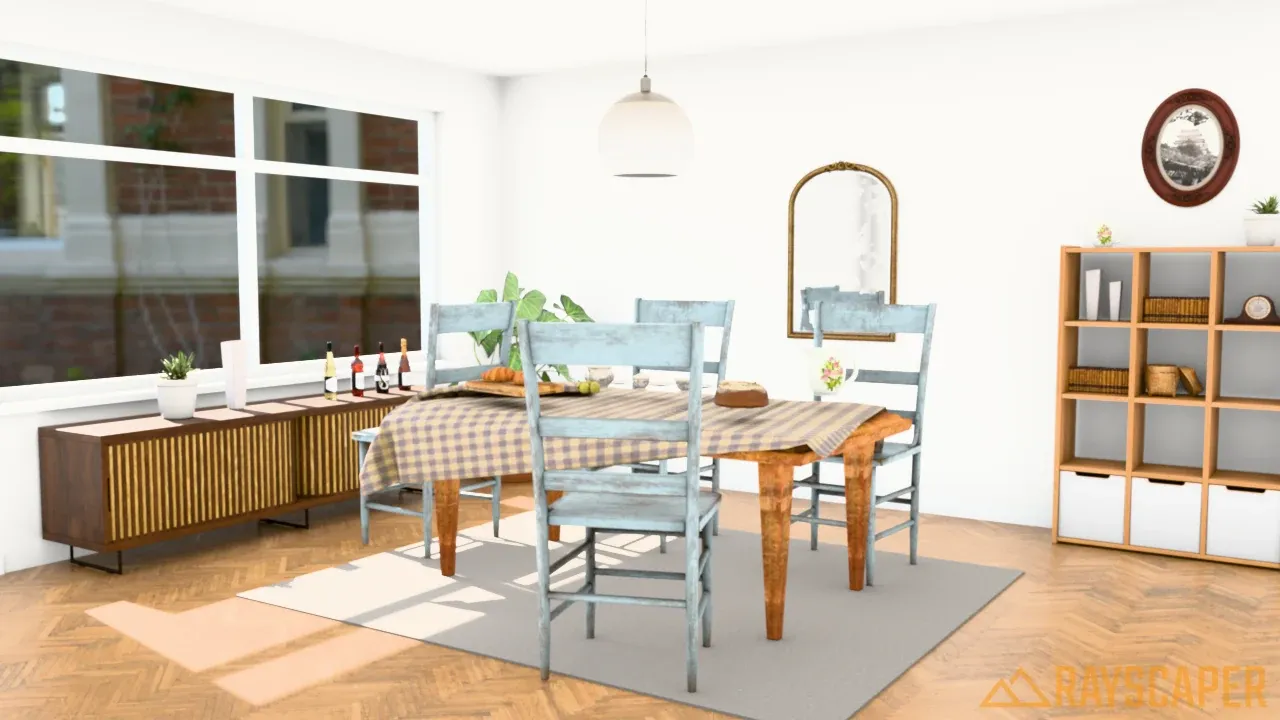
A brighter fill.
Bright, the room starts to look flat.
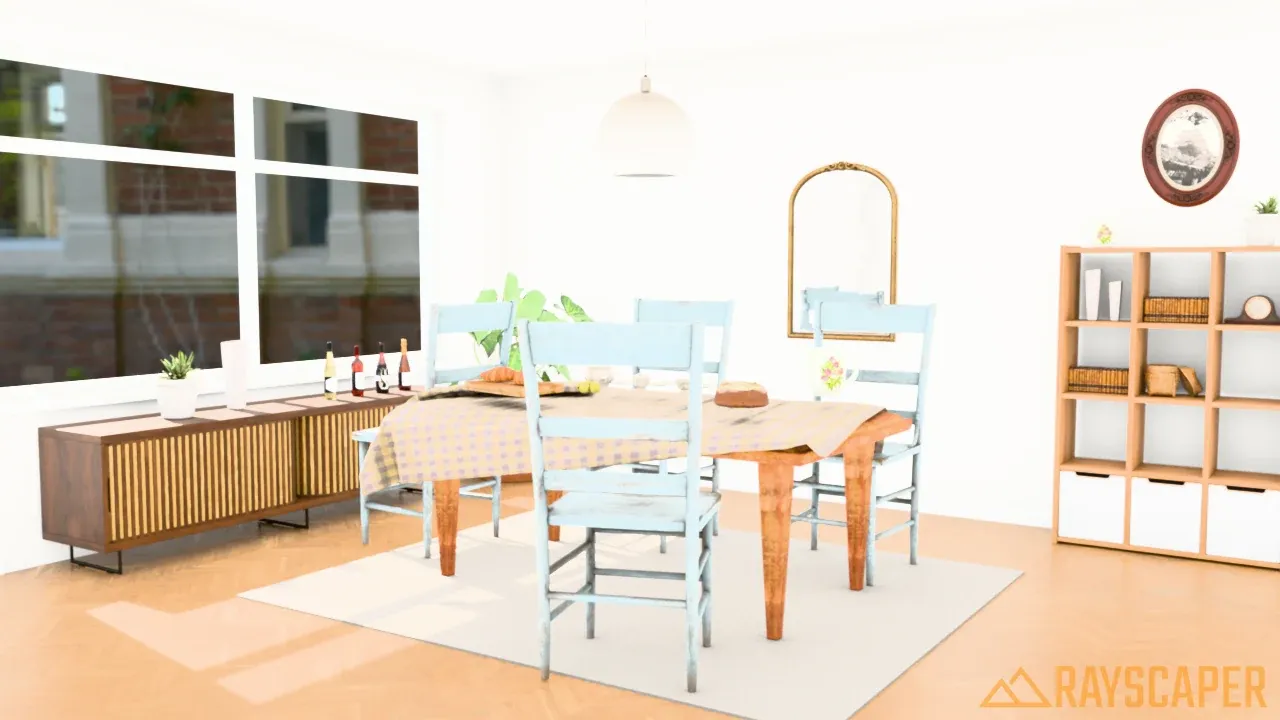
Too bright: the ambient light washes out the sunlight.
Diagnostic Methods
Section titled “Diagnostic Methods”These methods each show one property of the scene instead of a lit image. Use them to check a model, or save them as extra layers for compositing in Photoshop, After Effects or similar software.
Albedo
Section titled “Albedo”The base color of every surface, without any lighting or shading. Handy to check materials and textures, and as a color layer in compositing.
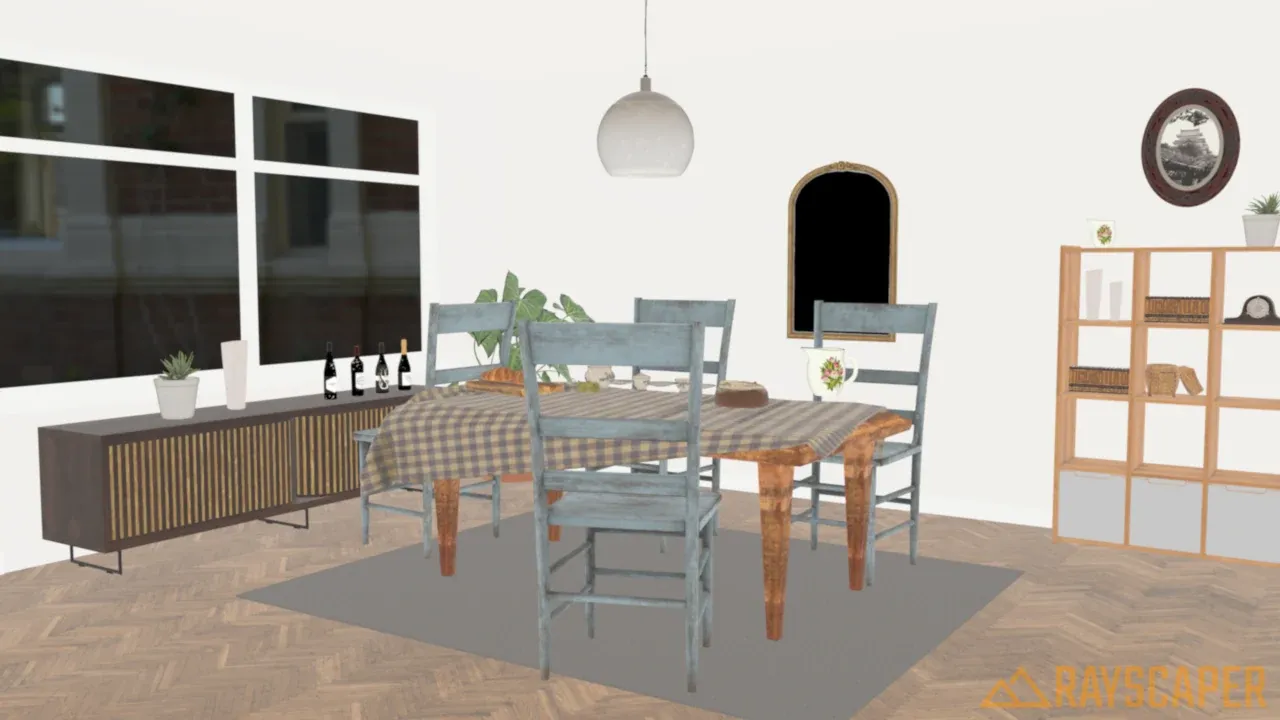
The albedo pass. The herringbone parquet, the tablecloth and the rug show their real colors, without light or shadow.
Ambient Occlusion
Section titled “Ambient Occlusion”Shows how open every point is: white where nothing nearby blocks the view of the surroundings, darker in corners, gaps and under objects. Multiply it over a render in post-production to add depth to contact areas.
AO Distance sets how far to look for nearby surfaces, from 0.001 to 100 m. The default is 10 m.
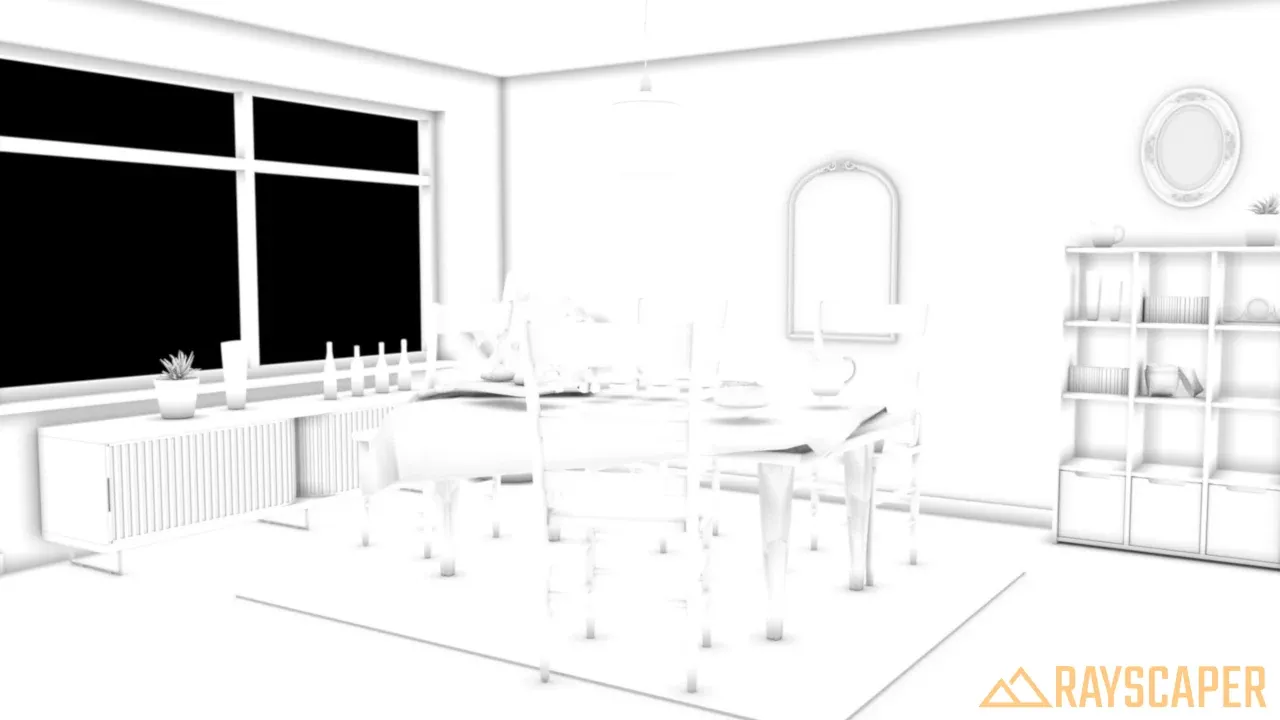
Only contact shadows and tight gaps, like under the plates and along the skirting boards.
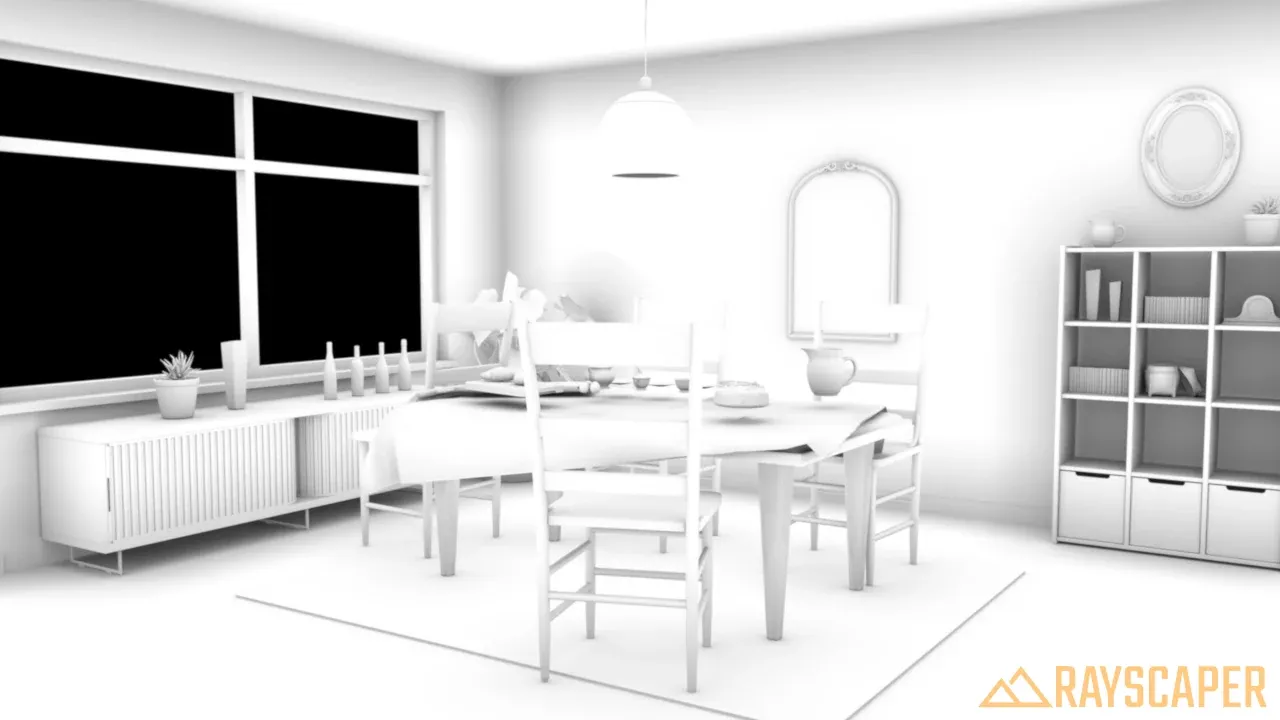
Soft shading under the table and the sideboard.
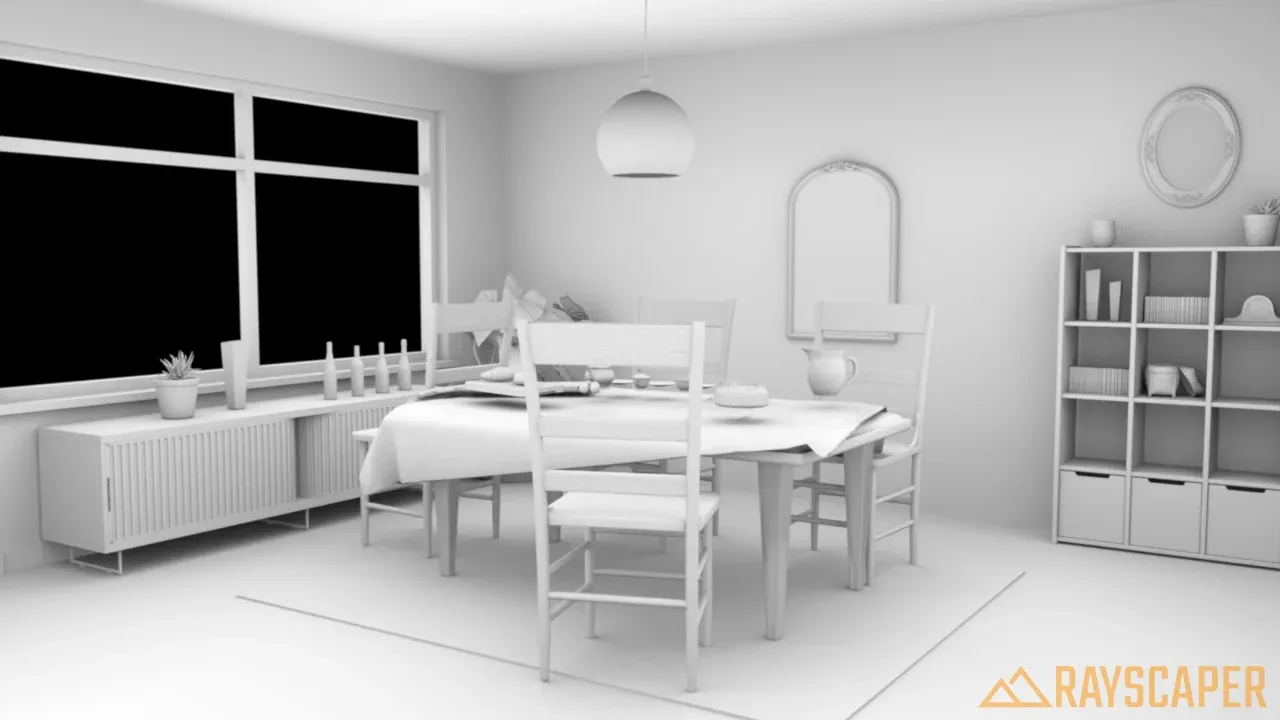
Broad shading in the corners of the room.
Geometric Normals
Section titled “Geometric Normals”The direction every face points in, as a color: X (red), Y (green) and Z (blue). This uses the actual faces of the model, without smoothing or normal maps, so it shows the real geometry. Negative directions can’t be shown as a color, so faces that point along -X, -Y or -Z, like the back wall here, render black. The floor is one even color, because its boards only exist in the normal map.
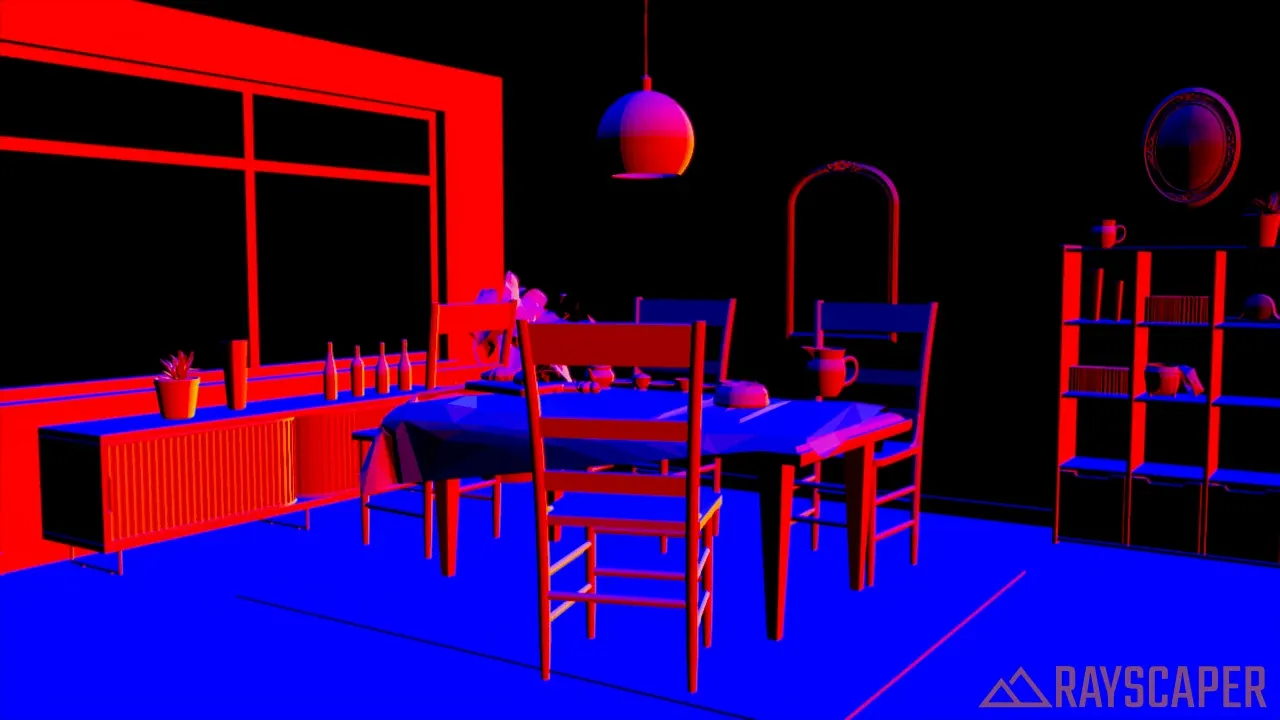
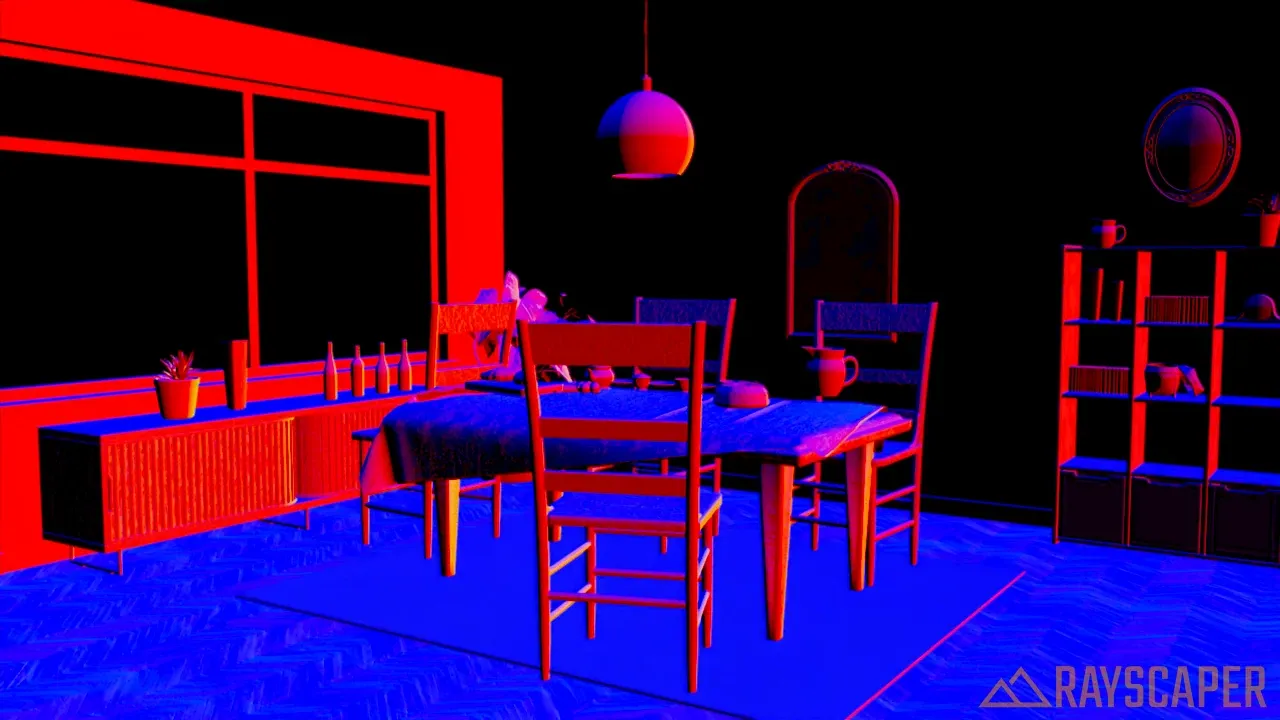
Shading Normals
Section titled “Shading Normals”Like geometric normals, but after smoothing and normal maps, so it shows the surface direction that the lighting actually uses. Compare it with the geometric normals to check that normal maps and smoothing work as expected: here the normal map of the floor shows up as a pattern of boards.
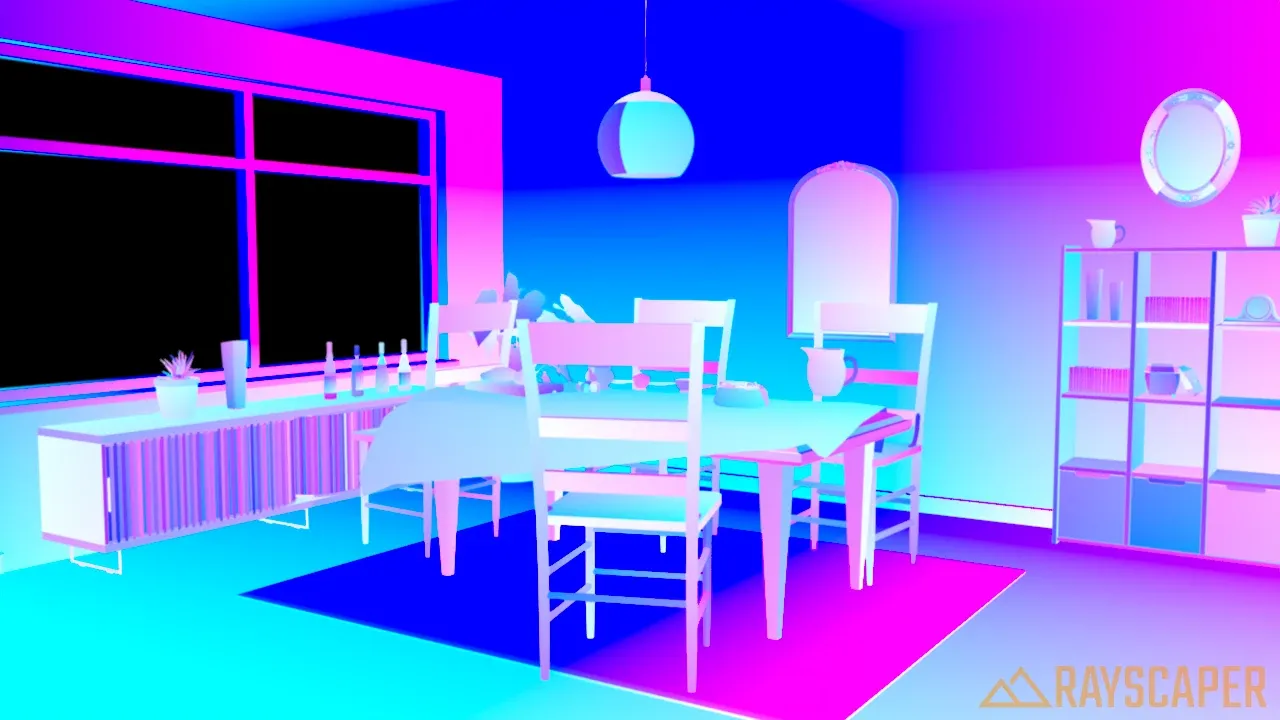
Texture Coordinates
Section titled “Texture Coordinates”The texture coordinates (UVs) of every surface as a color: U is red, V is green. Use it to check that textures are placed, scaled and oriented as intended.
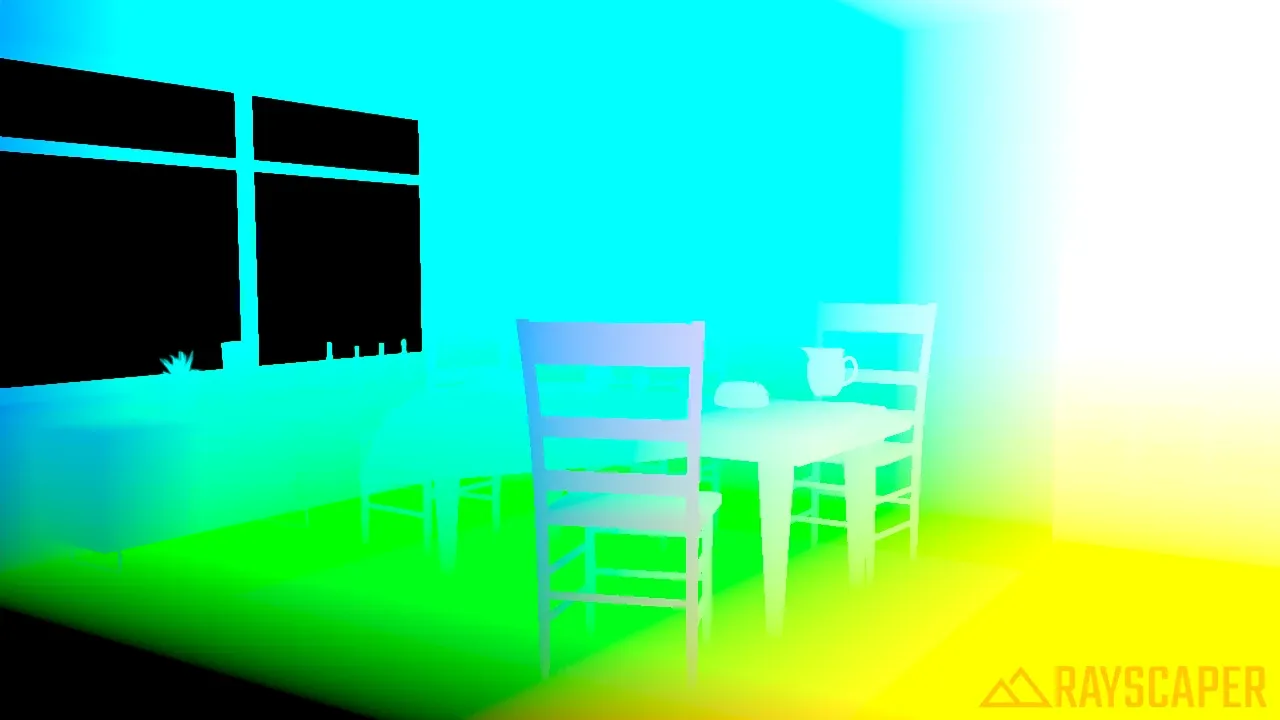
World Coordinates
Section titled “World Coordinates”The position of every surface in the scene as a color: X (red), Y (green) and Z (blue), in meters. Values above 1 show as full color and negative values as black, so save it as EXR (needs a license) to keep the real positions.
Credits
Section titled “Credits”The example scene on this page is built from CC0 models, textures and HDRIs from Poly Haven.